 EQ Mini
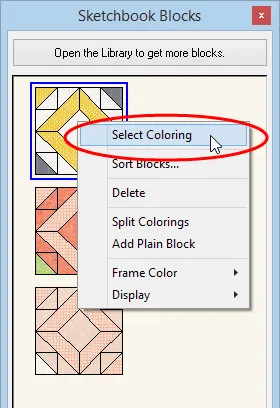
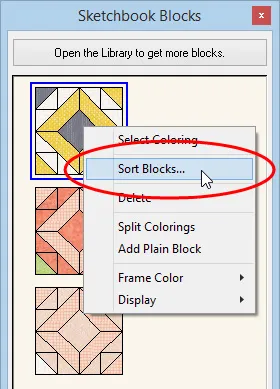
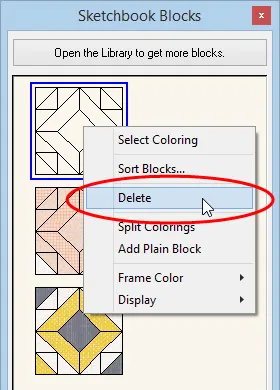
Right-click on the Blocks palette or in the Blocks section of the Sketchbook to display the menu.
Select Coloring
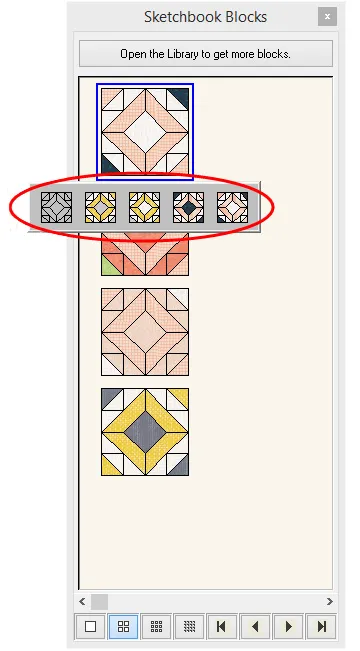
In the Blocks palette, this option lets you quickly choose the coloring of the block you want to set on your quilt.
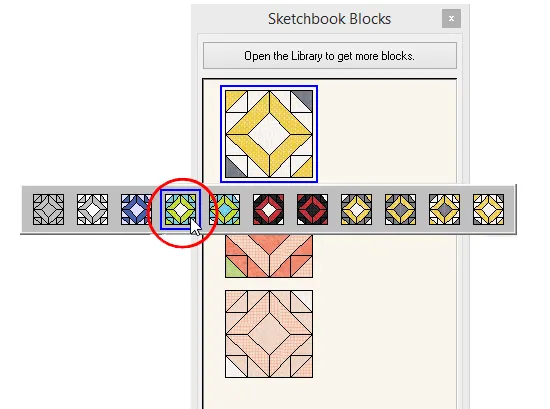
- Click the Set Block tool to display the Blocks palette.
- Click to select a block in the palette.
- Right-click on the block and choose Select Coloring.
- Click on the coloring in the display menu to select it. The chosen coloring will be the active coloring of your block.
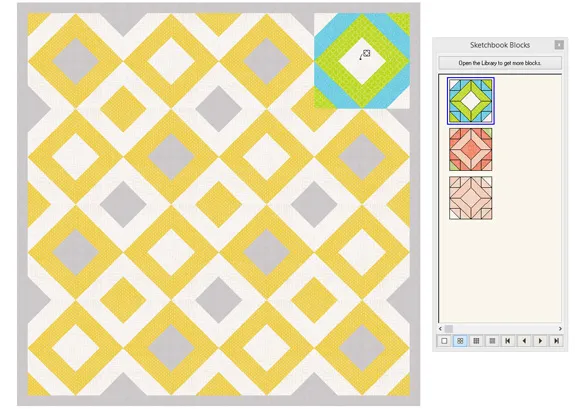
- Set the block in your quilt.
Sort Blocks
All the palettes let you sort the items currently in the palette using the menu.
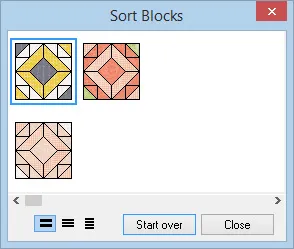
Click the Set Block tool on the Quilt toolbar to display the palette. Right-click on the palette to display the menu. Choose Sort Blocks. The Sort dialog will appear. Click each block in the order you want them to appear in your palette. If you make a mistake, click Start over. When you’ve sorted all the blocks, the dialog will disappear. If you click Close on the Sort dialog before sorting all of the blocks, the remaining blocks will fall in behind the ones you’ve sorted.
Once you click Close on the Sort dialog, the sorted items will permanently be reordered.
For more information, see Sorting in the Sketchbook >
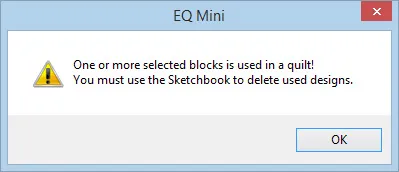
Delete
The Blocks palette and Sketchbook will let you delete items using the menu. If the item is used in a quilt, you’ll see a message reminding you of this.
- To delete a block and all its colorings more quickly, click the first arrow to display the line drawing. Right-click to display the Context menu and choose Delete. If you’re in the Project Sketchbook, click the Delete button. This will delete the block and all of the colorings at once.
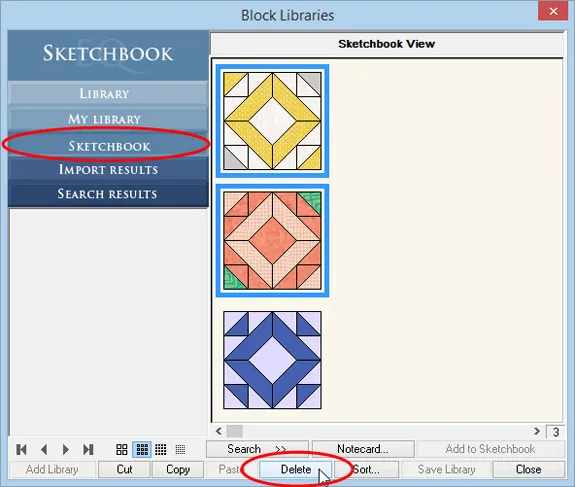
- If you want to delete several blocks at a time, go to Library > Block Library > Sketchbook tab. Using the Sketchbook through the Library dialog allows you to select all the blocks at once by holding the Shift key and clicking on the blocks, or by clicking Ctrl+A (or Command+A on a Mac) to select all, then hit delete. You are only able to do this if the selected blocks are not used in a quilt.
For more information, see Deleting from the Sketchbook >
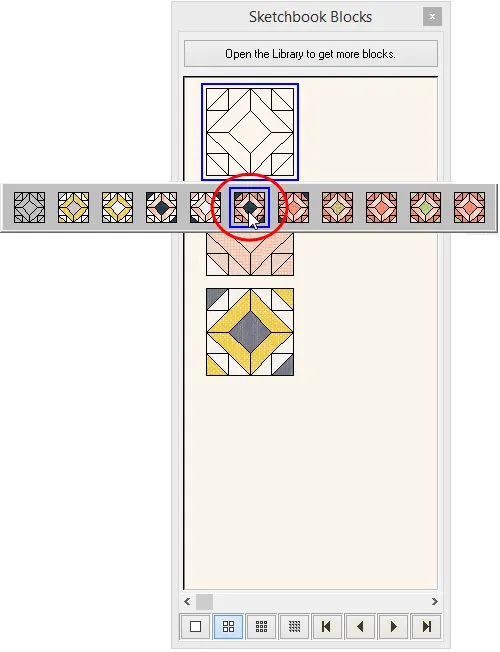
Split Colorings
Each time you add a coloring to the Sketchbook, EQ will stack the newest colored version of the block on top of the other colorings. By default, up to 10 block colorings can be stacked together. If you have several colorings of a block, you can split the group of colorings to make it easier for you to find the correct coloring.
- Click the Set Block tool to display the Blocks palette.
- Click to select the block you want to split.
- Right-click and choose Select Coloring. Choose the coloring of the block where you want to split the colorings.
- Right-click and choose Split Colorings. The last colored version will pop below the first group of colorings in the palette.
- Right-click on the new group of block colorings and choose Select Coloring. Notice the original coloring you chose before splitting the colorings is now the first colored block in the coloring stack (after the line drawing).

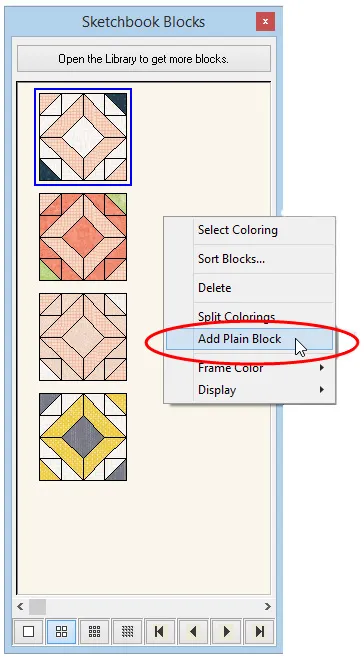
Add Plain Block
By choosing Add Plain Block from the menu, a new plain block gets added to the end of the block list in your palette. Alternatively, if you want a plain block in your quilt, simply color the empty quilt block space with the Paintbrush tool. Once the empty space is colored, it will act as a plain block.

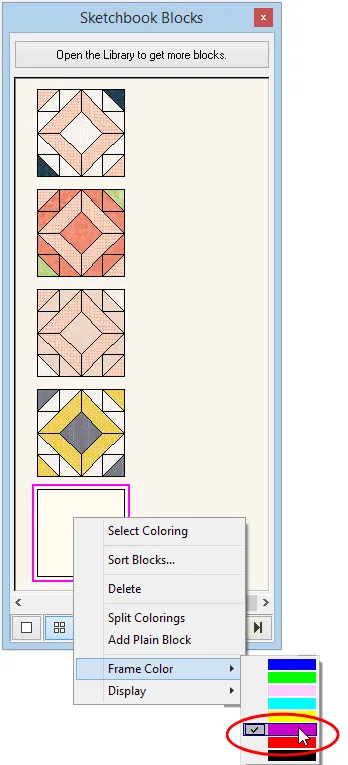
Frame Color
When you select an item in the palette, it becomes highlighted. Use the Frame Color option to change the color that the items are highlighted with. Right-click to display the menu. Point to Frame Color and choose from the eight different colors to highlight your items.
Display
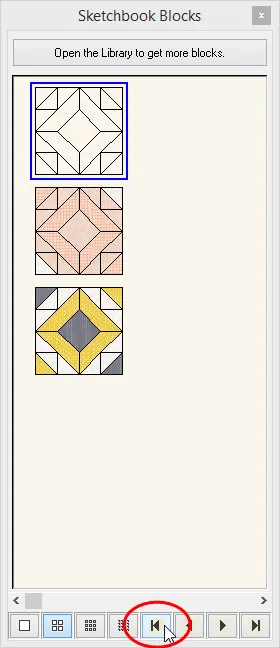
You can choose the number of items to be displayed at a time in the palette. Each palette allows you to display a different number of items based on the type of palette. The Blocks palette lets you display up to 4 columns of blocks at a time. The Fabrics palette, however, lets you display 6 columns of fabric swatches at a time. Right-click to display the menu. Point to Display and choose the display options you want.
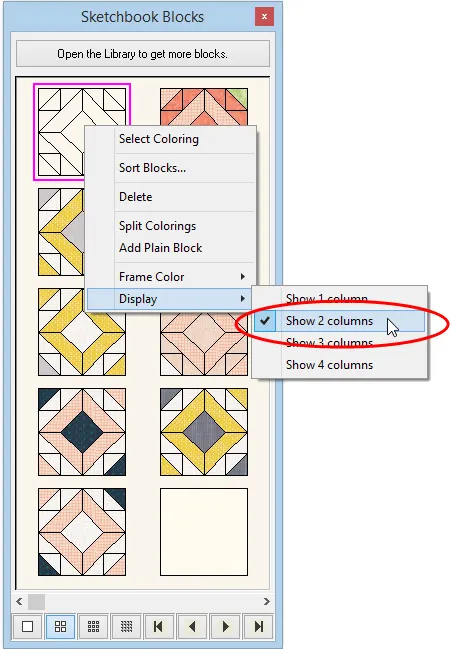
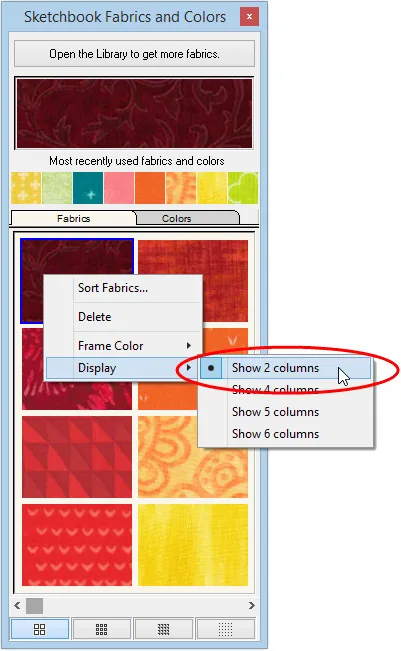
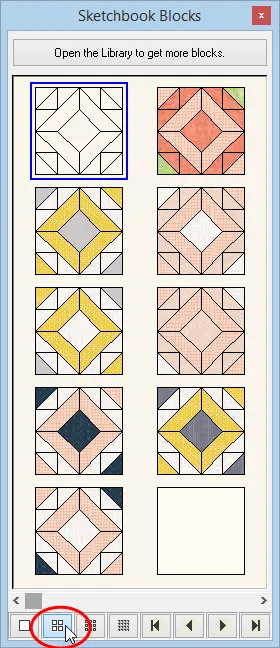
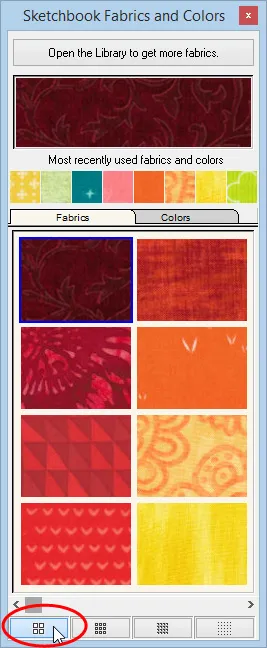
You can also change the display by clicking the display buttons at the bottom of the palette. The images on the buttons indicate the type of display each button represents.
For more information, see Changing the Display in the Sketchbook and Palettes >
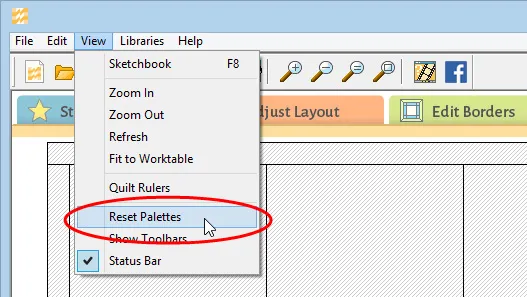
Reset Palettes
Palettes should display when you have any of the following tools selected: Set Block, Paintbrush, Spraycan, Swap All Colors and Eyedropper. If a palette does not appear, on the menu bar, click VIEW > Reset Palettes.