 EQ Mini
Welcome
Welcome to EQ Mini! Learning to use new software is not always easy…but it should be fun! These lessons are intended to teach you the basics of EQ Mini and encourage you to have fun with all the possibilities of quilt design. Plus, we’ve tried to keep them short so they work as a quick review if you haven’t used EQ Mini for awhile. Let’s get started.
Restore Defaults
Before we start this lesson, let’s make sure that EQ Mini has all the default settings of the software. This will help to make sure you’re seeing the same thing on your screen as we walk through the steps of each lesson.
- Double-click the desktop icon to start EQ Mini.
- If a Welcome box appears, click Close.
- If a Tip of the Day appears, click Close.
- On the menu bar, click FILE > Preferences.
- Click Restore along the left of the box.
- Click Restore Default Settings in the middle of the box.
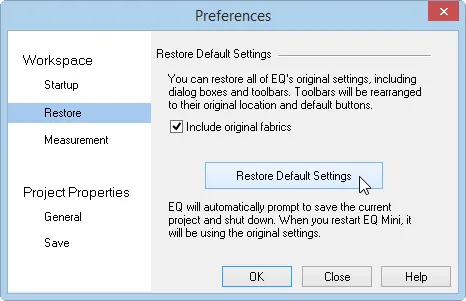
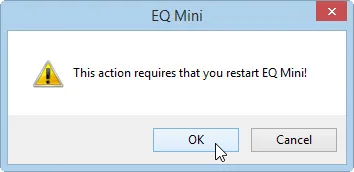
- A message will display saying EQ Mini needs to restart. Click OK.
- EQ Mini will close. Now we’re ready to start Lesson 1.
It’s a good idea to restore defaults periodically. We encourage you to always restore defaults before starting any of the lessons.
Start a New Quilt
- Start EQ Mini.
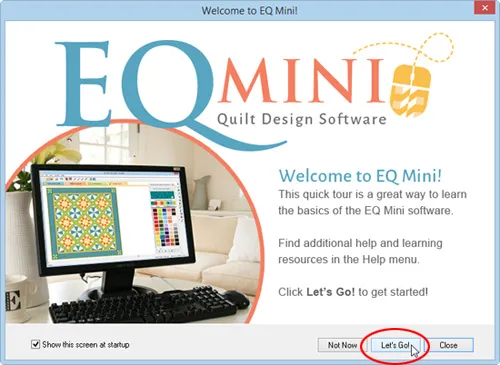
- When the Welcome to EQ Mini box displays, click Let’s Go! and read through each box. This gives a quick visual tour of the workspace.
- When you’ve reached the last box, click Close.
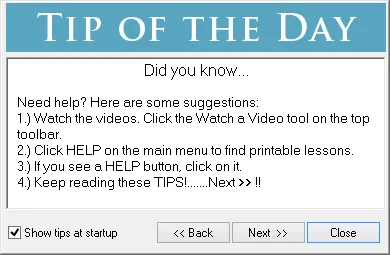
- When the Tip of the Day appears, read as many tips as you like or just click Close.
- You will see the blue Start New Quilt tab and the four basic quilt layout styles listed along the left. Click On-Point Layout along the left to see the sample on-point layouts.

- Click Horizontal Strip Layout and Vertical Strip Layout to see their corresponding samples.
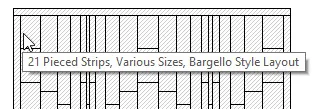
- Float the mouse cursor over the last sample layout on the right. A tooltip will display on screen giving more information on the quilt the cursor is hovering over. Reposition the mouse over several of the samples to see their tooltips.
- Click Horizontal Layout.

- Click the first sample. Notice the gray frame turns blue when you click directly on it.
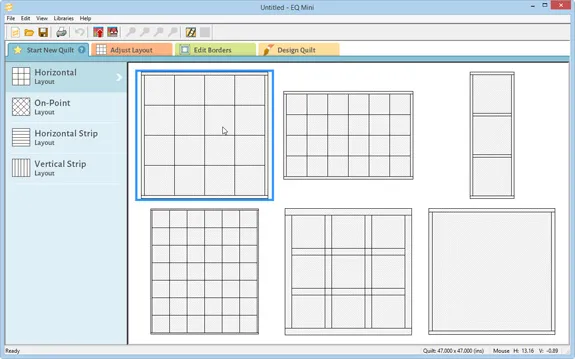
Note: Does the blue frame look different on your screen than in the image above? That’s just because your window is a different size. You can see the shape of the frame change when you adjust the size of the software window.
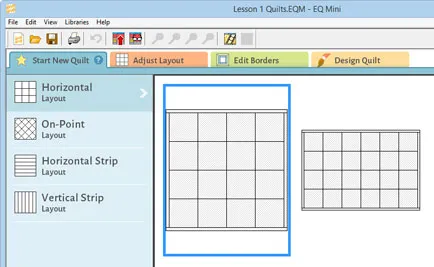
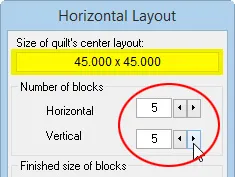
- Click the Adjust Layout tab along the top. The Layout palette will display giving you options for adjusting the layout.

- Change the number of blocks Horizontal and Vertical to 5 by clicking the arrows. Leave all the other settings unchanged. You can see the overall size of the center of the quilt at the top of the palette. Additionally, you can see the overall size of the quilt with its borders on the bottom status bar.

Name the Project
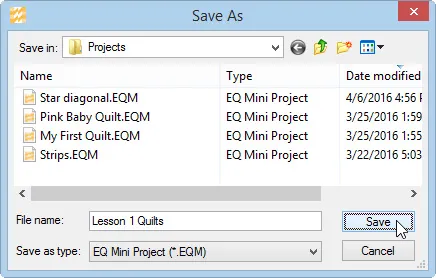
EQ Mini lets you design as many quilts as you like and keep them all in the same project file. The project name appears at the very top of the EQ Mini window. This project says Untitled. Let’s name this project.
- On the top toolbar click the Save button
 . The Save As box will display.
 - You’ll need to decide a location on your computer for saving the files. We strongly suggest that you save all your project files in the default location: Documents > My EQ Mini > Projects folder.
- In the File name box type Lesson 1 Quilts.
- Click Save. The box will close. Notice the project name Untitled has been replaced with Lesson 1 Quilts.
Here’s an important point to remember when using EQ Mini. Once you’ve named your project, anything that you design and add to the Sketchbook will automatically get saved in the project. In other words, we won’t need to click the Save button again. We will be clicking the Add to Sketchbook button ![]() . Let’s continue designing our first quilt.
. Let’s continue designing our first quilt.
- Click the Edit Borders tab along the top. The Borders palette will display giving you options for adjusting borders.

- Let’s make the border wider. Drag any of the small rectangles in the palette to start adjusting the size. Notice that all 4 borders adjust at once. Adjust the size to 4.500 inches.
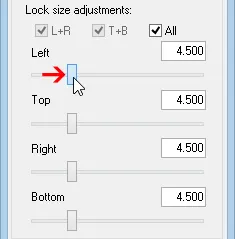
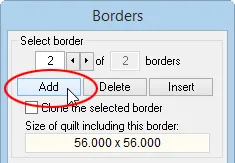
If you have any trouble dragging to 4.500, click directly on the line to the right or left of the rectangle for small adjustments. Let’s add a second border.
- Click the Add button in the palette. This will add a 1 inch border of the same style—Long Horizontal. Notice that the new border is now gray. The border that you’re adjusting will always display in gray.
Add Blocks and Color Borders
- Click the Design Quilt tab along the top. Now the fun begins. First let’s get some blocks to set in the layout.

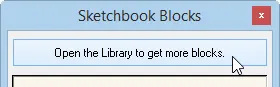
- Click the Set Block tool
 . Your Sketchbook Blocks palette will open on the right side of the screen. This palette holds the blocks you will use in your quilt design. Currently this palette is empty.
Note: If your palette is too large or moved off the side of the screen, you can reset its position to fit better on your screen. Choose View > Reset Palettes from the menu. Read more here >
- At the top of the Blocks palette, click Open the Library to get more blocks. This will open the Block Libraries box. The first style will be selected—Antique Mosaics.
- Click Add to Sketchbook repeatedly until all the blocks in the first style have been added. The blocks will temporarily disappear letting you know that they have been added to your project. Library blocks are never permanently deleted from the Library.
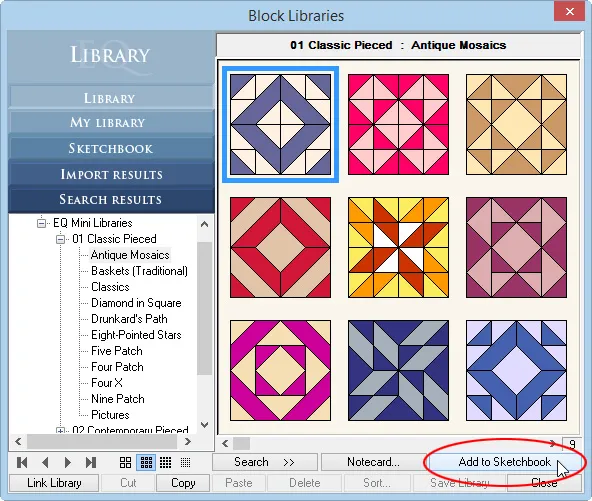
- Click Close. The blocks from the library will now appear in the palette. This means they have been added to our project.
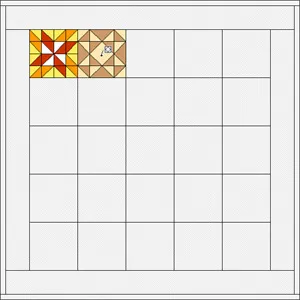
- Click on any block in the palette, and then click in the quilt to set the block.
- Continue to click on a block in the palette to select it and then click on a space in the quilt.
- To replace a block in the quilt, you don’t have to erase or undo. Just click on the existing block in the quilt to replace it with the one selected from the palette. Click on an existing block to see this feature.
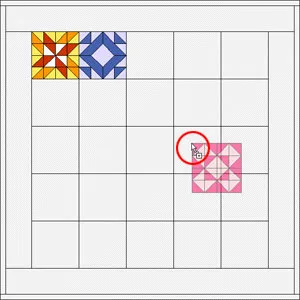
- You can also drag blocks from the palette to the quilt. Be sure to “drop” when the cursor is in the center of the area where you want to set the block. Now try setting a few more blocks by dragging.
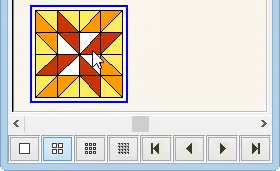
- Click Mosaic, No. 19 block in the palette to select it. Block names will appear when you float the mouse cursor over the block.
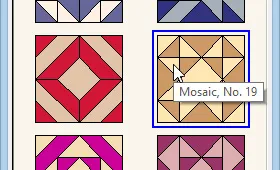
- Hold down your keyboard CTRL (Command for Mac users) key. Click in any space in the quilt. All the blocks will be replaced with Mosaic, No. 19.
- Click Mosaic, No. 18 block in the palette to select it.
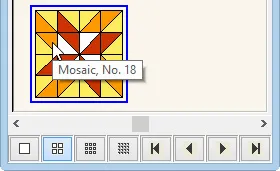
- Hold down your keyboard ALT (Option for Mac users) key. Click the block in the upper right corner. Holding ALT (Option) will set blocks in alternating spaces in the quilt. Let’s color the borders.
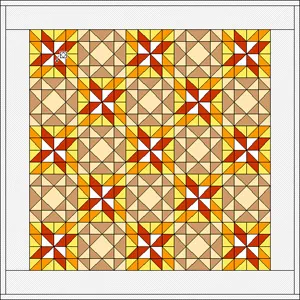
- Click the Paintbrush tool
 on the right-hand toolbar.
 - Click on any red fabric in the palette and click on the wide border.
- Continue to click on each side of the wide border.
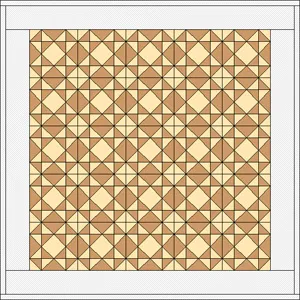
- Click on any orange fabric in the palette. Hold down your keyboard CTRL (Command) key, and click on one side of the narrow border. Holding CTRL (Command) colors the entire border with just one click. With this combination of blocks, this horizontal quilt has an on-point feel that is appealing.

Add to Sketchbook and Name Quilt
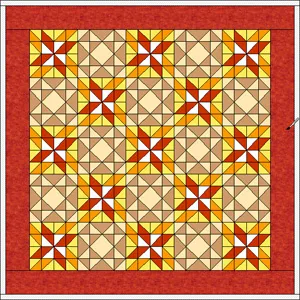
- The quilt is complete. Click the Add to Sketchbook button (the red button with the red arrow on the top toolbar
 ) to make this quilt part of your project. Remember: since our project has a name, we simply click Add to Sketchbook to ensure that our quilts are getting added to the project.
 - Click the View Sketchbook button (the red button with the eyeglasses on the top toolbar
 ) to see the Project Sketchbook. The Sketchbook will appear.
 - You should see your quilt when the Sketchbook displays. If you don’t, click the Quilts section along the left.
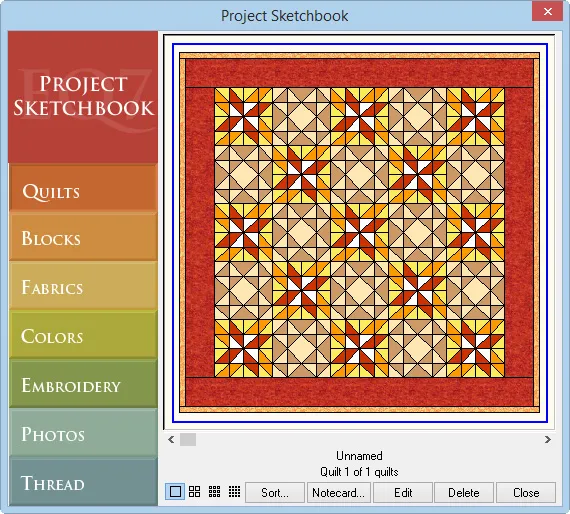
- Click the Blocks section to see the blocks that were added to this project.
- Click the Fabrics section to see the fabrics in this project. Every new project that you start comes with this set of default fabrics. You can always add more fabrics from the library. You can even create your own set of default fabrics.
- Click the Quilts section. You will see Unnamed below the quilt.

- Click the Notecard button to display it. An empty notecard gets created with each new quilt added to the Sketchbook. Notecards let you name quilts and record other important notes to remember.
- Type Lesson 1: Quilt 1 on the Name line.
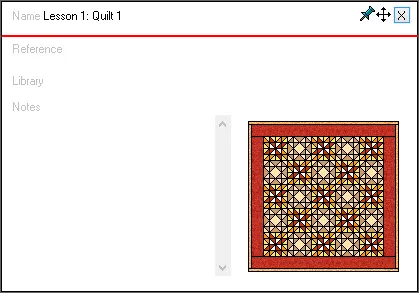
- Click the X in the top-right corner of the notecard to close it. You will see Lesson 1: Quilt 1 below the quilt.

- Click Close in the bottom-right corner of the Sketchbook.
Print Quilt
- Click the Print button
 on the top toolbar and choose Quilt from the menu that displays. (FILE > Print > Quilt works too.)
 - Under Printing Style, choose Outline drawing.
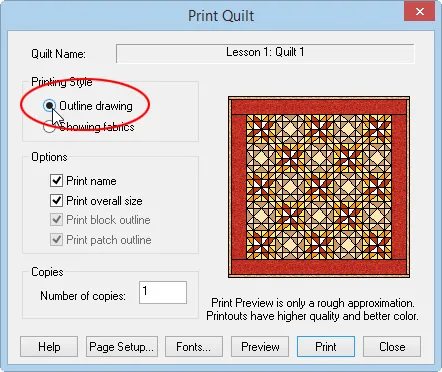
- Click the Preview button. Outline shows a black and white line drawing of the quilt.
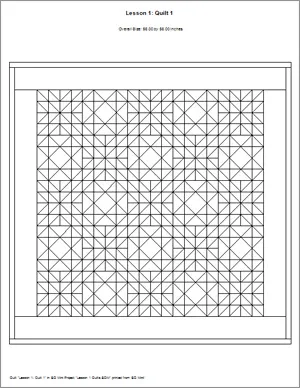
- Click Close at the top of the preview.
- Under Printing Style, choose Showing fabrics.

- Click Preview. This is a colored version of the quilt for you to use as a guide when you’re sewing.
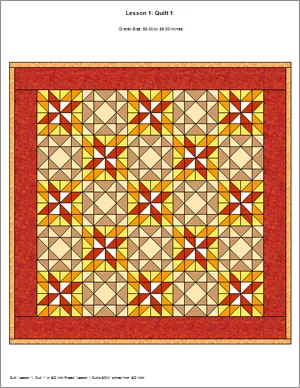
- Click Print at the top of the preview. If you want to do more during this session of EQ Mini, then see the homework assignment at the end of this lesson. Otherwise, continue to the next step.
- Click FILE > Exit to close EQ Mini.
You’re done with Lesson 1. You’ve named a project, designed a quilt, added it to the project, named the quilt and printed it. Great job. Repetition is the best way to learn. Let’s do it again in Lesson 2.
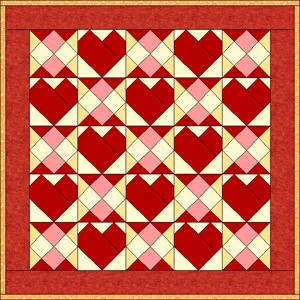
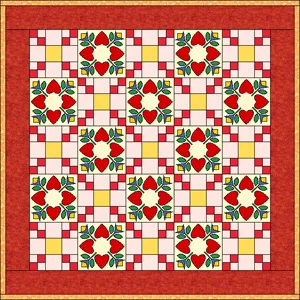
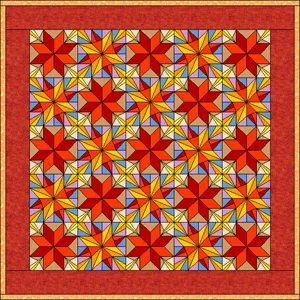
If you want a little homework…
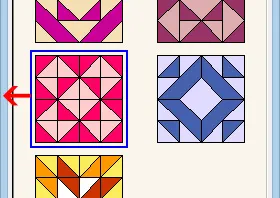
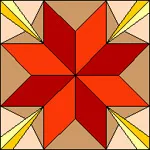
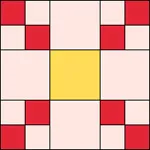
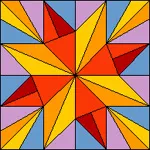
Find these blocks in the library and add them to the Sketchbook.
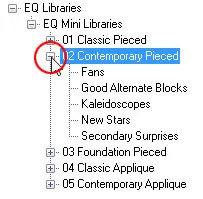
Note: When viewing the different library styles, click the (+) or (-) next to the style to expand and collapse each library.
|
|
|
|
|
|
|
|


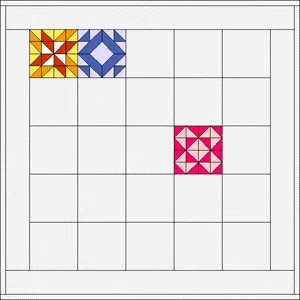
Then replace blocks in the current quilt to create these quilts. Don’t forget to click the Add to Sketchbook button ![]() to save these quilts in your project.
to save these quilts in your project.