
 EQ Mini
Printing a quilt must be done from the Design Quilt tab. When you are ready to print, click FILE > Print and then click Quilt. The Print Quilt box appears. You can also print a quilt by clicking the Print tool on the top toolbar, then choose QUILT from the menu.
EQ Mini will always print the quilt as large as possible. The quilt will be centered on the page based on your current margin settings. Use the Page Setup button to adjust margins.
Quilt Name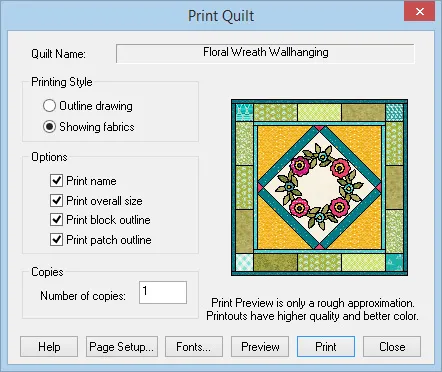
This is the name that will appear at the top of your printout. You need to name your quilt in the Notecard of the Sketchbook, otherwise this option will say Unnamed.
Printing Style
Choose from the following options.
- Outline drawing
This will print a black and white line drawing of the quilt with empty patches. - Showing fabrics
This will print the quilt just as seen in the dialog including the colors and fabrics that appear in the quilt.
Options
Choose from the following options.
- Print name
Check this option to have the quilt name appear at the top of the printout. - Print overall size
Check this option to have the overall size of the quilt print just below the quilt name at the top of the printout. - Print block outline
Check this option to print a thin black line outlining each block of the quilt. - Print patch outline
Check this option to print a thin black line outlining each patch of the quilt.
Copies
Select the number of copies you want of the printout.


