


Start with an image on the worktable.

Click Color in the ribbon, and then click the Channel Mixer tool in the palette to display the Channel Mixer dialog.
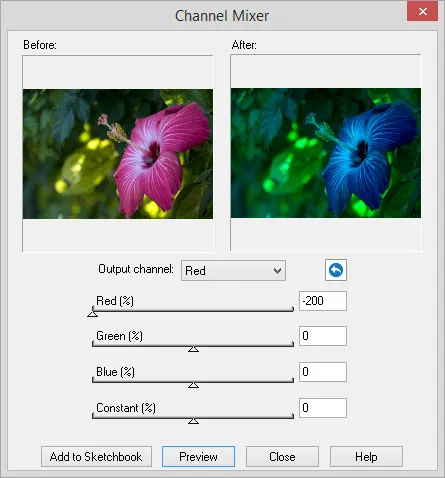
Use this dialog to apply creative color adjustments to an image. The colors red – green – blue, are the primary colors. Every color is made by some combination of these three colors.
Color channels are like filters. Each channel (filter) will allow a certain amount of light through it starting with red, and then through green and finally through blue. What’s left when the light has passed through all three channels is the color in the image. This process of light passing through the channels happens for every single pixel in the image.
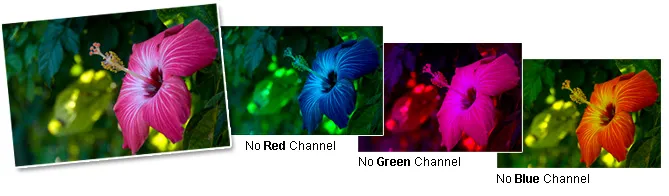
In elementary school, you learned that adding two primary colors together creates a secondary color. Knowing that Red + Blue = Purple, it’s easy to visualize how adding Red to the first flower example above (the first “No Red Channel” image) will make the photo look like the original (on the left). Imagine putting a red transparent film on top of that image. That is how the Red Channel will complete the photograph.
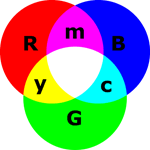
When equal amounts of all three fully saturated colors are mixed, the result is white. When all the colors are removed, the result is black. And equal amounts of all three create shades of gray. All the other colors get created with varying combinations of red, green and blue to create yellow, orange, magenta and so on.
In the Channel Mixer dialog, select the channel to adjust from the drop list. You can only adjust one channel at a time. When the Red channel is selected, the sliders will indicate 100% red and 0% for all the other sliders. When the Green channel is selected, the slider show 100% green and 0% for all the others, and so on.
Drag the sliders to increase or decrease the percentage of each color from its original amount within each channel. Once the amount is decreased to zero, then changes will no longer be visible. Remember that no matter which slider is used, the increase or decrease is applying to the selected channel color.
For example, if you are editing the Red channel and set the Red slider to 50%, this means the amount of red in the image is reduced to 50% from its original amount of 100%.
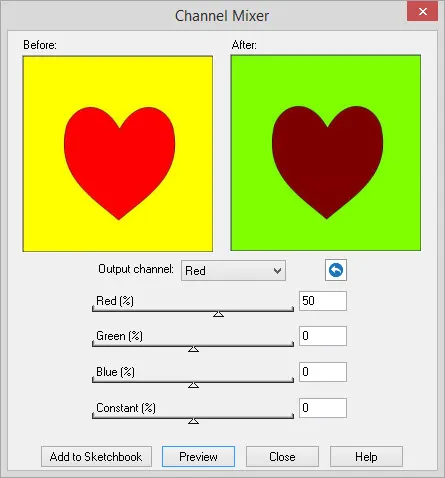
| BEFORE Heart: RGB=255,0,0 so it’s pure red. Background: RGB=255,255,0 so it’s equal parts of red and green. |
AFTER Heart becomes a darker red. (128,0,0) Background now has less red so it appears more green. (128, 255,0) |
 |
|
In these examples, we’ll continue to adjust the Red channel, and we’ll leave it at 100% so the heart remains pure red. As the green slider decreases in percentage, more green appears in the image. It’s important to remember that the amount of red is what is being decreased because we’re on the red channel.
The background is now orange. (RGB=255, 128, 0)
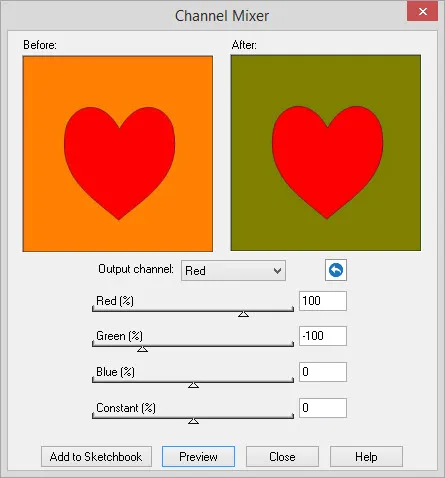
Reducing the percentage of green from 0 to -100 from the red channel means we’ve cut the red by half. Now the RGB of the background is 128, 128, 0.
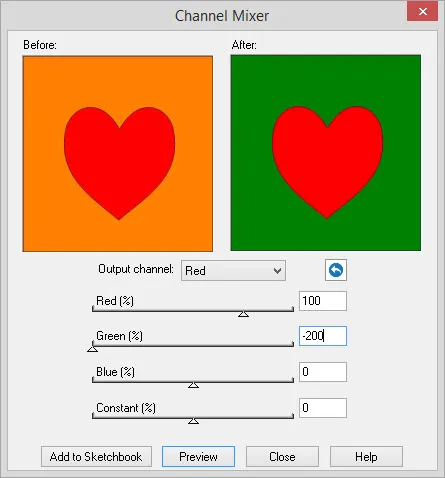
Reducing the percentage of green down to -200 means all the red has been removed. The RGB of the background is 0,128,0 and looks even more green.
Red is a component of both yellow (RGB=255,255,0) and of magenta (RGB=255,0,255).
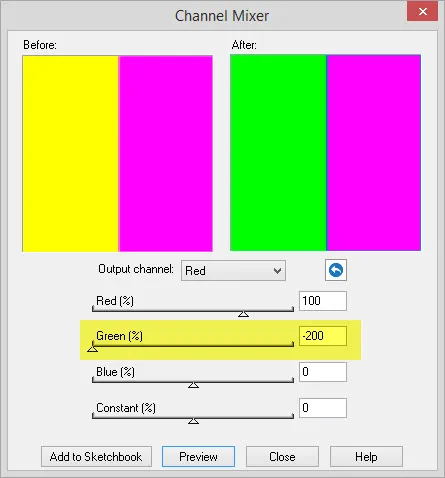
Decreasing the percentage of green (from the red channel) will adjust the yellow without changing magenta.

Decreasing the percentage of blue (from the red channel) will adjust the magenta without changing the yellow.
Decreasing red will adjust all the red so both are adjusted at once.
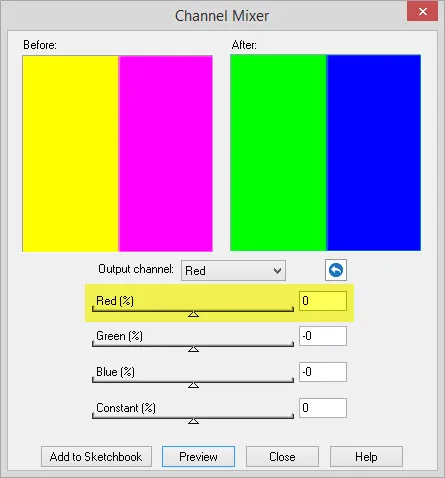
If you change channels using the drop list, the percentages will be recorded and restored once you return to that channel.The slider for Constant is originally set at zero for all the channels. If you want to darken the color of the selected channel, drag the slider to the left. If you want to brighten the color, drag the slider to the right.
Use the Reset button to restore all the values to the original settings.


