
Let’s get to know the basics of drawing an applique block by creating four different flowers.
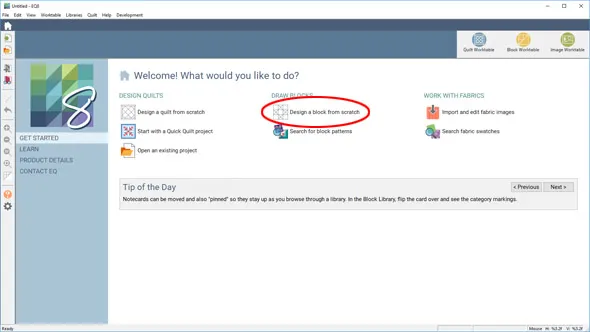
- Open EQ8. On the Home Screen, click Design a block from scratch.
- You’ll be switched to the Block Worktable with the NEW BLOCK tab selected. You can choose which kind of block you’d like to draw in the ribbon. You’ll see tips for the selected block style in the palette below.
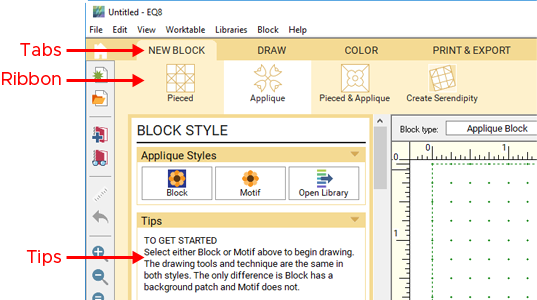
- Click Applique in the ribbon, then Block in the palette.
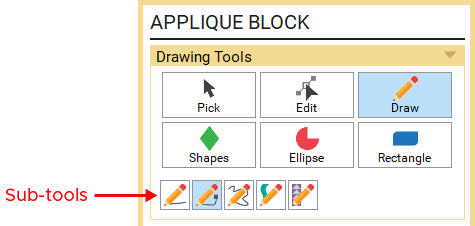
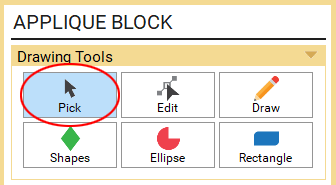
- You will switch to the DRAW tab. Notice the tools available in the palette. The Draw, Shapes, Ellipse, and Rectangle tools are for drawing. Each of the drawing tools has sub-tools that appear when the tool is selected. The Pick and Edit tools are for editing the lines and shapes you’ve drawn.
- On the Precision Bar above the worktable set the Block Width and Height to 12″. Set the Snaps Horizontal and Vertical to 12.
Turn the Graph Paper Cells ON and set Horizontal and Vertical to 2.

- Next to Snapping Options, make sure the second and fifth options are selected (Snap to nodes and Auto join segments).

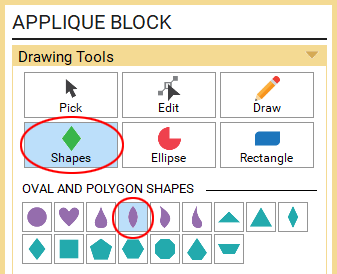
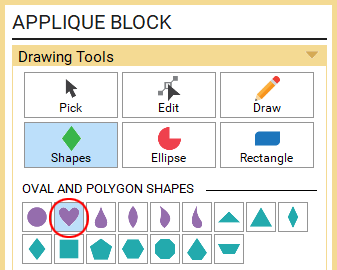
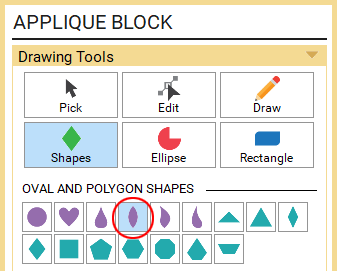
- We’ll draw a different flower in each of the four quadrants of the block. Click the Shapes tool. Click the Leaf sub-tool.
- Starting at the center of the upper-left quadrant, click, hold and drag to the right creating the leaf shape.
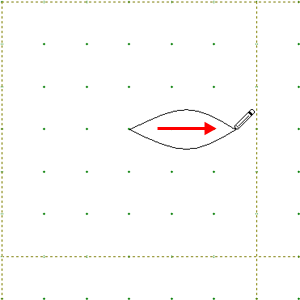
When you release the mouse the shape will fill to a solid cream color (if Auto Fill is selected on the Precision Bar). - Continue drawing petals to finish the flower.

The first flower is finished, but the petals are not uniformly sized or spaced (not that real flowers are perfectly shaped!). Let’s try another method that will create perfectly spaced petals. - In the palette, click the Heart sub-tool.
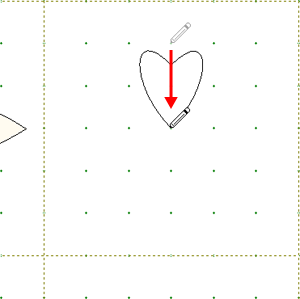
- Draw the next flower in the upper-right quadrant. Place your cursor on the top center grid point of the quadrant and drag down to the center grid point.
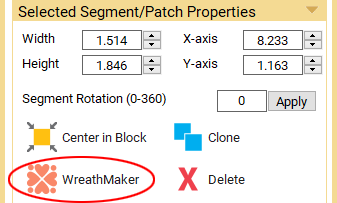
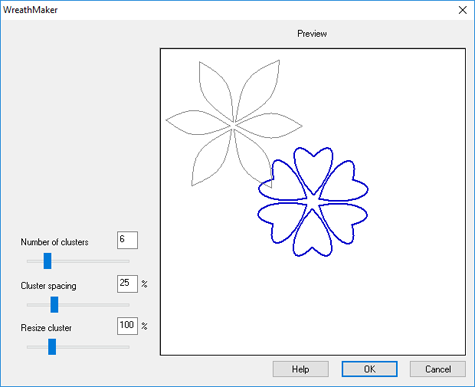
- The heart will be selected when you release the mouse. In the palette, under Selected Segment/Patch Properties, click Wreathmaker (if you have a smaller screen, you may need to use the vertical scrollbar to the right of the palette to see this option).
- In the Wreathmaker window, input these settings:
Number of clusters: 6
Cluster spacing: 25%
Resize cluster: 100%
Click OK.
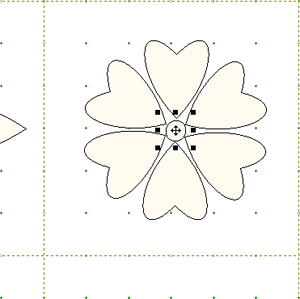
- A “wreath” of hearts will appear in the center of the block. Position your cursor on the black crosshair in the center of the wreath and drag it to the upper-right quadrant.
- In the palette, click the Circle sub-tool.
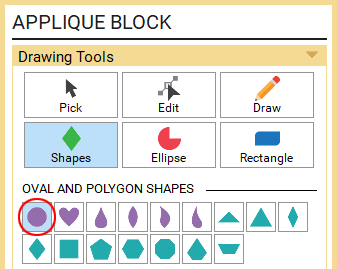
- Draw a center for your heart petals. You may need to drag the circle into position after you’ve drawn it. Just position your cursor over the black crosshair and drag.
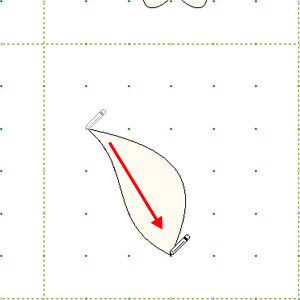
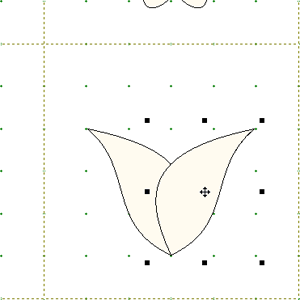
- In the palette, click the Curvy Leaf sub-tool.
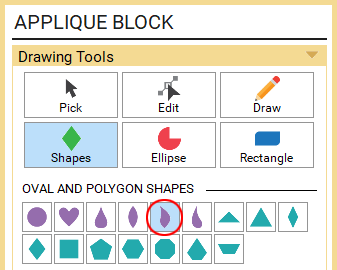
- In the lower-right quadrant, draw a leaf as illustrated below.
- Click the Pick tool.
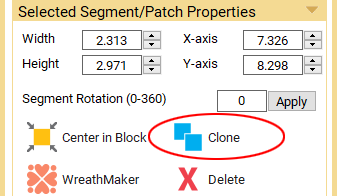
- The curvy leaf should still be selected (if it’s not, click on the edge of the shape to select it). In the palette, click Clone. The new, cloned shape will be selected.
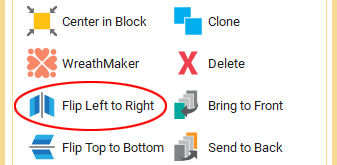
- Click Flip Left to Right. (You may need to use the vertical scrollbar to the right of the palette to see this option.)
- Position your cursor over the black crosshair and drag the second shape to the right so that the bottom points of the two shapes match up.
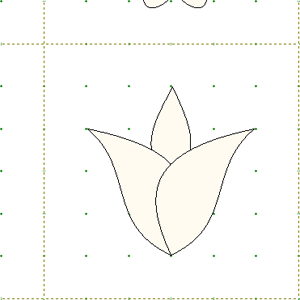
- In the palette, click the Shapes tool. Then select the Leaf sub-tool.
- Place your cursor on the top center grid point of the quadrant and drag straight down.
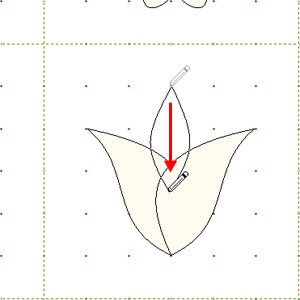
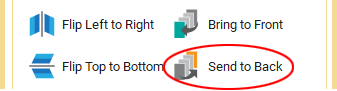
- While the new shape is still selected, click Send to Back in the palette.
And then the tulip is finished.
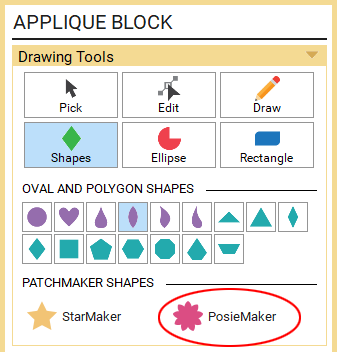
- For the last flower, we’ll use one of the new Patchmaker Tools to create a flower without drawing. In the palette, click PosieMaker.
- In the PosierMaker window, click the fourth Auto Shape at the bottom.

- This Auto Shape is a good starting point for the final shape. Make some slight adjustments by using the slider bars to change the settings to match the illustration below. The Preview window will update accordingly.
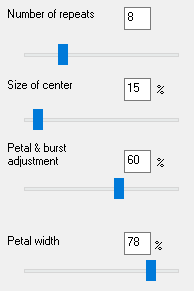
- Click OK.
- You’ll now see the new PosieMaker shape on the worktable. Position your cursor over the black crosshair and drag it to the lower-left quadrant.
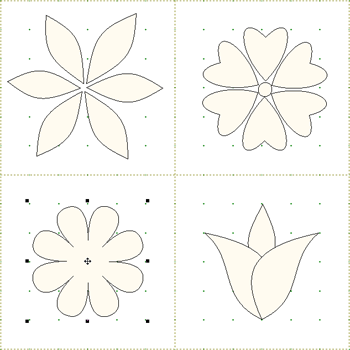
- Click Add to Project Sketchbook.
- You’ll see a message explaining that you’re adding the block to the Sketchbook, but the project file has not been saved yet (that’s why it says Untitled at the top). Click OK. In the Save As box that appears, type Basic Applique Lesson. Click the Save button to save the project file to your computer. After saving, you’ll see that EQ8 automatically adds a plain background square to the block when it is added to the Sketchbook.
- Click the Color tab at the top of the screen.

- Use the Paintbrush tool to color the block with fabrics or solid colors.
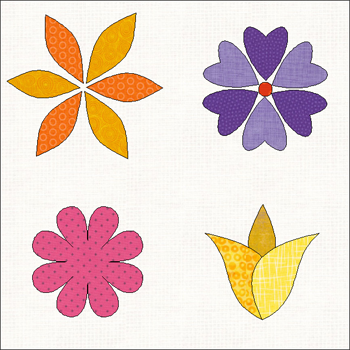
- Click the Add to Project Sketchbook button to save this colored version of the block to the sketchbook.
- If you’re done working in EQ8, you can close the program by clicking the X at the top or clicking File > Exit (PC) or Electric Quilt 8 > Quit Electric Quilt 8 (Mac).


