
 BlockBase+
Welcome to BlockBase+! This lesson will walk you through the steps of finding and printing your first block using the BB+ software. Let’s get started!
- Double-click the BlockBase+ icon to launch the software.

- You’ll see a Getting Started screen. Click the Next button to read through the on-screen guide so you are familiar with the software. Click the Finish or Close button when you are done.

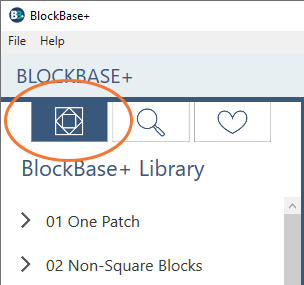
- The Navigation panel is on the left side of the screen. At the top, you’ll see the three Navigation buttons. The first button is for the Library (which is what you are viewing when you open the software). The Library is where you can browse through the categories to find blocks.
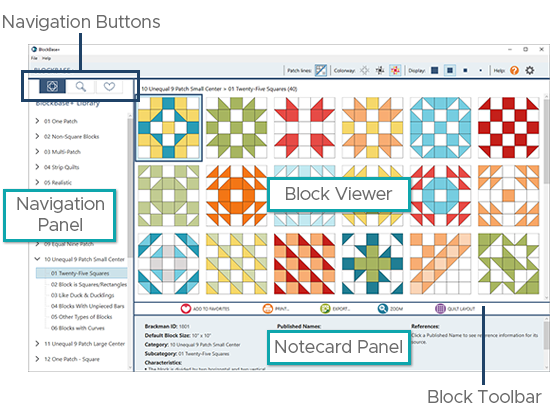
- By default, BB+ opens to the 10 Unequal 9 Patch Small Center category. Click on a couple of the subcategories to view the blocks.
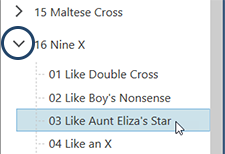
- Use the vertical scrollbar to the right of the categories to find the 16 Nine X category. After you click on the category, notice the arrow points down and you can now see the subcategories.
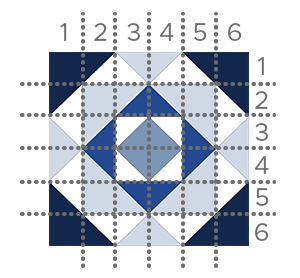
- Click the 03 Like Aunt Eliza’s Star subcategory.
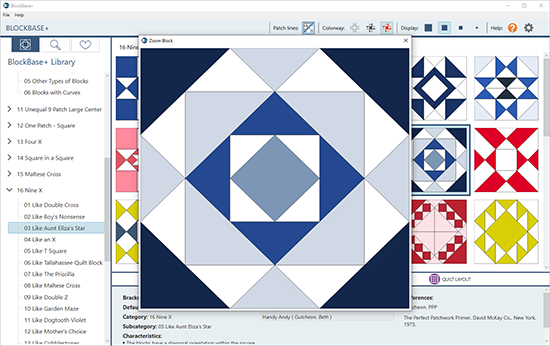
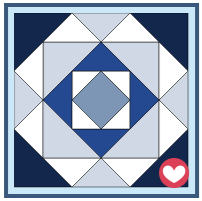
- Click on Block 2839b to select it. You can see the block name, default size, and category info in the Notecard panel below the blocks.
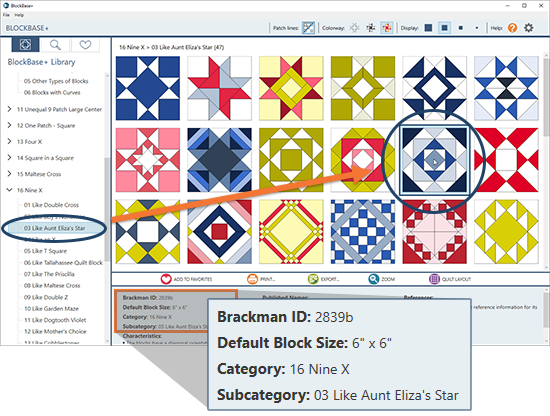
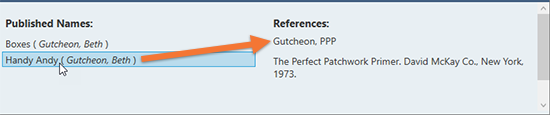
- In the Notecard panel you’ll find the Published Names for the block. Click on one of the names to view the source info under References.
- Want a closer look at the block? Click the Zoom button in the Block toolbar to view a larger image of the block. Click the X (or press the Esc key) to close the window.
- Let’s print the foundation pattern for this block. Click Print in the Block toolbar, then choose Foundation Pattern from the menu.

- In the Print Foundation window, you’ll see the Print Options tab first. This is where you set the basic information for your printout.
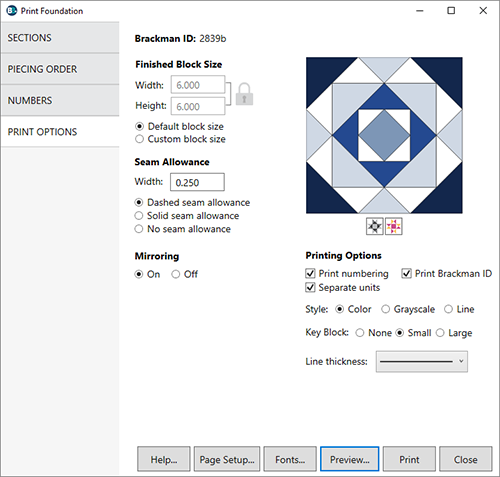
(Note: The print dialogs shown in this lesson are from a Windows computer. The tabs appear along the left on Windows and along the top on Mac.) - At the top of this window, notice that the block size is listed as Finished Block Size. The “finished size” is the size of the block after all the seams are sewn. For example, if you want the block to be 12″ when it’s all sewn into the quilt, enter 12″ for the block size in the print dialogs. BB+ adds the seam allowance for you. We’ll leave the size set to the default 6″ for this exercise.
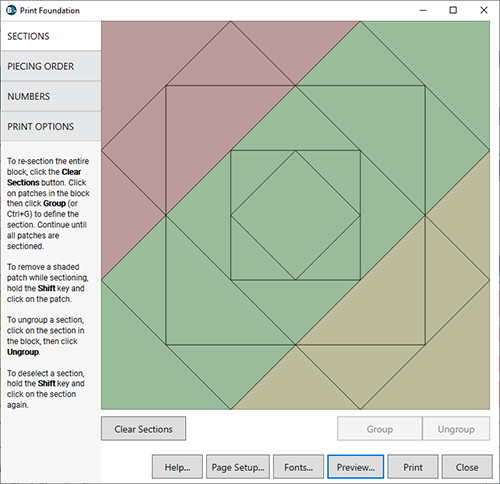
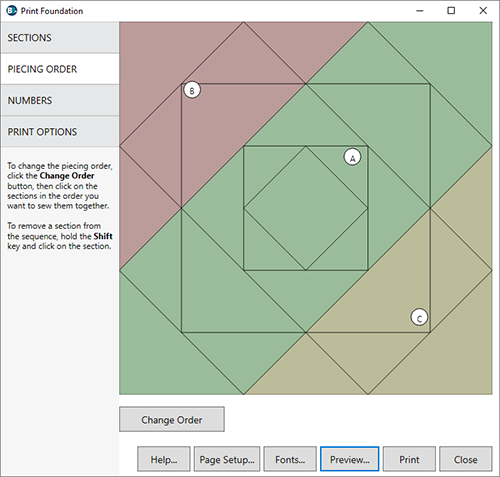
For more details about the available options, visit the Print Foundation Patterns support page. - Click the Sections tab. Each section is a different color, so you can see that this block can be pieced in three sections. If you’d like to change the way a block is sectioned, click the Clear Sections button and group the patches how you’d like, keeping the sewing order in mind as you group.
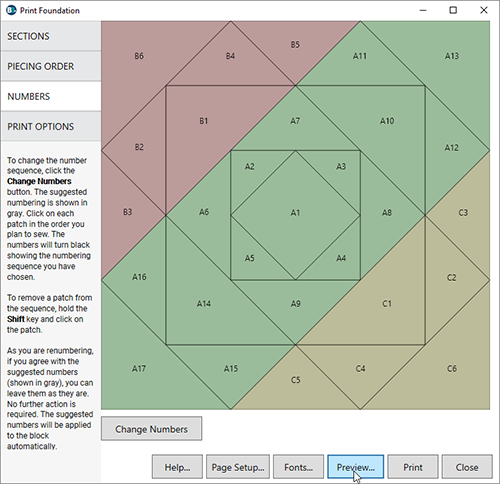
- On the Piecing Order tab, you can change the letters that are assigned to each section. If you’d like to change the order, click the Change Order button and then click the sections in the order you’d like the letters to appear.
- On the Numbers tab, you can change the numbers that indicate sewing order in each section. Click the Change Numbers button, then click on the patches in the order you’d like to sew them.
Each tab in the Print Foundation dialog has instructions for customizing the printout. You can also visit the Print Foundation Patterns support page. - Click the Preview button. It’s always a good idea to preview the printouts before printing.
- On the Print Preview screen you can move, rotate, copy/paste, and delete sections. Click on a section and you’ll see that the lines turn red, indicating it is selected. Drag the sections so they fit on two pages. You can also use the handle in the middle of the section to rotate a section, if necessary, for a better fit. To see the print preview in action, watch this video.
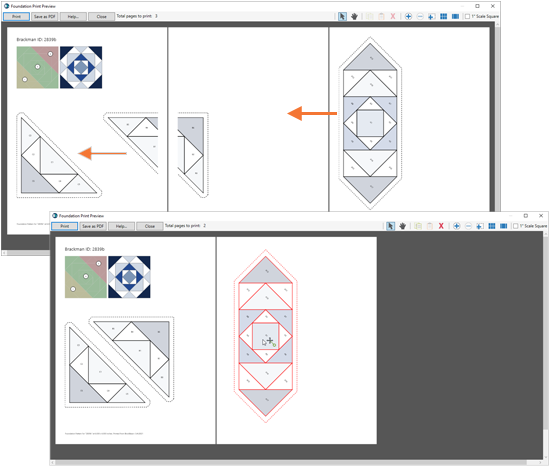
- Check the box for the 1″ Scale Square. After printing, you can measure this square to make sure your printer is accurately printing your pattern.

- If you’d like to print this foundation pattern, you can click Print. Or you can click Close to exit the print preview.
- After printing/closing, click the Close button in the print dialog window.
- What would this block look like it a quilt layout? You can preview the block in several different layouts. Click the Quilt Layout button in the Block toolbar.

- In the Quilt Layout window, use the arrows below the quilts to see the selected block in seven different layouts. (Note: These layouts are for preview purposes only. There are no instructions included to make these quilts.)
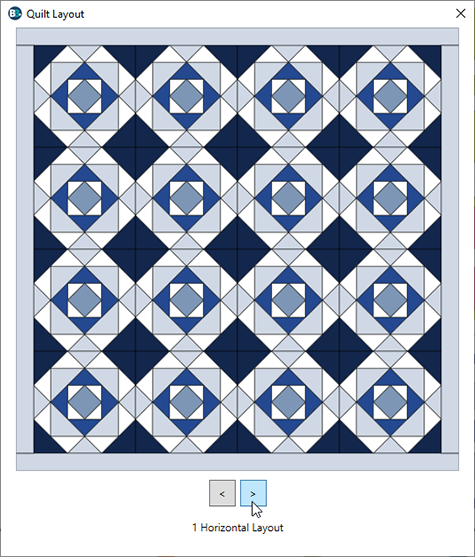
- Take a closer look at the first layout–1 Horizontal Layout. This is a regular straight set layout with 4 blocks across and 4 down, for a total of 16 blocks. We’ll use this info in just a few minutes!
- Click the X (or press the Esc key) to close the Quilt Layout window.
- Let’s take a look at the Rotary Cutting Chart for this block. Click Print > Rotary Cutting Chart.

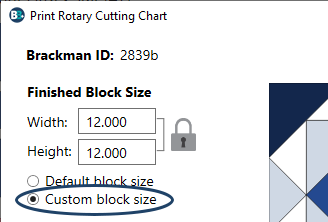
- Notice under Finished Block Size, the Default block size for this block is 6″ x 6″. This gives us a clue as to the grid structure of this block and sizes that would work best when cutting the patches using a rotary cutter and ruler. We will see easier-to-cut dimensions if we choose a block size that is a multiple of 6 (12″, 18″, 24″, etc.).
- Choose Custom block size and type 12 in the Width box. Because the Lock button is on, you can press the Tab key on your keyboard and the Height will automatically update to 12.00 too.
- We’ll leave the rest of the settings at the defaults for now. Click the Preview button.
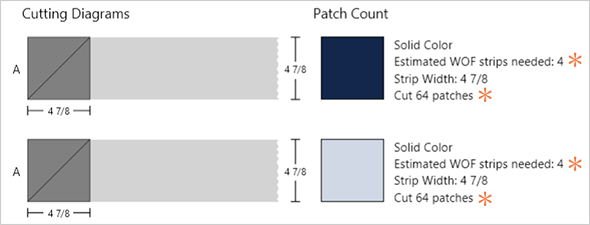
- You’ll see the Rotary Cutting Chart for one 2839b block at 12″ inches, finished (the quarter inch seam allowance is included in these cutting dimensions). Let’s look at how how to read these diagrams:
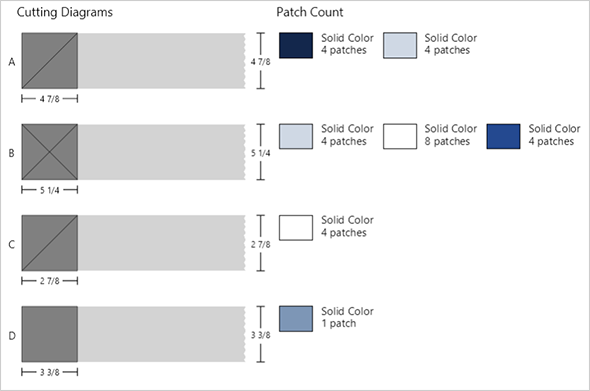
For Patch A: Cut a strip of fabric 4-7/8″ wide. From that strip, cut a 4-7/8″ square. Then subcut the square diagonally in one direction to create two triangles. You’ll need 4 triangles of the dark blue fabric, and four triangles of the light blue fabric.
For Patch B: Cut a strip of fabric 5-1/4″ wide. From that strip, cut a 5-1/4″ square. Then subcut the square diagonally in both directions to create four triangles. You’ll need 4 triangles of the light blue fabric, 8 triangles of the white fabric, and 4 triangles of the medium-dark blue fabric.
For Patch C: Cut a strip of fabric 2-7/8″ wide. From that strip, cut a 2-7/8″ square. Then subcut the square diagonally in one direction to create two triangles. You’ll need 4 triangles of the white fabric.
For Patch D: Cut a strip of fabric 3-3/8″ wide. From that strip, cut a 3-3/8″ square. You’ll need one square of the medium blue fabric.
For more information on rotary cutting charts, visit the Print Rotary Cutting Chart support page. - If you’d like to print this rotary cutting chart, you can click Print. Or you can click Close to exit the print preview.
- Let’s make some adjustments to the rotary cutting chart and then preview it again. Under Calculate for… select Detailed view.
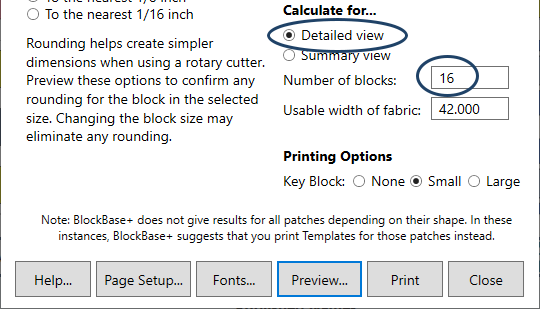
- Remember back in step 23 when we looked at the Horizontal Quilt Layout and made note that the quilt had 16 blocks? Here’s where we can use that info. Type 16 in the box for Number of blocks.
- The Usable width of fabric is set to 42″ as this is the standard usable yardage width used in quilting magazines. If you would like to calculate for a different width of fabric, you can change it in this window.
- Click the Preview button.
- Notice how much more information is listed now that we’ve switch to the Detailed view for the rotary cutting chart. Patches are listed separately for each fabric and you’ll now see an estimated WOF (width of fabric) strip count and a patch count for all 16 blocks!
- This time, rather than printing the chart, let’s save a PDF file. Click the Save as PDF button at the top of the screen.

- A Save window will appear. The file will be named the Brackman ID number (2839b.PDF). You can type a new name, if you’d like.
- Click the Save button. By default, the PDF file will be save here: Documents > My BlockBase Plus > PDFs. PDF files can be opened outside of the BB+ software, or sent to friends who do not own the software. For more information, visit the Saving PDF Files of Patterns support page.
- Click the Close button to close the print preview. Then click Close in the print dialog window.
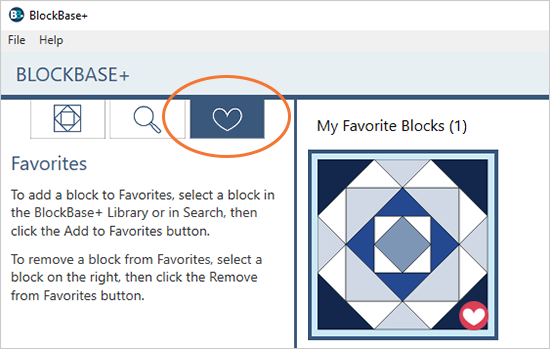
- Want to make it easier to find this block the next time you open BB+? With the block still selected, click the Add to Favorites button in the Block toolbar.

- You’ll now see a heart icon in the corner of the block and the block will appear in the Favorites view.
- At the top of the Navigation panel, click the Favorites button. You’ll see block 2839b. If you’d like to remove it from the Favorites view, click Remove From Favorites in the Block toolbar.
- Click the Library button at the top of the Navigation panel to return to the BlockBase+ Library view. Now it’s your turn to browse through the blocks and print the patterns for your next project! We walked through printing foundation patterns and rotary cutting charts in this lesson, but you can also print templates and an image of the block.
- If you’re done working in BlockBase+, you can close the program by clicking the X at the top or clicking File > Quit BlockBase+.


