
Use the Set Photo tool to place photos in your quilt.

The Set Photo tool is available on all layers of any type of quilt.
Setting Photos on Layer 1
Photos can be set onto your quilt in much the same way as blocks, motifs, or stencils. You can set your photo onto each of the three layers of all the quilt layouts except for One Patch. You can only set photos onto Layer 2 and Layer 3 for One Patch.
To set a photo on Layer 1, click Photo Tools on the ribbon, then the Set Photo tool in the palette. Click on a photo in the palette to select it. Click on a space in the quilt to set the photo. The photo will resize to fit the block size of your layout.
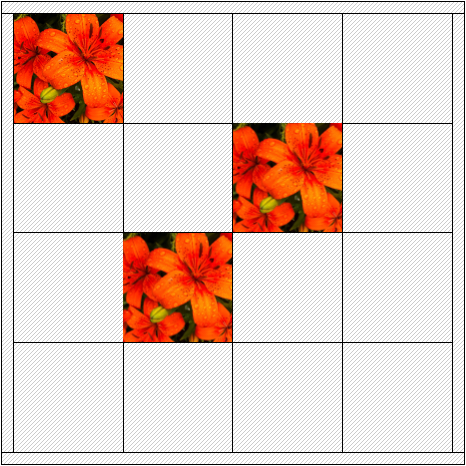

Use Ctrl+click to set the focused photo in all positions. Use Alt+click to set the focused photo in alternating positions. Once you’ve placed a photo on Layer 1, it’s easy to replace it. To replace a photo, click on the photo you want to replace to set the new photo.
You can also drag and drop photos on the layout. The photo will set in the actual size.
Note: Photos set on Layer 1 cannot be rotated or flipped.
Setting Photos on Layers 2 or 3
You can drag and drop photos on the layout. Select a photo in the palette. Click, hold, and drag that photo from the palette to the quilt layout. Release the mouse to drop the photo on the quilt.
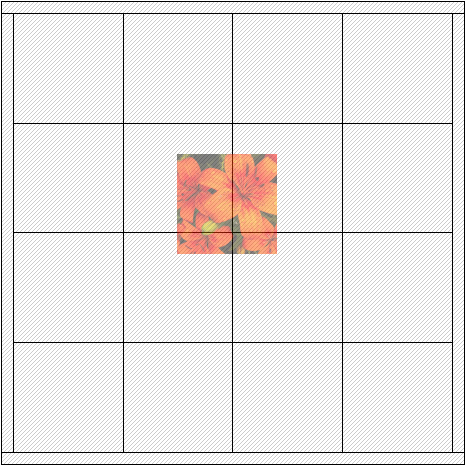
To manually set the size and shape of the photo, hold down the Shift key and move your mouse over the quilt on the worktable. The cursor will change into a small crosshair. With the Shift key pressed, click hold, and drag a rectangular marquee of the approximate size and location of the photo. When you release the mouse, the photo will appear.
Use the Adjust tool to make changes to the size and location of the photo. With the Adjust tool you can delete the photo using the keyboard Delete key.
Use the Erase tool to erase the photo. This will leave an empty placeholder from the photo.


