
Start with an image on the worktable. Click Special Effects in the ribbon, and then click the Effects tool in the palette. The Apply Effects dialog will display. Use the Distort menu at the top of the dialog to choose an affect.
Wind
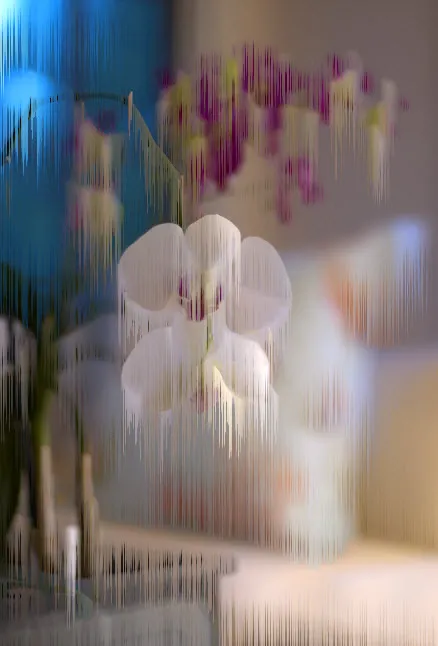
This effect creates thin lines along a specified angle to produce the effect of wind.
Wind settings:
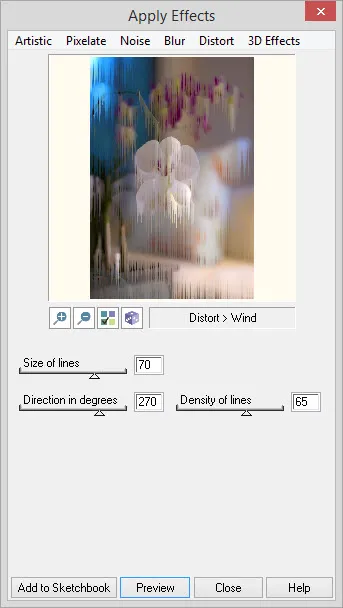
Size of lines: This value is the size in pixels of the thin lines used to create the wind effect. Range: 1 – 100
Direction in degrees: This value is the direction in degrees used to create the wind effect. Range: 0 – 360
Density of lines: This value is the thickness in pixels of the lines used to create the wind effect. Range: 0 – 100
Polar
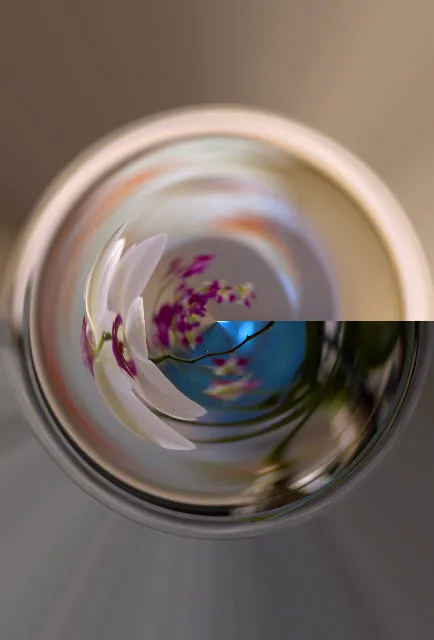
This effect converts the image from rectangular coordinates to polar coordinates and vice versa.
Polar settings:
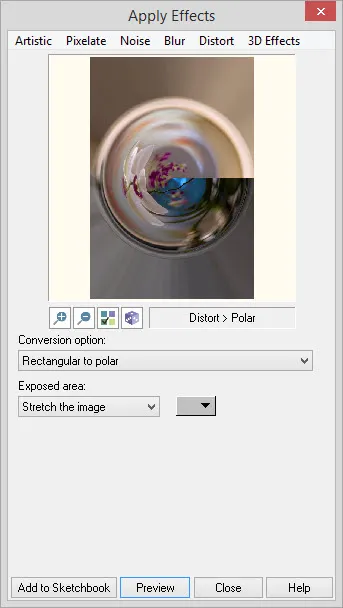
Conversion option: Choose to convert the image from Rectangular to polar or from Polar to rectangular coordinates.
Exposed area: Choose Fill with color to apply the color in the color indicator to the exposed background area. Stretch the image uses the edges of the image and stretches it to fill the background area. Leave as is will use the unchanged image to fill the exposed background area.
Middle color indicator: Color used to fill background if Fill with color is selected for the Exposed area.
Zoom Wave
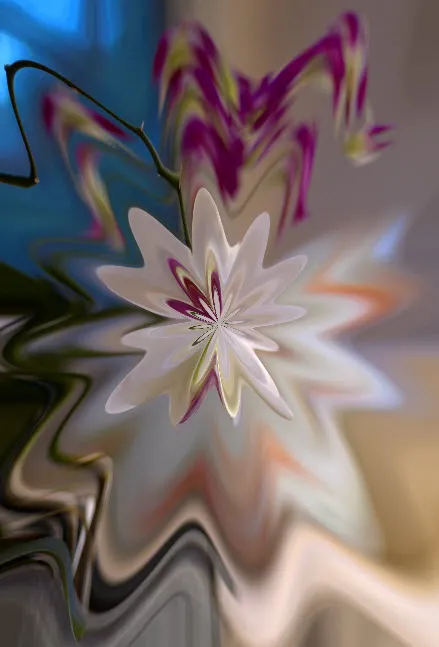
This effect distorts the image with a wave zoomed from a specified point.
Zoom Wave settings:
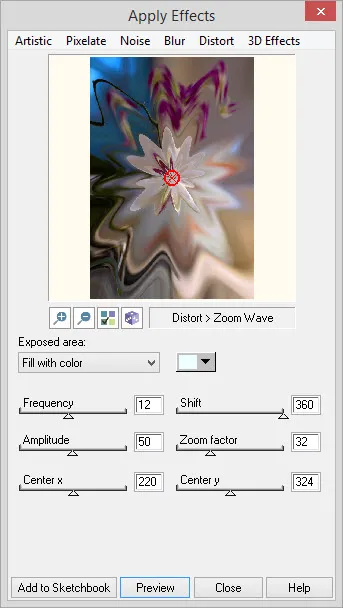
Exposed area: Choose Fill with color to apply the color in the color indicator to the exposed background area. Stretch the image uses the edges of the image and stretches it to fill the background area. Leave as is will use the unchanged image to fill the exposed background area.
Middle color indicator: Color used to fill background if Fill with color is selected for the Exposed area.
Frequency: This value is the number of waves that come out from the specified point. Range: 1 – 25
Shift: This value will shift the wave points without shifting the image. Range: 0 – 360
Amplitude: This value represents the steepness of the waves. Smaller numbers give gently sloping waves and larger numbers give steeply sloping waves. Range: 1 – 100
Zoom factor: The percentage the wave grows as it moves from the center point. Range: 0 – 100
Center x and Center y: This is the point from which to zoom the image. Range: 0 – to width and/or height of image
Radial Wave
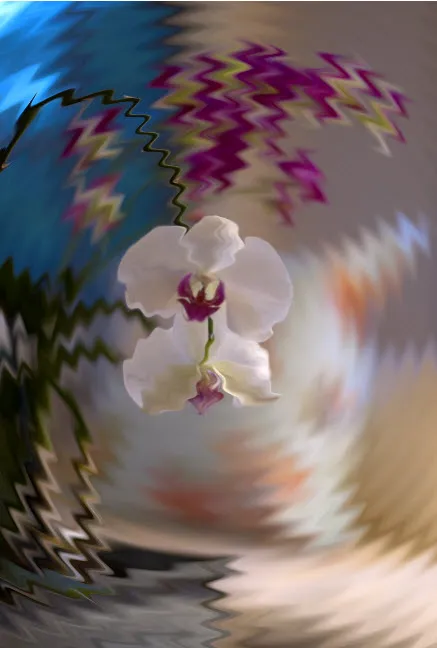
This effect distorts the image by using a wave that radiates from a specified point.
Radial Wave settings:
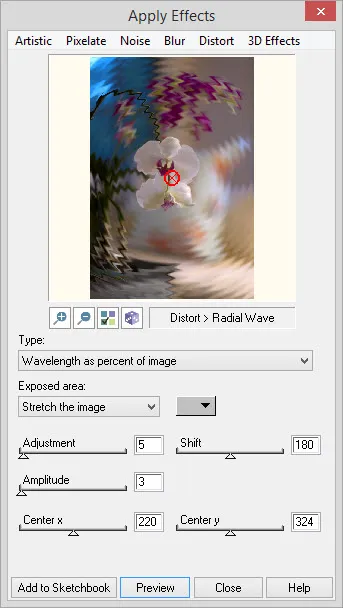
Type: Choose Wavelength as percent of image to make the length of the wave the significant factor or Wavelength set as frequency to make then number of wave repeats the significant factor.
Exposed area: Choose Fill with color to apply the color in the color indicator to the exposed background area. Stretch the image uses the edges of the image and stretches it to fill the background area. Leave as is will use the unchanged image to fill the exposed background area.
Middle color indicator: Color used to fill background if Fill with color is selected for the Exposed area.
Adjustment: The result of this value is determined by the Type selection. If Wavelength as percent of image is selected, then this value represents the length of a wave as a percent of the overall image dimensions. In other words, the smaller the value, the more waves and the larger the value, the fewer waves. If Wavelength set as frequency is selected, this value is the number of wave repeats. Range: 1 – 100
Shift: This value will shift the wave points without shifting the image. Range: 0 – 360
Amplitude: This value represents the magnitude of the waves. Smaller numbers give gentle waves that are almost in a straight line. Larger numbers give large waves that wrap around the specified point more significantly. Range: 1 – 100
Center x and Center y: This is the point from which the radial waves are created. Range: 0 – to width and/or height of image
Swirl
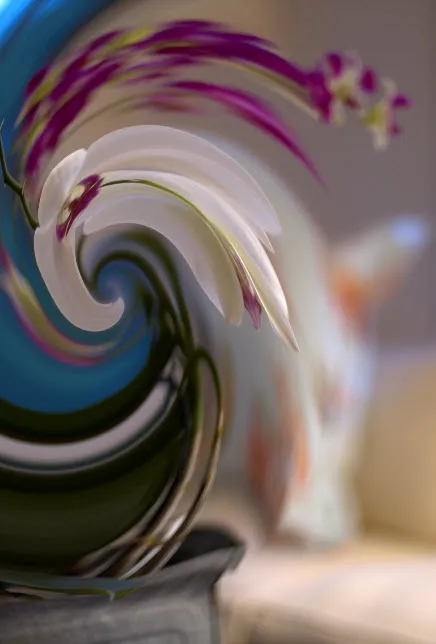
This effect creates a swirl pattern by spinning the image around a specified point.
Swirl settings:
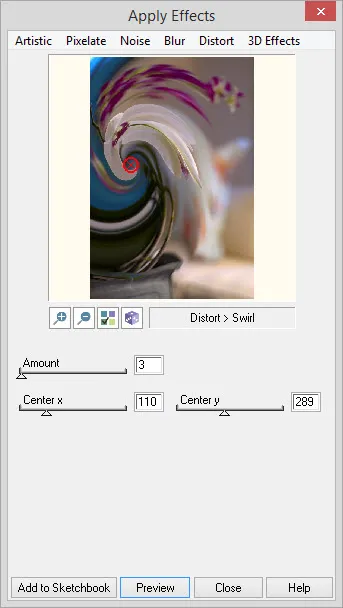
Amount: The value determines the amount of the spin that will be created. Range: 1 – 100
Center x and Center y: This is the point from which the spin begins. Range: 0 – to width and/or height of image
Wave
This effect distorts the image with two perpendicular waves at the specified angle and with the specified wave type.
Wave settings:
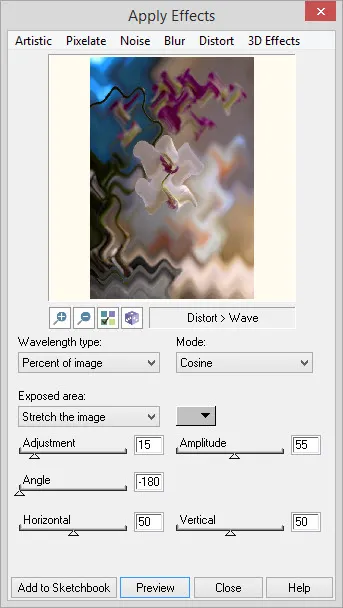
Wavelength type: Choose Percent of image to make the length of the wave the significant factor or Set as frequency to make then number of wave repeats the significant factor.
Mode: Choose from Sin, Cosine, Square or Triangle for the style or mode of the wave.
Exposed area: Choose Fill with color to apply the color in the color indicator to the exposed background area. Stretch the image uses the edges of the image and stretches it to fill the background area. Leave as is will use the unchanged image to fill the exposed background area.
Middle color indicator: Color used to fill background if Fill with color is selected for the Exposed area.
Adjustment: The result of this value is determined by the Wavelength type selection. If Percent of image is selected, then this value represents the length of a wave as a percent of the overall image dimensions. In other words, the smaller the value, the more waves and the larger the value, the fewer waves. If Set as frequency is selected, this value is the number of wave repeats. Range: 1 – 100
Amplitude: This value represents the magnitude or size of the waves. Small numbers give gentle waves and large numbers give more severe waves. Range: 1 – 100
Angle: This value is the degree of rotation of the waves. Range: -180 – 180
Horizontal: This value is the size of the horizontal wave as a percentage. Range: 0 – 100
Vertical: This value is the size of the vertical wave as a percentage. Range: 0 – 100
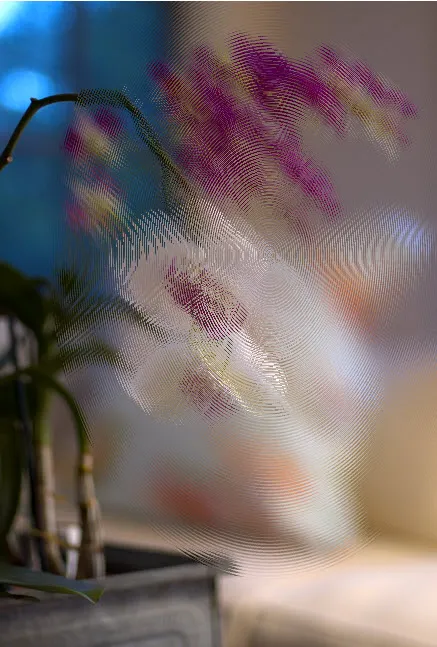
Ring
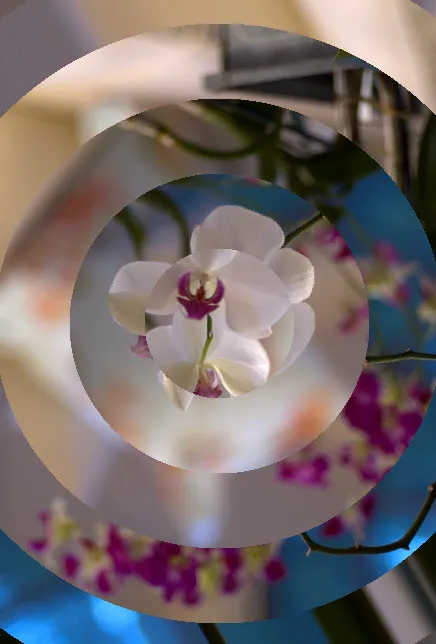
This effect divides the image into a specified number of rings. Each ring is rotated according to the specified rotation angle.
Ring settings:
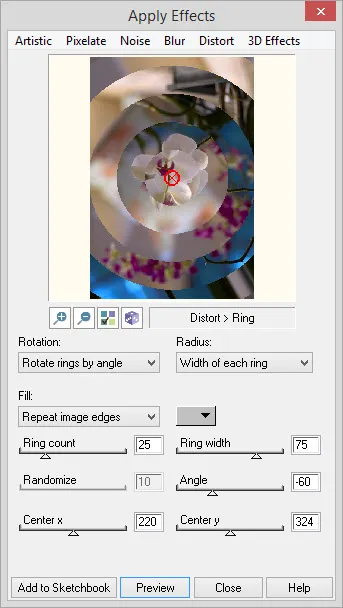
Angle: Choose Randomize the rotation to have the rotation angle chosen randomly. The starting point of the randomization can be adjusted using the Randomize slider. Choose Rotate rings by angle to have the rings rotated by a given angle. Use the Angle slider to set the angle.
Radius: Choose Width of each ring to set the width in pixels for each ring using the Ring width slider. Choose Maximum width to set the size of the rings using the following formula: Ring width value / Ring count value + 1.
Fill: Rings with a large radius might not be completely inside the image. These are considered incomplete rings and the portion of the ring outside the image is unknown. When the ring is rotated, some of the unknown area may come into view. These areas can be filled in one of three ways: Choose With color to apply the color in the color indicator to the unknown area. Choose Repeat image edges will fill the unknown area with the image’s edges. Choose Keep original to keep the original image in place to fill the unknown area.
Middle color indicator: Color used to fill background if With color is selected for the Fill option.
Ring count: This value represents the number of rings that the image is divided into. Range: 1 – 100
Ring width: This value sets the width of the rings and is determined by the Radius setting. If Width of each ring is selected for Radius, then this value is the width of each ring in pixels. If Maximum width is selected for Radius, then this value is divided by the Ring count value plus 1.
Randomize: If Randomly rotate is selected for Rotation, this entry can adjust the starting point for the random number generator to set the numbers used for the shift angle of each of the rings. Each ring is rotated against its inner ring by these random numbers. Range: 1 – 500
Angle: If Rotate by a fixed angle is selected for Rotation, this entry is used. Each ring is rotated against its inner ring by this angle. Range: -180 – 180
Center x and Center y: This is the point from which the rings begin. Range: 0 – to width and/or height of image
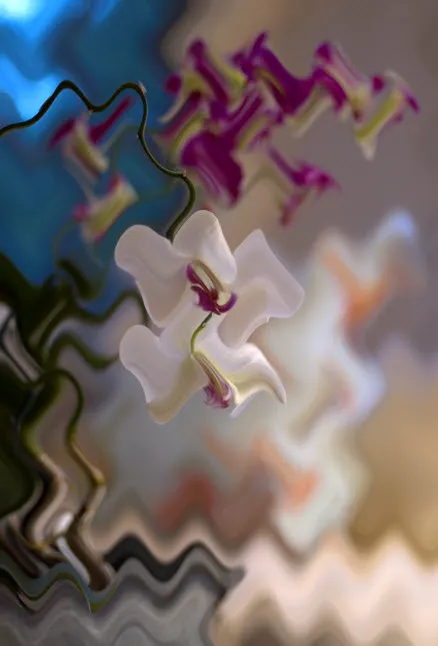
Zigzag
This effect applies to the image zigzag waves twisting around a center point.
Zigzag settings:
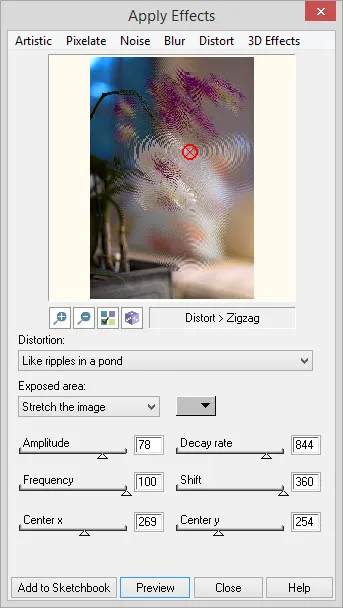
Distortion: Choose a distortion level. For subtle waves, choose Like ripples in a pond. For more dramatic distortion, choose Around center point.
Exposed area: Choose Fill with color to apply the color in the color indicator to the exposed background area. Stretch the image uses the edges of the image and stretches it to fill the background area. Leave as is will use the unchanged image to fill the exposed background area.
Middle color indicator: Color used to fill background if Fill with color is selected for the Exposed area.
Amplitude: This value represents the amount of displacement of the zigzag. In other words, the magnitude or size of the zigzag. Small numbers give gentle zigzags and larger numbers give harsh zigzags. Range: 1 – 100
Decay rate: This value indicates how rapidly the zigzag decays or decreases. Smaller values create harsher zigzags and larger numbers create less zigzag. Range: 1 – 1000
Frequency: This value is the number of times the zigzag repeats along a radial line. Range: 0 – 100
Shift: This value is the wave shift in hundredths of degrees. Range: -360 – 360
Center x and Center y: This is the point from which the zigzag begins. Range: 0 – to width and/or height of image


