


EasyDraw Edit Tool
Adjusting Lines and Curves
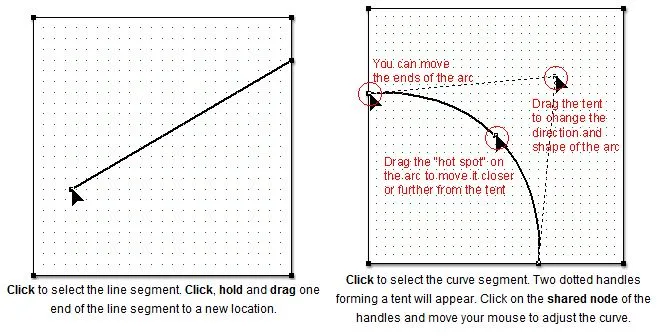
The Edit tool allows you to to make simple adjustments to lines and arcs.
Adding Nodes
The Edit tool also allows you to add nodes to an existing segment. Once you have added nodes, you can join other lines or arcs to them.
Add node At Location
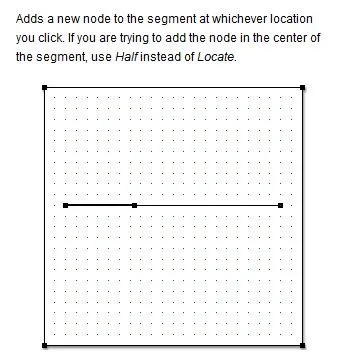
Click to select a segment. Click At Location in the palette. Click on the segment to add a node. This will split the segment into two segments at that point.
Add node At Intersections

Click to select a segment. Click At Intersections in the palette. Notice the new nodes added at the intersections. Also, the initial three lines now get split into multiple segments at each new node.
Add node at Half
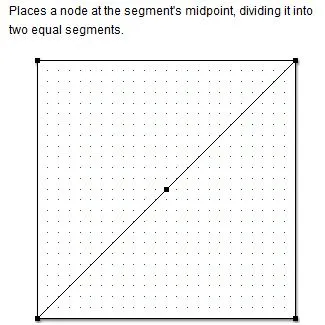
Click to select a segment. Click Half in the palette to divide the segment evenly into 2 segments.
Add nodes at Thirds
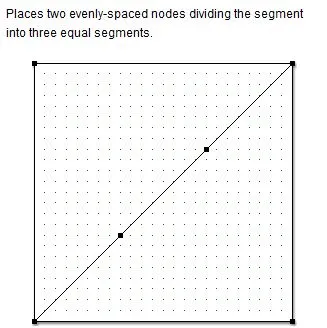
Click to select a segment. Click Thirds in the palette to divide the segment into three equal segments.
Partition Segment
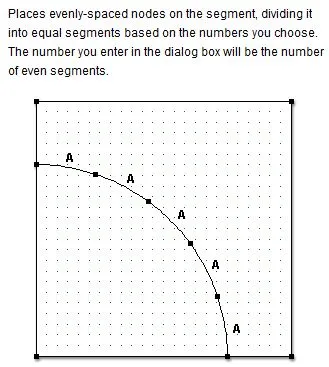
Click to select the segment. In the palette, click the up and down arrows next to Partition Segment for the number of equal segments that will partition the arc. Click Apply. For the example above, the number 5 was entered into the dialog box. Each segment marked A indicates equal lengths.
Stagger Segment

Click to select the segment. In the palette, click the up and down arrows next to Stagger Segment to change the numbers. Click Apply. For the example above, the number 5 was entered for Stagger Segment. When you click Apply, the segment is split into 4 equal segments (A) and 2 segments half the length of the other segments (B)—resulting in 5 equal segments.


