
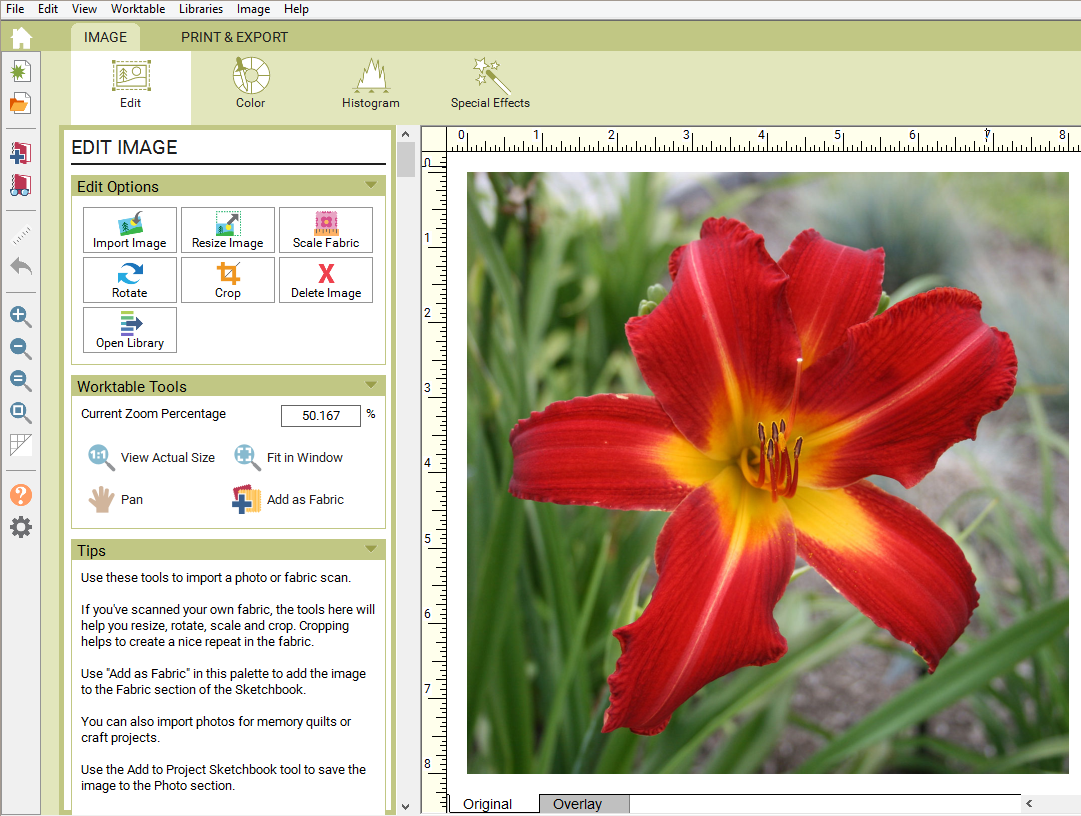
Import Image

Click the Import Image tool in the palette to display the Import Image dialog box.
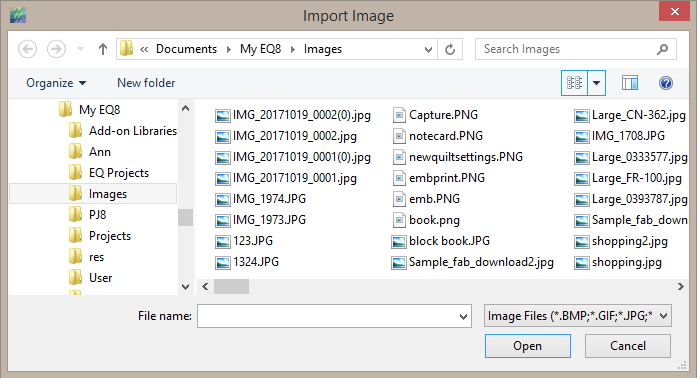
Click directly on the file. Click the Open button and the image will display on the worktable.
Resize Image

Click the Resize Image tool in the palette to display the Import Image dialog box.
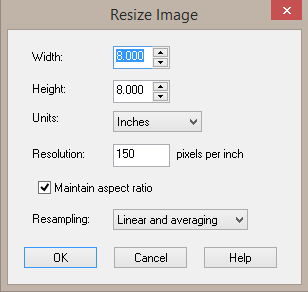
Type or use the arrow buttons to adjust the size for Width and Height. The Units drop-down lets you select from inches, centimeters and pixels. Note: If Maintain aspect ratio is checked, changing one entry will automatically adjust the other entry to keep the appropriate proportions.
Type a new value for Resolution to adjust the size. Remember that if you make a change to the resolution, this will change the size of the image on your computer display because EQ8 shows the image pixel-for-pixel. The rulers will re-scale to reflect the change. Note: If you have Pixels selected for Units, when you change the Resolution, the entries for Width and Height in pixels will adjust automatically when you click OK.
Changing the aspect ratio distorts the image by stretching or contracting the image in one dimension differently than the other. When Maintain aspect ratio is checked, the image will be constrained to the image’s current proportions for Width and Height. Keep this checked for the highest quality resizing.
Resampling is a mathematical technique used to create a new version of the image with a different width and/or height in pixels.
When images are increased in size, the number of pixels increases, but the original information is the same so the new image cannot increase in detail. It can only rely on the information in the original image. As a result, images normally become softer, the more they are enlarged, since the amount of information per pixel goes down. Increasing an image size involves interpolating between the existing pixels to obtain an estimate of their values at the new pixel locations.
When images are decreased in size, information in the original image has to be discarded to make the image smaller. Reducing the size of an image can make a soft image appear sharper even though it contains less information than the original. Decreasing an image size involves computing a weighted average of the original pixels that overlap each new pixel.
Note: If you decrease the size of an image and then increase the size, you will not get all the original image detail back.
- Normal – Images with 256 colors or less will automatically be set to Normal.
- Linear and averaging – This option is good for increasing and decreasing the size of an image.
- Bicubic and averaging – This option is the best option when increasing the size of an image. It helps prevent jaggedness.
Scale Fabric

If you scan in your own fabric, be sure to use 72-75 dpi when you scan it. If you follow this rule, your fabric will automatically scale appropriately in EQ8. If you download fabrics from the internet or you take a photograph of your fabric, then you’ll need to scale the fabric in EQ8. If you can, place a ruler on the fabric before you take the photo. Even if you don’t have a ruler in the photo, if have the actual fabric, you can measure the actual fabric to scale it.
Import the image of your fabric. It you’ve placed a ruler on the fabric when you photographed it, then you’ll notice that the ruler in the photo and the ruler on worktable probably don’t match. We need to make these rulers match in order to have the correct fabric scale.
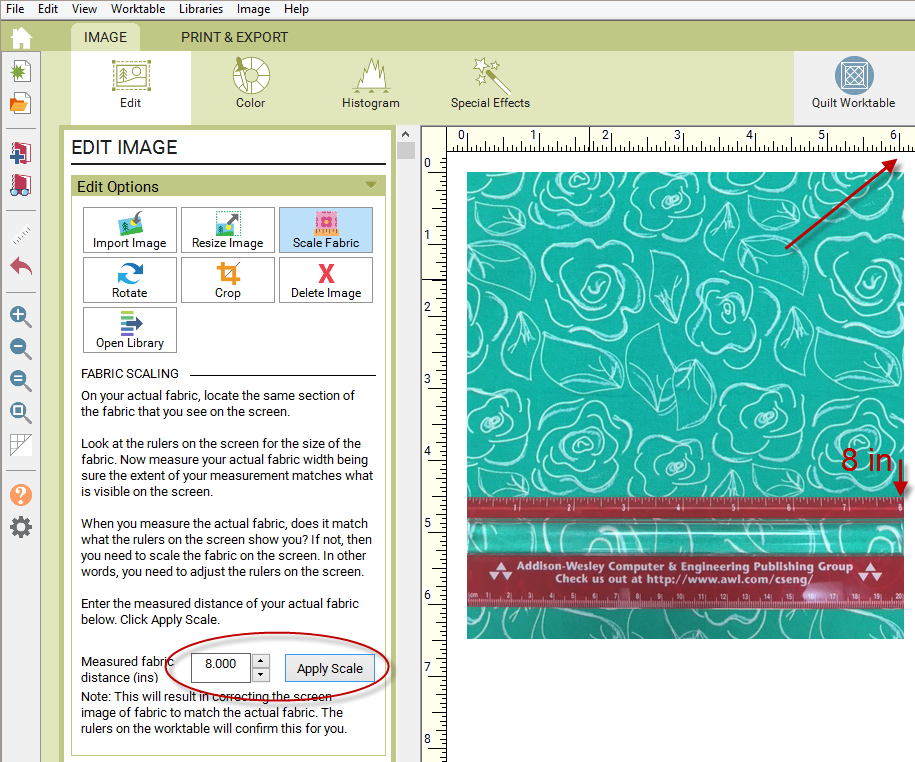
Then click the Scale Fabric tool in the palette. Type the size shown on the ruler in the photo into the entry in the palette.
In this example we would type 8 and click Apply Scale.
![]()
Now the rulers on the worktable match the ruler on fabric. You can crop the fabric in any way you choose and it will maintain the proper scale.
Note: If you don’t have a ruler in the photograph, use a ruler to measure the distance on the actual fabric that matches the distance on the screen. Enter the number in the palette and click the Apply Scale button.
Rotate
The palette includes several ROTATE AND SHEAR OPTIONS. Whenever you use any of these options, the image is required to display 1-to-1. This means that your image may become larger than the screen You’ll need to click Fit in Window to adjust the image to your screen.
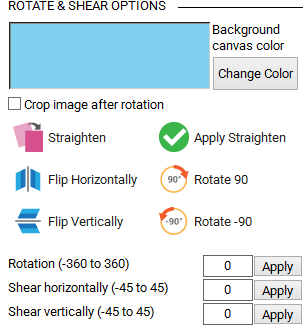
The Rotate and Flip buttons give a visual indication of what they will do to the image when clicked.
Rotate by degrees: Enter a number for degrees in the box. A negative number will rotate counter-clockwise. Click to rotate the image by the designated number. (This tool will be disabled until a number is entered.) The selected Canvas color will become part of the image. If you want the image to be cropped, place a check in the box.
Shear
Shear horizontally by degrees: Enter a number for degrees in the box. A negative number will shear counter-clockwise.Click to shear the image horizontally by the designated number. (This tool will be disabled until a number is entered.) The selected Canvas color will become part of the image.
Shear vertically by degrees: Enter a number for degrees in the box. A negative number will shear counter-clockwise. Click to shear the image vertically by the designated number. (This tool will be disabled until a number is entered.) The selected Canvas color will become part of the image.
Straighten
Click Straighten in the palette.
![]()
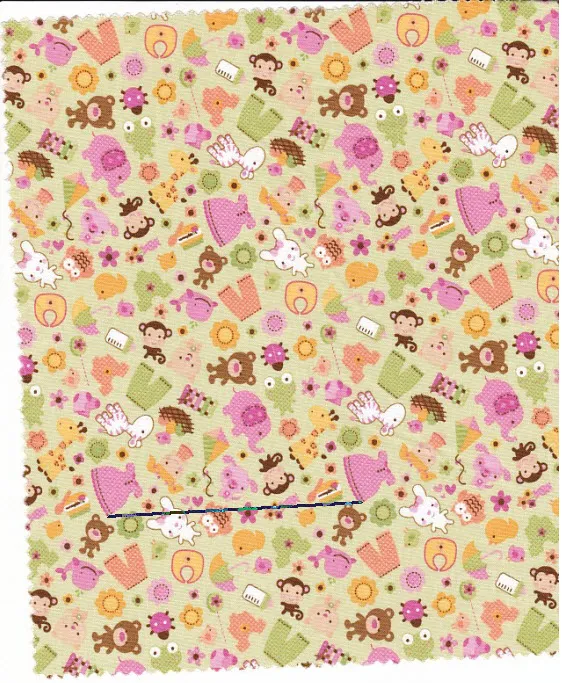
The cursor will change to a crosshair. Drag to draw a line across this image. If you are straightening fabric, you can follow something in the pattern of the fabric.
In this example, draw a line from one pink dress to the other dress. If you don’t like the line, you don’t need to erase it. Just start redrawing a new line and the old line will disappear.
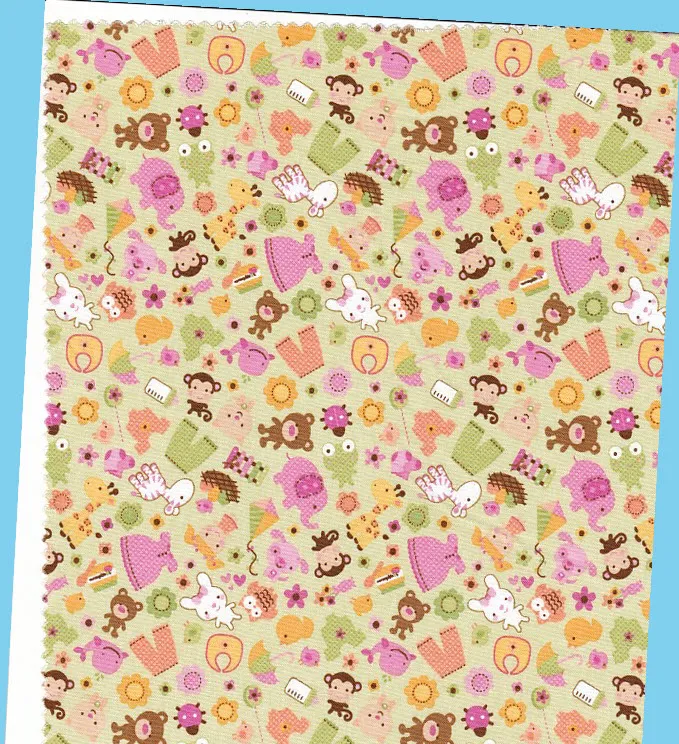
Click Apply Straighten in the palette. The fabric will straighten, either horizontally or vertically, and redraw at actual size.
![]()
Click Fit in Window so that the whole image fits in the screen again.
![]()
EQ8 fills in the background canvas with a color when the fabric straightens. Use the Crop tool to eliminate the background color. You can also check Crop image after rotation in the palette. Be aware that this will crop your image as well as some of the background canvas. If you’re not happy with the straighten, simply repeat the steps.
Change Canvas Background Color
In the palette next to the Background canvas color, click the Change Color button. This will display the Create a Color dialog. Here, you can create any color you’d like to use for the background of your image as you rotate, shear or straighten.
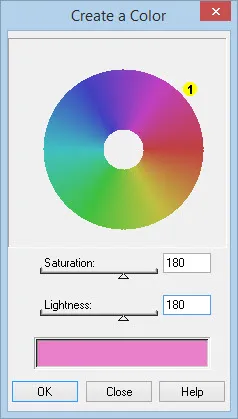
Color wheel
Drag the small yellow dot control to adjust the color. Drag it around the circle to change to the matching color on the wheel. The newly created color will appear along the bottom of the dialog.
Saturation shift
When the slider is at the maximum value, 255, all the colors will be fully saturated with ‘pure’ hues. The colors will be very intense. When the slider is at the minimum value, 0, the colors are desaturated so no hue is dominant. The colors will look grayscale.
Lightness shift
Dragging the slider to the right increases the lightness. The maximum value creates totally white colors. Dragging the slider to the left decreases the lightness making the colors darker and darker. The minimum value creates totally black colors. Values range from 0 to 255.
Crop
Once you’ve imported a photo or fabric scan, click the Crop tool in the palette to display the tools for cropping.

EQ8 will automatically resize your image to fit this screen when you import it. Look at the Current Zoom Percentage to know if your image has be resized to fit your screen. Whenever you’re on the Crop tool, the zoom tools in the palette and the scrollbars on the worktable will be disabled. This allows you to see the entire image while cropping.
Use the mouse to drag the nodes surrounding the image to create the crop window. The cursor will change to indicate the cropping position. Place the mouse in the center of the crop window to move it.
The entries in the palette will adjust as you move the mouse. You can also use the entries in the palette to create the size and position of the crop window.
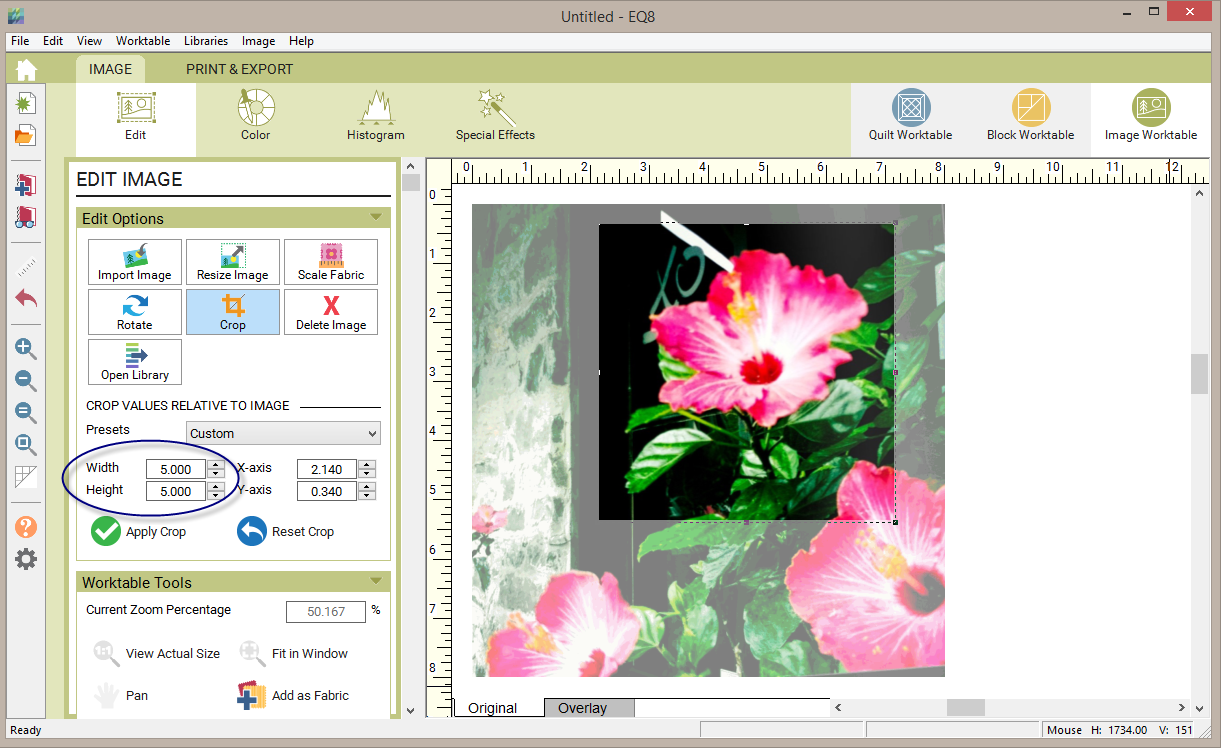
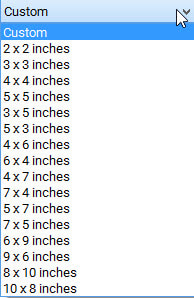
The Presets drop-down may be helpful in selecting the size of the crop.
To complete the crop, click the Apply Crop button.
![]()
To start over and reset the crop window to the whole image, click the Reset Crop button.
![]()
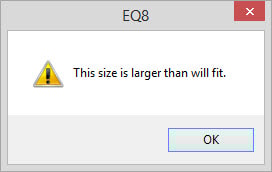
Note
You can only select a preset option with dimensions that fit inside your image’s actual size. For example, if your image is 9″ x 6″ in size, then you can only crop to a size smaller than 9″ x 6″. If you choose a size larger than your image’s size, you will see this prompt. Click OK, and change your Crop Preset to a different size.
Delete Image
Click the Delete Image tool in the palette to delete the image on the worktable.
Open Library
Click the Open Library tool in the palette to open the Photo Library.


