
Since images can be imported to all worktables (Quilt, Block, or Image Worktables), the Image Options dialog can be found in the QUILT, BLOCK and IMAGE menus.
Import to Image Workable
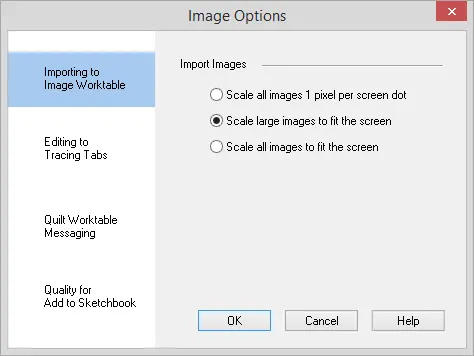
The way the images display is set in the Image Options dialog.
Option 1: Images can always display 1 to 1. This means they may or may not fit the screen. The zoom factor will always be 100%.
Option 2: Images that will be larger than the screen can be reduced down to fit the screen. This is the default setting. The zoom factor will be 100% or some number less than that.
Option 3: All images can be reduced or enlarged to fit the screen. This means you’ll need to look at the zoom factor to determine if the image has been reduced or increased to fit the screen.
Editing to Tracing Tabs
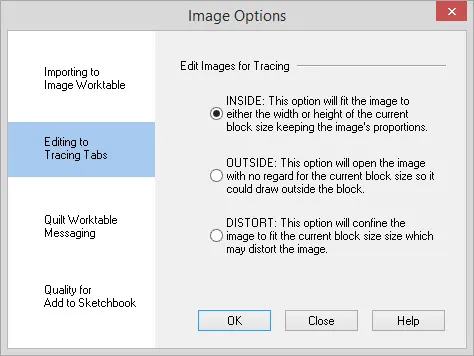
When you edit an image to the the tracing tab of the Block Worktable, it will display in one of the following settings:
Auto-size to fit “inside” the block’s width or height. The image’s largest dimension will be scaled to fit either the design’s width or height so that the whole image fits inside the current size.
Auto-size to fit “outside” the block’s width or height. The image’s smaller dimension will be scaled to fit either the design’s width or height and the other dimension will spill outside the current size.
Auto-size to “distort” to the current block size. This will force the image to fill the current design’s width and height.
Quilt Worktable Messaging
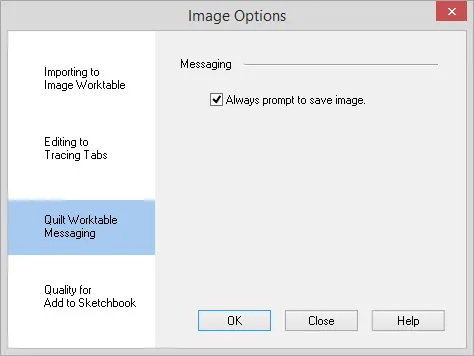
Keep this option checked if you want to be prompted to save your image before importing a new image or before closing EQ8. When this option is unchecked, you will not be prompted to save.
Quality
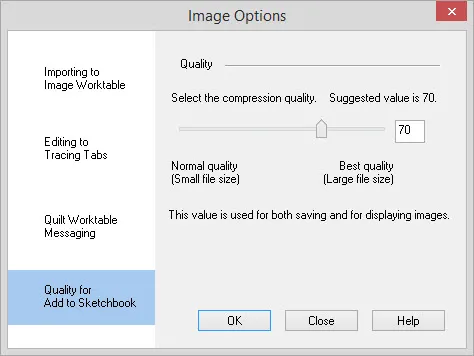
Once an image is imported into EQ, it gets added to the Sketchbook based on the Quality setting found in Image Options. This value is also used to display images. It is recommended that you set this value according to your preference and then leave it.
EQ uses a JPEG compression scheme to add images to the Sketchbook. This means that the image is allowed to change (degrade) in order to achieve smaller file sizes. We found that settings of 70 and higher produce high quality when printing on fabric or displaying on screen. To avoid disappointment we strongly suggest that you make and print samples of the different compression qualities and make the selection that you’re happy with for the type of printing that you’re doing.
This value is used to display images as well as save them. In other words, if you save an image with a low quality setting like 20 and then you change the setting to 90 and edit that photo, it will only have a quality of 20 because that’s how it was saved. Conversely, if you save an image with quality 90, it will always have that quality though you may not be able to see it if you adjusted this value back down to display at 20.
Again, we recommend that you find a number that satisfies you and leave it. Don’t continuously change this setting, or you may get unexpected results.


