
The EQ8 Image Worktable is like a photo-editing program built right into your quilt design software! In this lesson we’ll take a photo from the Photo Library and edit it on the Image Worktable to make it sepia-tone. Then we’ll create a quilt design featuring this photo. We’ll use the Auto Borders tool to quickly create a custom quilt that doesn’t take a lot of time to design.
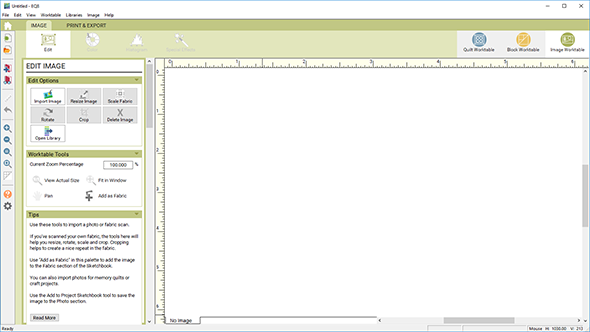
- Open EQ8 and you’ll see the Home Screen. Click the Image Worktable button in the upper-right corner.

- You’ll be switched to the Image Worktable, with the IMAGE tab selected.
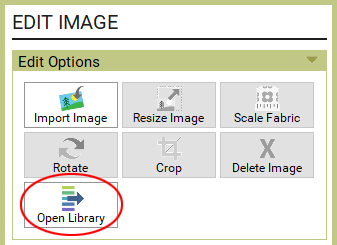
- In the palette, click Open Library.
- In the Photo Library, click 07 Pink on the left.
- Drag the scrollbar below the photos all the way to the right, then click on the birdhouse photo to select it.
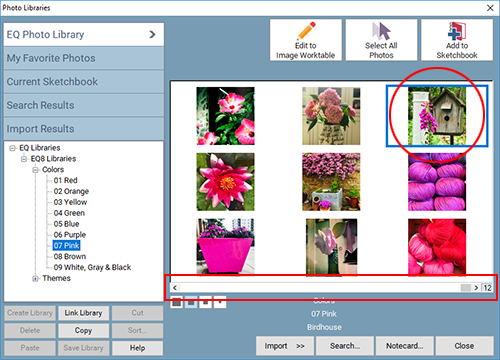
- Click the Add to Sketchbook button in the upper-right corner. The photo will “disappear” to let you know it’s been added to the Sketchbook. This is only temporary; the next time you visit this section of the library, the photo will be back.
- Click the Close button in the lower-right corner to close the library.
- Click the View Project Sketchbook button.

- In the Sketchbook window, click Photos on the left.
- The birdhouse photo will be selected (because it’s the only photo we’ve added to the Sketchbook). Click the Edit button and choose to Image worktable from the menu.

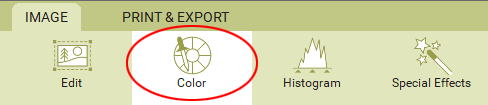
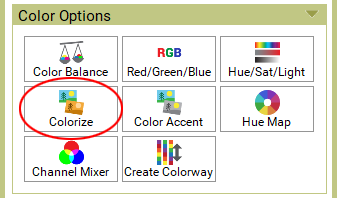
- The photo is now on the Image Worktable. In the ribbon, click Color.
- In the palette, click Colorize.
- In the Colorize window, drag the triangle below the line for Saturation to the left. This will make the After image grayer.
- Drag the triangle below the line for Hue somewhere in the yellow-orange-red range to choose the underlying color for the sepia-tone image.
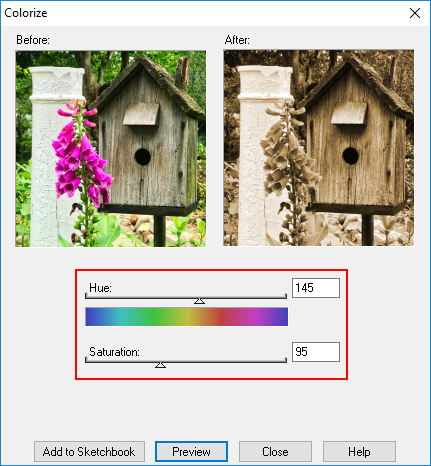
- Click the Preview button to see the effect on the larger image on the worktable.
- If you’d like, make adjustments to the Hue or Saturation, then click Preview again to see your changes.
- When you’re happy with the image, click the Add to Sketchbook button to save the image in your Sketchbook. This will update the image on the worktable, so you are now working with the After image. The Colorize window will remain open in case you want to make other colorized versions of the image.

- Click the Close button to close the Colorize window.
Note
All of the image options have a Help button at the bottom of the window. Click the Help button and you’ll be taken to the Support site section for the feature you’re using. You can then read in-depth instructions on the feature with color examples.
All of the image options have a Help button at the bottom of the window. Click the Help button and you’ll be taken to the Support site section for the feature you’re using. You can then read in-depth instructions on the feature with color examples.
- Click the View Project Sketchbook button.
- The Photos section should still be selected. Notice that the new sepia-tone image is now saved in the Sketchbook after the original image.
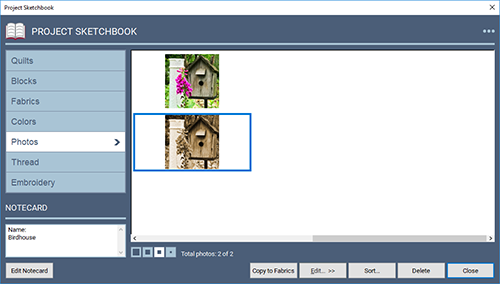
- Click Close to close the Sketchbook.
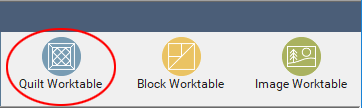
- In the upper-right corner, click the Quilt Worktable button.
- You’ll be switched to the Quilt Worktable, with the NEW QUILT tab selected. The Horizontal layout will be selected in the ribbon.
- Click the LAYOUT tab.

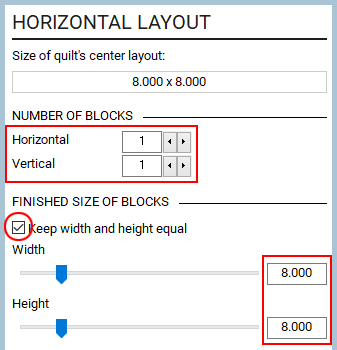
- In the palette, set the Number of Blocks for both Horizontal and Vertical to 1.
- Under Finished Size of Blocks, put a check next to Keep width and height equal. Then use one of the slider bars to change one of the dimensions to 8.000.
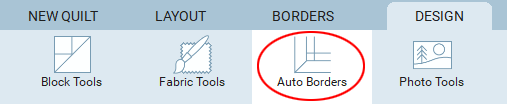
- Click the BORDERS tab.
- Choose Blocks in the ribbon.

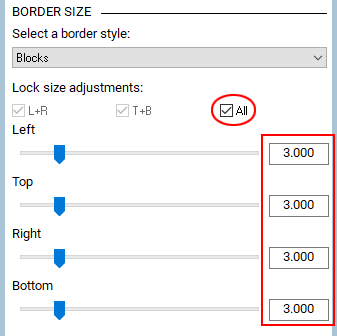
- In the palette, under Lock size adjustments, put a check next to All (if it’s not already checked). Then use one of the slider bars to change the size to 3.000.
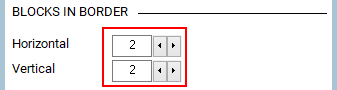
- Under Blocks in Border, change both Horizontal and Vertical to 2. If you don’t see this option, use the vertical scrollbar beside the palette to see more options.
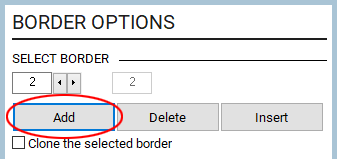
- In the palette, click the Add button to add an additional border to the quilt.
- In the ribbon, choose Blocks as the style for this second border.
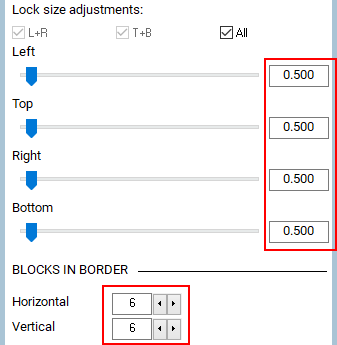
- In the palette, use one of the slider bars to change the size to 0.500 (All should still be checked under Lock size adjustments). Change Blocks in Border to 6 for both Horizontal and Vertical.
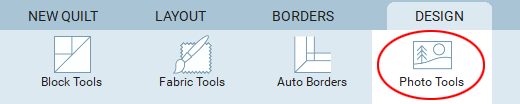
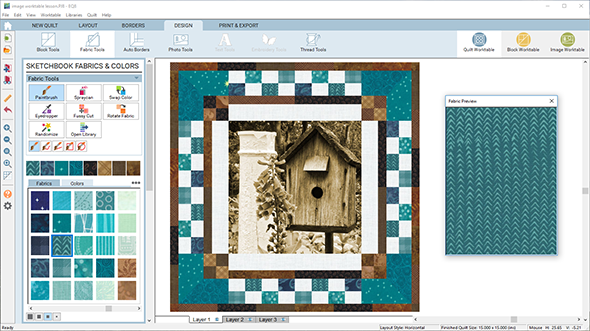
- Click the DESIGN tab at the top of the screen, then choose Photo Tools in the ribbon.
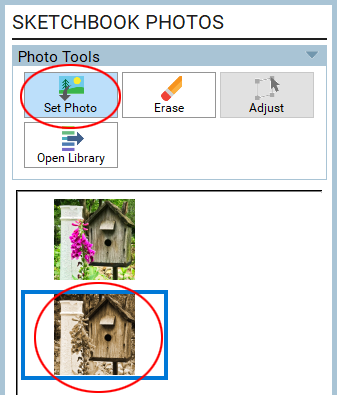
- The Set Photo tool will be selected in the toolbox. Click on the sepia-tone image in the palette to select it.
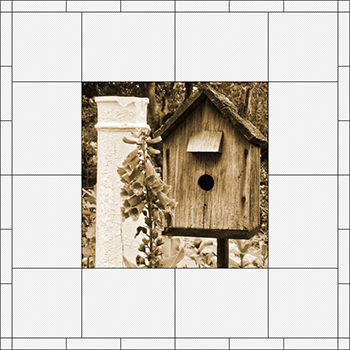
- Click on the center block space on the quilt to set the sepia-tone image in the space.
- Click Auto Borders in the ribbon.
- In the palette, the Checked style will be selected. Click on the eighth border in this category to select it.
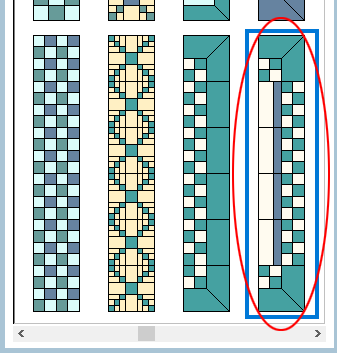
- Click on the first border on the quilt to set this auto border.
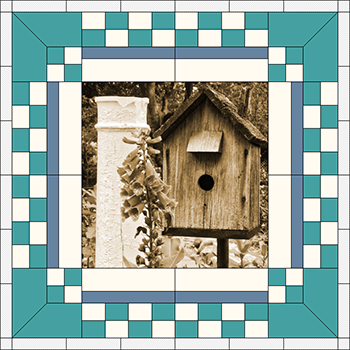
- Click Fabric Tools in the ribbon and use the tools to color the quilt however you’d like.
- Click the Add to Project Sketchbook button to save the quilt design.

- You’ll see a message explaining that you’re adding the quilt to the Sketchbook, but the project file has not been saved yet (that’s why it says Untitled at the top). Click OK. In the Save As box that appears, type Sepia-Tone Lesson. Click the Save button to save the project file to your computer.
- If you’d like to print the patterns for this quilt, click the PRINT & EXPORT tab at the top of the screen.
- If you’re done working in EQ8, you can close the program by clicking the X at the top or clicking File > Exit (PC) or Electric Quilt 8 > Quit Electric Quilt 8 (Mac).


