
Start with an image on the worktable. Click Special Effects in the ribbon, and then click the Effects tool in the palette. The Apply Effects dialog will display. Use the Noise menu at the top of the dialog to choose an affect.
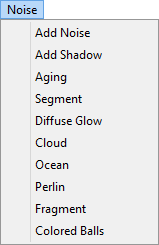
Add Noise
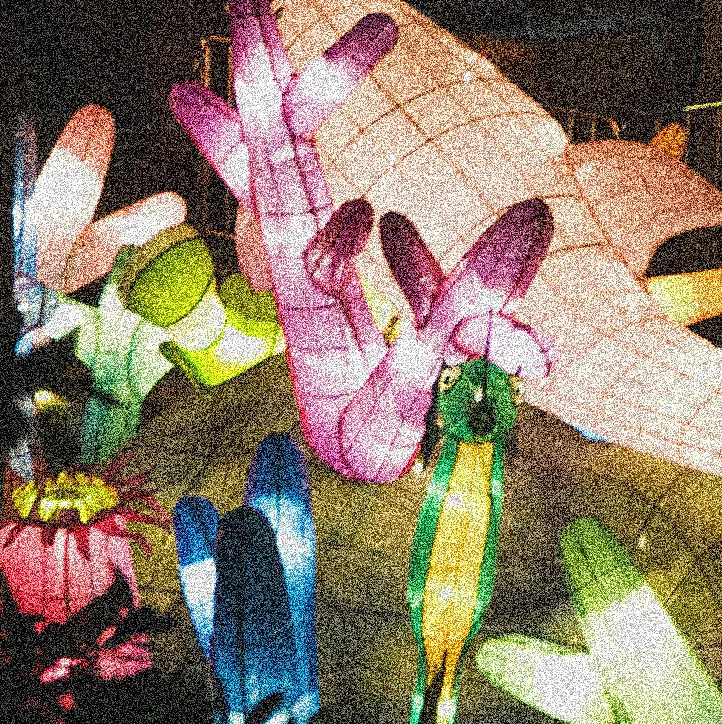
Adds random pixels to the image, letting you specify the percentage of coverage and the color plane to apply.
Add Noise settings:
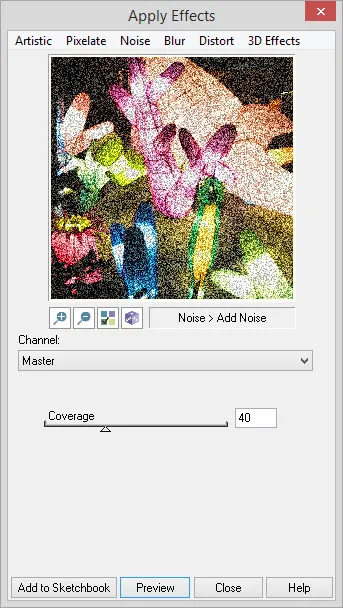
Channel: Red channel, Blue channel, Green channel or Master (All) channel.
Coverage: Percentage of coverage. Range: 10 – 100
Add Shadow
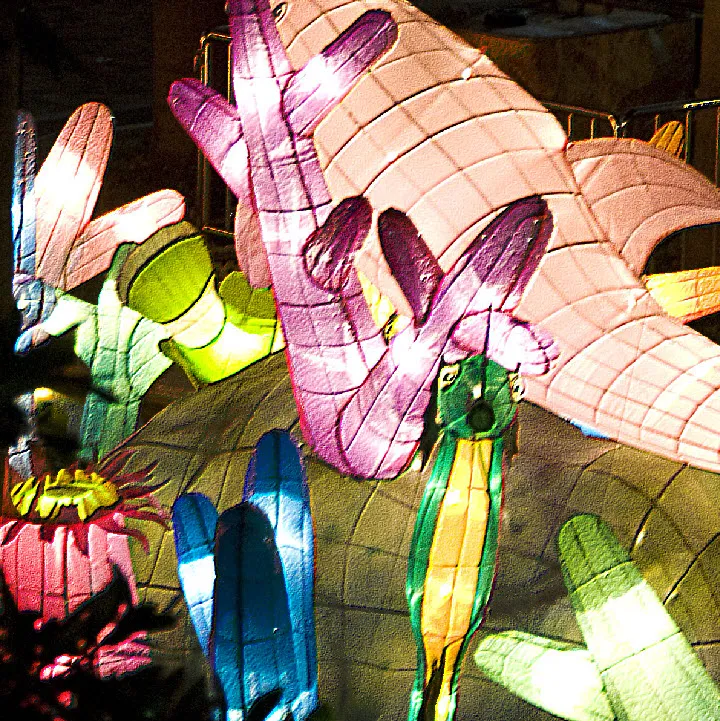
Adds shadows to the image.
Add Shadow settings:
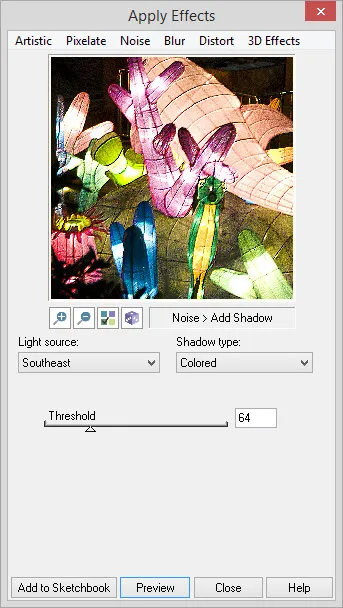
Shadow angle: Direction of the light source that produces the shadow. Range: 8 possible directions.
Shadow type: Indicates the type of the shadows, either Color or Grayscale.
Threshold: This value determines which pixels are affected by the shadow. Pixel values less than the threshold value will be unaffected. Range: 0 – 255
Aging
Adds the appearance of random dust, scratches and pits along with color changes, to make the image look like it was made from an old film.
Aging settings:

Scratch Horizontal count: Number of horizontal scratch lines. Range: 0 – 100
Scratch Vertical count: Number of vertical scratch lines. Range: 0 – 100
Scratch Max length: Scratch length in pixels. Range: 2 – 20
Scratch color: To specify the color, check the box and use the color indicator to select the color for the scratches.
Pit Density: Value (percentage) of pits as density. 100% equals entire image, in other words number of pits = the entire image. Range: 1– 1000
Pit Max size: Maximum size for a pit in pixels. The size of the pits will be selected at random between 1 and this size. Range: 1 – 30
Pit color: To specify the color, check the box and use the color indicator to select the color for the pits.
Dust density: Value (percentage) of dust points as density. 100% equals entire image, in other words number of dust points = the entire image. Range: 1– 1000
Dust color: To specify the color, check the box and use the color indicator to select the color for the dust.
Segment
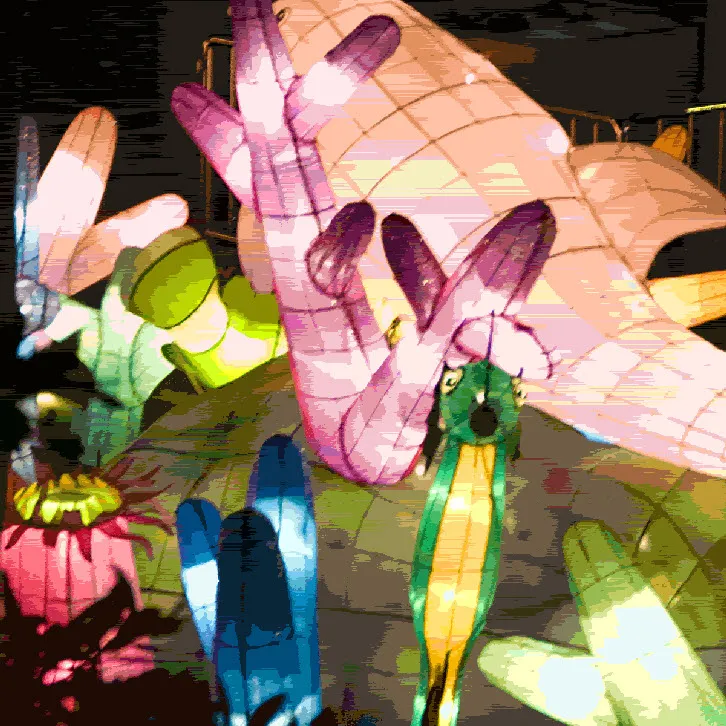
Divides the image into segments according to its pixel values. The segment shapes will be arbitrary. Adjacent pixels with approximately the same values are put together into homogenous segments.
Segment settings:
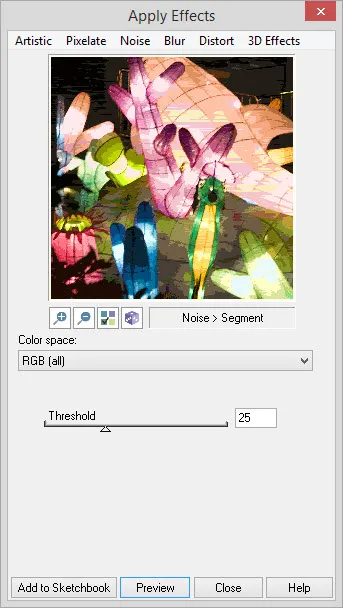
Color space: May be performed on the RGB and YUV color spaces. The YUV color-space model is where Y is a luminance (brightness) value, and the U and V values are chrominance (color or hue) values.
Threshold: The tolerance value of each segment. As this number increases, more pixels get added to segments making them grow is size, reducing the number of overall colors until the image is a solid color. Range: 0 – 75
Diffuse Glow
Adds a colored glow to an images light or dark areas, making these areas shine with a neon glow.
Diffuse Glow settings:
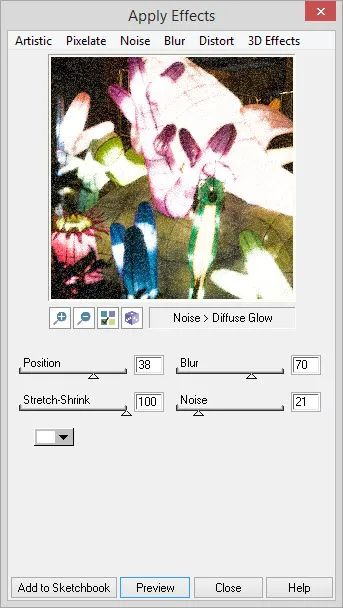
Position: Positive values add a glow to the brighter regions of the image. Negative values add a glow to the darker regions of the image. Range: -100 – 100
Blur: Amount of blur in the glow regions. 100 equals maximum amount of blur in the glow. Range: 0 – 100
Stretch-Shrink: Value represents how much the glow will grow outside the glow area. A value of 100 means the glow does not penetrate into the non-glow areas. Range: 0 – 100
Noise: Percentage of the image to be covered randomly with added pixels. Range: 1 – 100
Color indicator: Color of the glow.
Cloud
Creates different cloud patterns over the image.
Cloud settings:
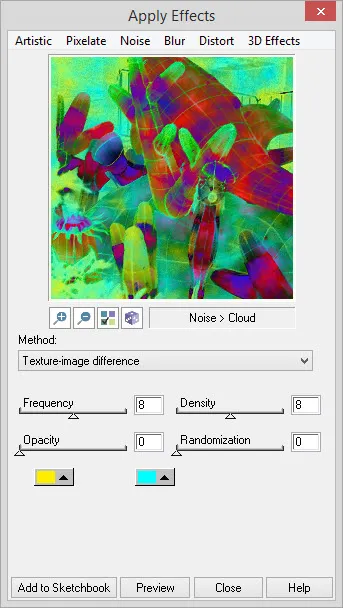
Method: Choose from 3 methods: Pure cloud image does not let any of the original image show. Texture-image difference applies the difference between the created cloud texture and the original image. Texture-image combination uses opacity to combine the image with the cloud texture.
Frequency: Number of clouds inside the image. Range: 0 – 16
Density: Value indicates the detail in the clouds (0 = no texture). Small values give blurring effect. Large values increase the detail in the clouds. Range: 0 – 16
Opacity: Value indicates percentage of opacity to apply if Texture-image difference or Texture-image combination is used for Method. Range: 0 – 100 (0 = transparency and 100 = maximum mix of clouds and image)
Randomization: Determines the cloud creation. Range: 0 – 16
Left color indicator: Color of the background of the clouds.
Middle color indicator: Color of the clouds.
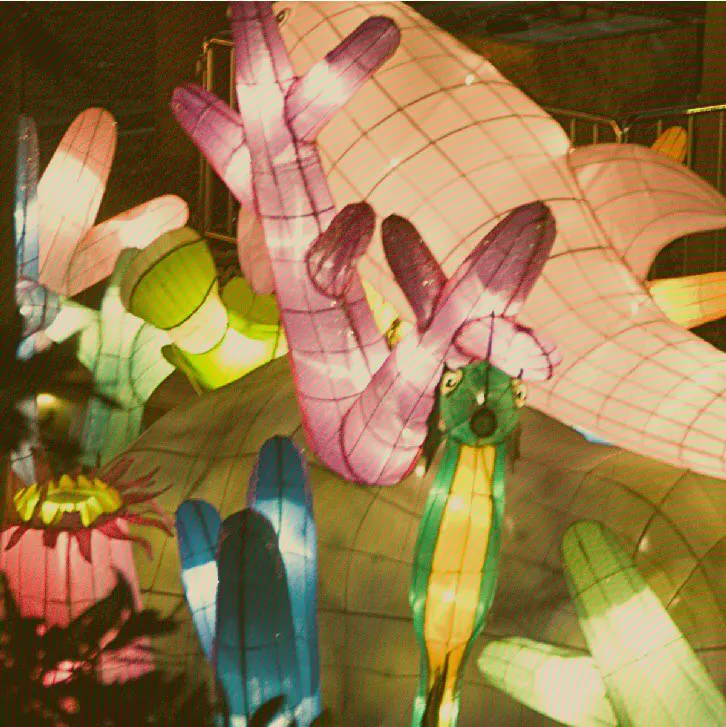
Ocean
Reflects the image on an ocean surface.
Ocean settings:
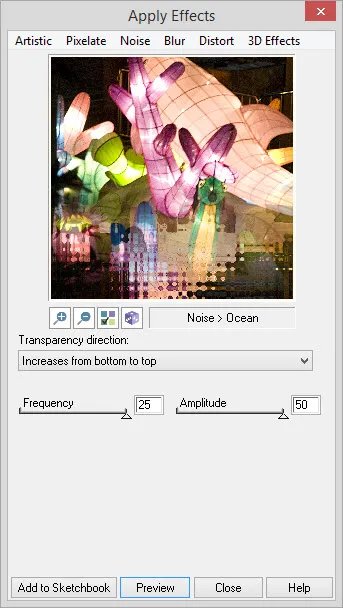
Transparency direction: Transparency will increase line by line by choosing from Increase from top to bottom or Increase from bottom to top.
Frequency: Number of repeated waves. Range: 1 – 25
Amplitude: Largeness of the waves in pixels. Range: 1 – 50
Perlin
Uses a pseudo-random number generator in order to create noise, and then procedurally transforms that noise into a texture. (Named after Ken Perlin, creator of the technique.)
Perlin settings:

Type: Choose Create new to produce noise as a new image. Combine using opacity uses the Opacity value to combine the image and the noise. Apply difference will use the difference between the noise and the image pixels.
Pattern: Choose to layout the noise in Concentric circles, in Lines at 45°, or at Random.
Noise density: Value represents the number of repetitions. Range: 0 – 8 (0=no noise. Increasing will increase the detail to the noise.)
Opacity: Value is a percentage that is used to combine the image with the noise. Range: 0 – 100
Layout frequency: Value that controls the frequency of the circle or lines if Concentric circles or Lines at 45° is selected for Pattern. Range: 0 – 100
Layout density: Value indicates the concentration of the noise. Range: 0 – 100
Center x and Center y: Point that represents the center of revolution when Concentric circles is selected for Pattern. Point can be moved by using the X and Y sliders or by dragging the red dot directly. Range: determined by the image width and height.
Left color indicator: Color of the Perlin noise.
Middle color indicator: Color of the background.
Fragment
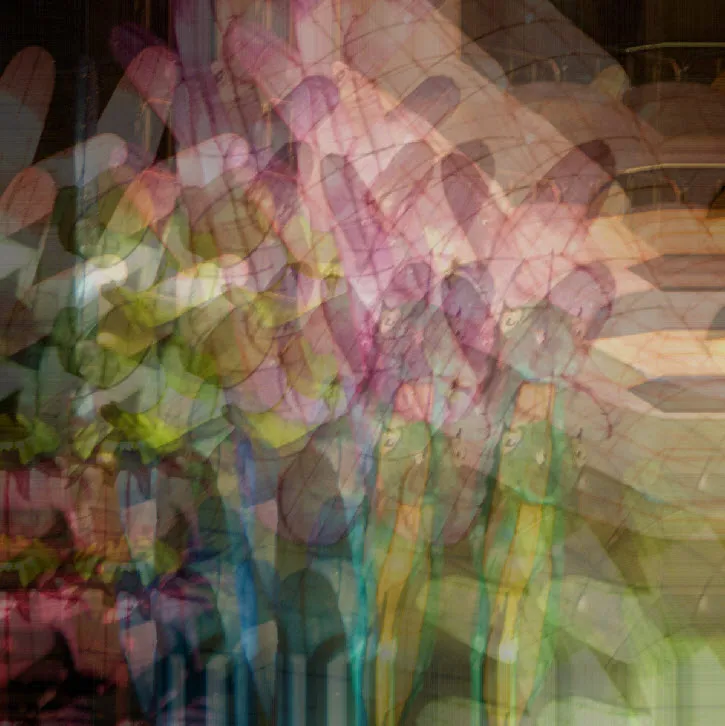
This function creates four copies of the image. Each copy is shifted by the offset amount into one of the four directions: top, left, bottom and right. Then the image is averaged with its shifted copies.
Fragment settings:
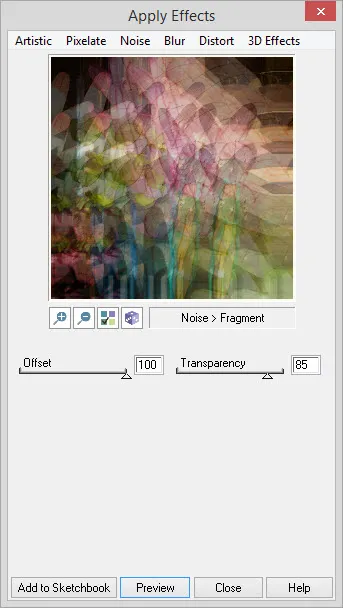
Offset: Value that indicates the number of pixels the copied image is shifted.
Transparency: Value is a percentage that indicates the transparency of the copy in comparison to the original image. A value of 0 means the resulting image will be black. A value of 100 means that each copy’s value will comprise 25% of the result. Range: 0 – 100
Colored Balls

This effect adds colored balls of various color and appearance to the image. The colors used to make the balls come from the current image.
Colored Balls settings:
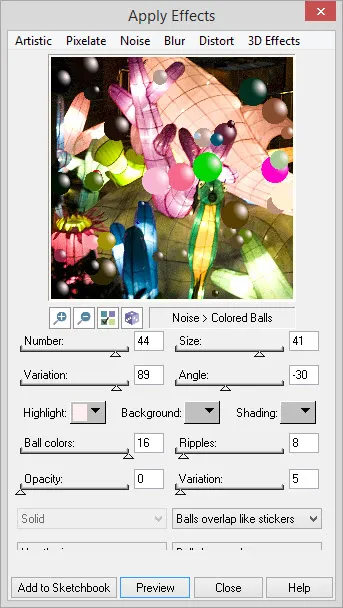
Number: Value represents the number of balls that will be drawn on the image. Range: 1– 50
Size: Value represents the average size in pixels of the balls. Range: 10 – 50
Variation: This value represents the amount of variation in the size of the balls. Zero indicates that all balls will be the same size. 100 indicates that some balls will be twice as big as the average ball size. The average ball size is set by the Size slider. Range: 0 – 100
Angle: This value represents the light source direction of the highlight on the ball. Positive values will rotate the highlight color clockwise. Negative values will rotate the highlight color counter-clockwise. Range: -360– 360
Hightlight color: Color used for highlight color.
Background color: Color used for background color.
Shading color: Color used for shade color.
Ball colors: Value represents the number of colors used to create the balls. Range: 2 – 16
Ripples: The number of ripples used to produce the background. Range: 1 – 100
Opacity: Value represents the average ball color opacity. Range: 0 – 255
Variation: This value represents the amount of variation in the ball color opacity. Zero indicates that all pixels will be assigned the same opacity. 100 indicates that ball color opacity will vary from 0 to twice the value of Opacity. Range: 0 – 100
Drop-list 1 – Shading: Indicates the type of shading for the background when Use a color is selected. Options include: Vertical lines, Horizontal lines, Concentric circles and concentric ellipses. There is no shading if Solid is selected. Colors used are set using the Background color indicator and the Shading color indicator.
Drop-list 2 – Background: Indicates the type of background, either Use image or Use a color. If Use a color is selected, the color is determined by the Background color indicator.
Drop-list 3 – Type: Indicates the type of ball to be drawn, either Balls overlap like stickers or Balls adjust like bubbles.
Drop-list 4 – Coloring: Indicates if the Balls have color so that their color blocks the image, or Balls have opacity and combine with the image color when they draw.


