 Dear Jane Add-on
Follow the instructions below to open the Dear Jane quilt project.
- Open EQ.
- Choose File > Open Project from the menu.
- Scroll down in the list to find and select DJ1_Dear Jane Quilt-MASTER.PJ8.
- Click OK. The Project Sketchbook will open.
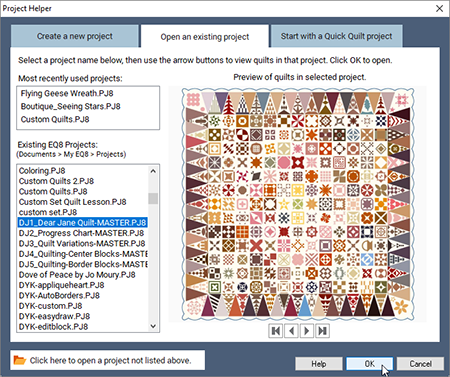
- Click the Quilts section on the left of the Sketchbook window.
- There are 3 quilts in this project. The first quilt is the Classic Dear Jane quilt as Jane Stickle designed it. Click through the other quilts and read the notecard information in the left notecard window.
- Select the Classic Dear Jane Quilt (quilt 1), and choose Edit at the bottom of the Sketchbook window. The quilt is now open on the Quilt Worktable.
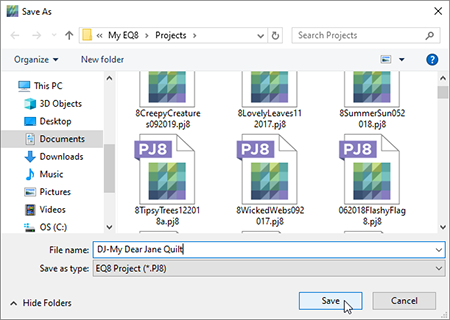
IMPORTANT STEPS!! You must save a copy of this project with a new name to avoid making changes to this “original” or “master” project file.
- Click File > Save As.
- The default location for saving projects is My EQ > Projects directory. If you are not in that location, please navigate there. For the File name, type DJ-My Dear Jane Quilt, then click Save.
There are 4 other projects included in the Dear Jane add-on that can be opened using the same steps as listed above. Remember, for each project you need to rename them so you do not change the master.
Here are the other 4 projects:
- DJ2_Progress Chart-MASTER.PJ8 – project file for keeping track of your sewn blocks
- DJ3_Quilt Variations-MASTER.PJ8 – project file that includes some fun variations of the classic quilt
- DJ4_Quilting-Center Blocks-MASTER.PJ8 – project file for viewing and printing the quilting designs
- DJ5_Quilting-Border Blocks-MASTER.PJ8 – project file for viewing and printing the quilting designs
Once the Classic Dear Jane quilt is opened, read further to learn how to use it.
Analyzing the Layout and Borders
Now that the quilt is on the Quilt Worktable, let’s take a look at how this is set up.
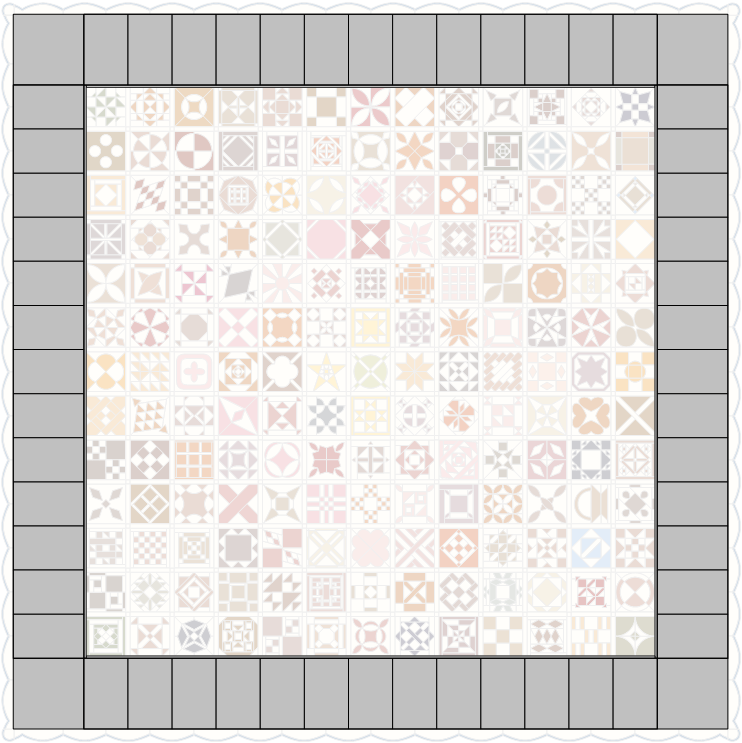
- Click the LAYOUT tab. Notice the quilt is 13 blocks wide by 13 blocks high. Each block is 4½” square and there is ½” sashing between the blocks. The quilt center is 64½” x 64½”. This is how Jane’s quilt was set up too!
- Click the BORDERS tab. Notice there are only 2 borders shown at the top of the Borders panel.
- Click the left arrow under SELECT BORDER to select border 1. The ¼” Long Vertical border is now selected. You can see its attributes in the panel.
- Click the right arrow under SELECT BORDER to select border 2. The 8″ Blocks border is now selected. This is where the triangles and kites are set. You can see this border’s attributes in the panel. The size of the quilt including the 2 borders is 81″ x 81″.
Where is the scallop border? Because of how this quilt was set up, the scallop border is not “technically” a border in EQ terms. The scallop border pieces are set on Layer 2 of the quilt and act more like a virtual border. This border was set up this way so you could get the nice, curved look of the scallops. So while it can be seen on the BORDERS tab preview (as shown below), it cannot be selected or edited here.
Understanding the Quilt Layers
- Click the DESIGN tab. Let’s take a look at the layers of the quilt.
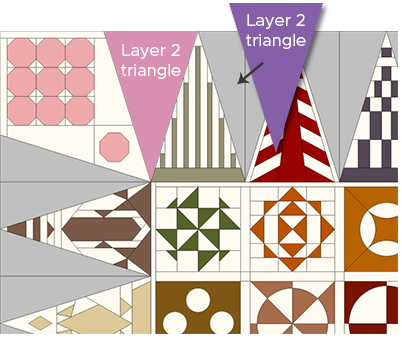
- Click the Eye icon next to Layer 1 to turn Layer 1 OFF. This reduces the view of the contents on Layer 1 and displays what’s on Layer 2. For this quilt, all the plain triangles and the scallop border pieces are on Layer 2, as you can see here.

- Click the Eye icon next to Layer 1 again to turn it back ON.
- Click the Eye icon next to Layer 2 to turn Layer 2 OFF. This hides all the triangles and scallop border (all contents of Layer 2) and now you can only see what’s on Layer 1.
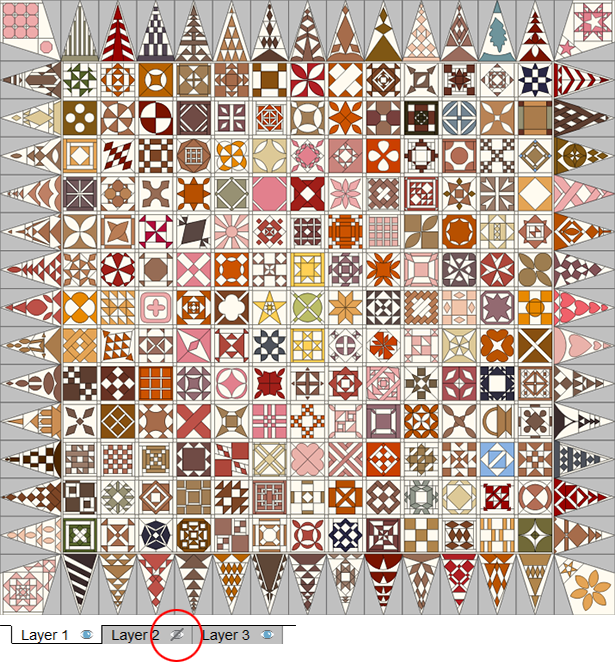
- Notice the gray triangles surrounding the pieced triangles and kites in the border. Because each of these triangles and kites were set into spaces in the “Blocks” border, a seam is created between each of them. The plain blocks are set on Layer 2 to cover up these seam lines to better represent Jane’s quilt.