
 EQ Mini
How do I save a pattern preview?
To save the pattern preview as a file, you must save it as a PDF file. For this you will need a PDF program on your computer.
PDFs from EQ for Windows
Windows computers have PDF writers installed on them such as “Microsoft Print to PDF”. You can check for this in EQ by going to FILE > Print Setup and in the Print Setup dialog box, click the drop-down menu for the Printer Name. If you do not have a PDF writer listed, you can download one for free from the internet (for example, CutePDF ).
- In EQ, choose the PDF printer as your printer by going to FILE > Page Setup > Printer. (The PDF program will show up in your printer list).
- Get your pattern all ready to print on the print preview, exactly as you would like it.
- Click Print
- Make sure that any box that says “Fit to Page,” “Shrink oversize pages to fit,” or “Expand small pages to paper size” is NOT checked. You do not want the size to be changed to fit the paper size. You will be offered a chance to save.
PDFs from EQ for Mac
EQ has some pretty advanced printing features that prevented us from implementing the built in “Print as PDF” feature. We did ensure that RWTS PDFwriter worked during our beta tests. The RWTS PDFwriter driver exactly uses the PDF library built into OSX to create PDFs.
Note: If you are running macOS 10.15 (Catalina) or older, you’ll need to download a previous version of RWTS PDFwriter available here: https://github.com/rodyager/RWTS-PDFwriter/releases/tag/v1.0.1
To install RWTS PDFwriter
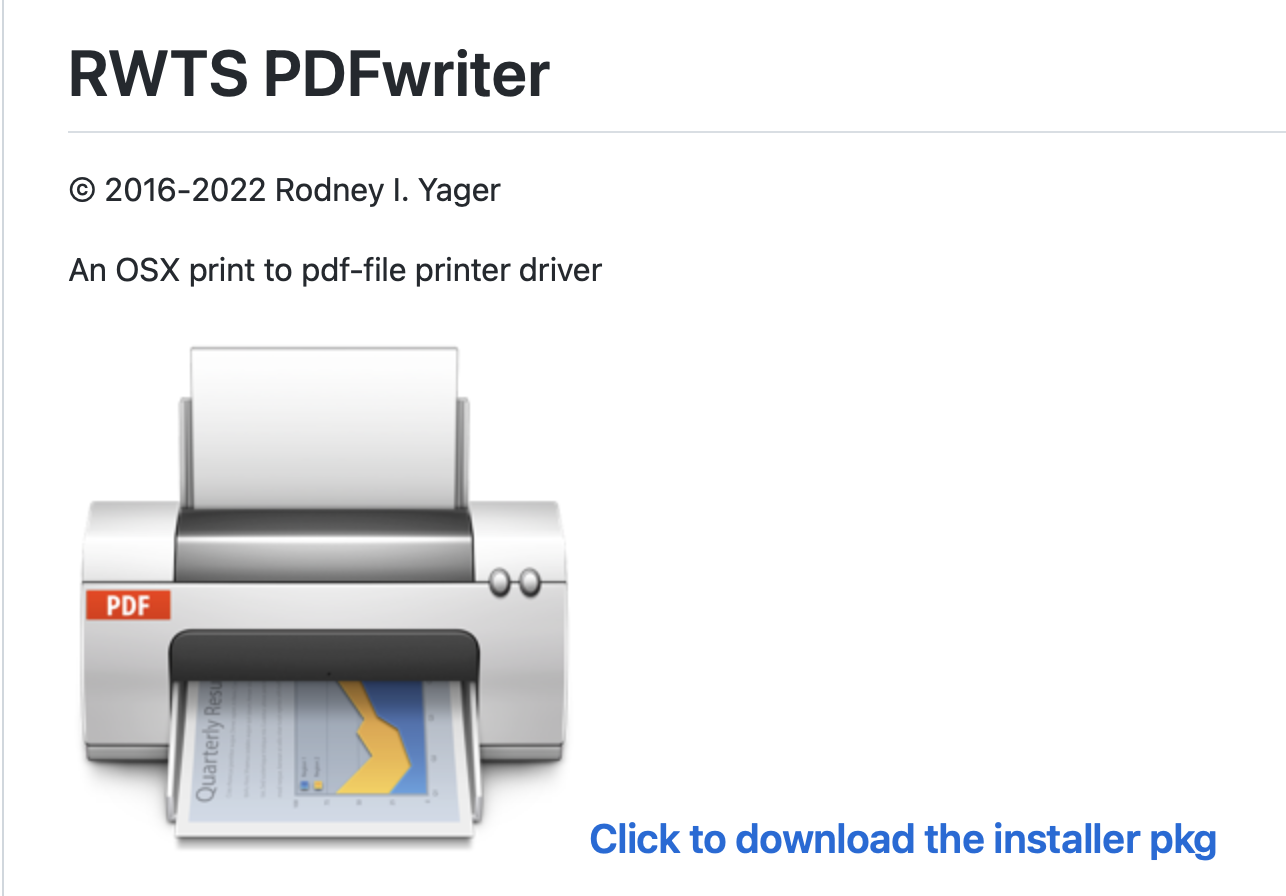
- Download RWTS PDFwriter for Mac from this link. Click on the blue link that says “Click to download the installer pkg”:
https://github.com/rodyager/RWTS-PDFwriter
- Open the “RWTS-PDFwriter.pkg” file. It should be in your downloads directory.
- In the “Install RWTS PDFwriter” window that appears, follow the directions on screen to install.
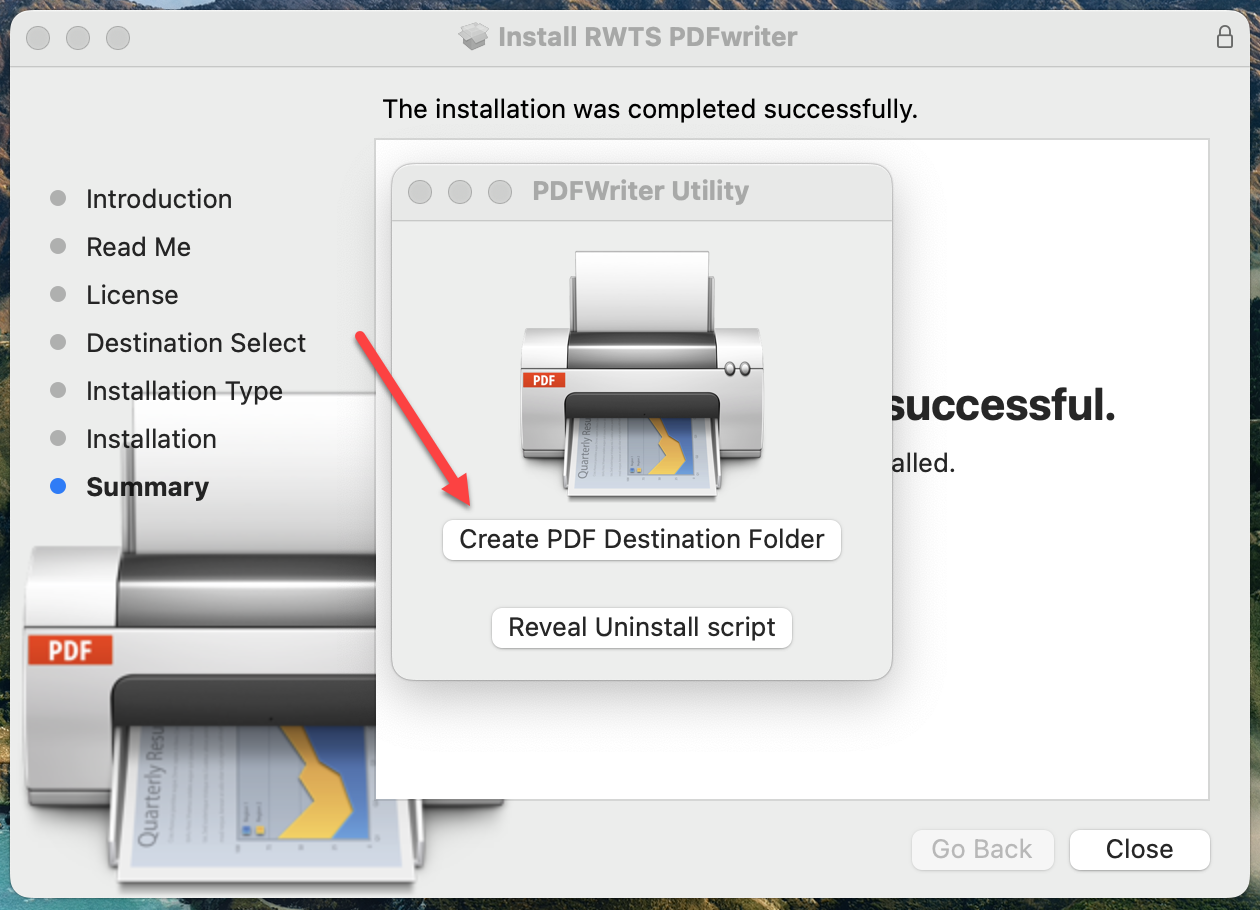
- After install is complete, the PDFWriter Utility will appear. Click the “Create PDF Destination Folder” button in this utility.

- In the window that appears, select where you want the PDFWriter folder to be created. This is where you will find all of the PDFs that you create using this program. We suggest that you select Documents from the dropdown list in the “Where” field, if it is not already selected by default:
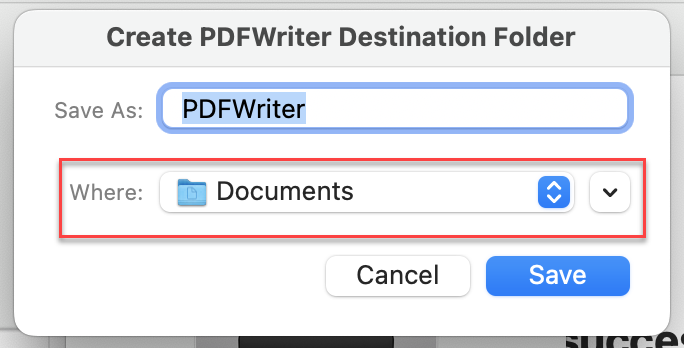
- Click the Save button to save your selections and close this Destination Folder dialog.
- Click the red circle button in the upper left to close the PDFWriter Utility.
- Click Close on the Install RWTS PDFwriter dialog box.


If you get the following error while installing RTWS PDFwriter
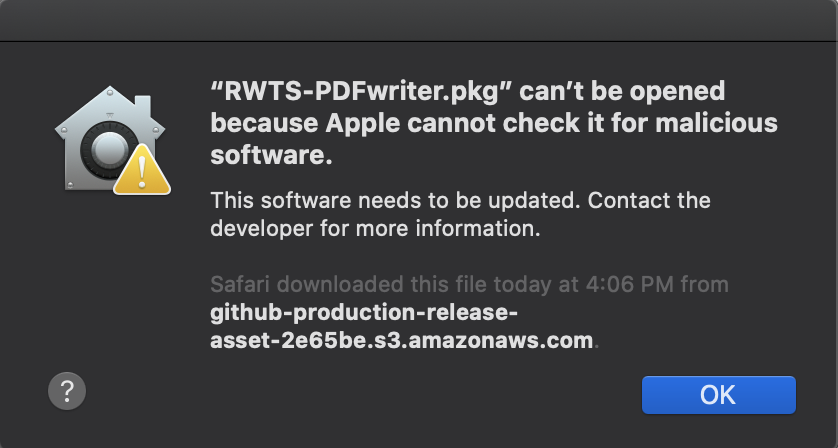
- Navigate to your Downloads folder in Finder
- Locate RWTS-PDFwriter.pkg
- Right click on the file, then select open.
- The window that appears will look similar to the original error but with an ‘Open’ button. Click the ‘Open’ button.
- In the “Install RWTS PDFwriter” window that appears, follow the directions on screen to install.
Set EQ to print to the PDFwriter virtual printer
- Open EQ.
- In the menu at the top of the screen, go to File > Print Setup.
- In the window that appears, change the “Format For” option to “PDFwriter”.
- Make sure that Scale is set to 100% and any box that says “Fit to Page,” “Shrink oversize pages to fit,” or “Expand small pages to paper size” is NOT checked. You do not want the size to be changed to fit the paper size.
- Click OK.
- EQ will now us the PDF writer instead of your physical printer when you click the Print button in any print dialog box.
Print to the PDFwriter virtual printer
- Make sure you have Set EQ to print to the PDFwriter virtual printer following the steps above.
- Navigate to the Print and Export tab and select the printing option from EQ8 that you want to use: Block, Quilt, Templates, Foundation Pattern, Rotary Cutting Chart, etc.
- If you would like, use the Preview feature to get your pattern ready to print exactly as you would like it.
- Click Print
- The PDFs will automatically save to the location you selected when you clicked the “Create PDF Destination Folder” from the the PDFwriter Utility. The file will be named with the name of your EQ8 project file. If you print multiple items a number will be added to the end of the name of the file.
- Use Finder to navigate to where you saved the PDFWriter folder (we recommended in Documents) to find these files.
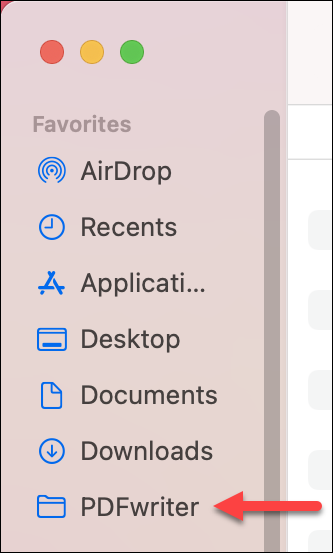
- We recommend adding this folder to your Favorites list in Finder so that you can get to it with one click in the future. Drag the PDFWriter folder over to the Favorites list at the left hand side of the Finder Window to save it there.

If you do not remember where the PDFwriter folder is saved
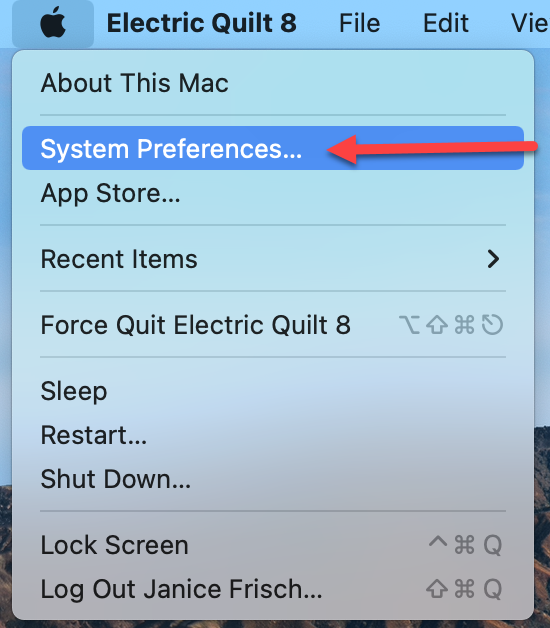
- Click on the Apple icon in the upper left corner of your computer to open the Apple menu.
- Select System Preferences… from the dropdown menu that appears.
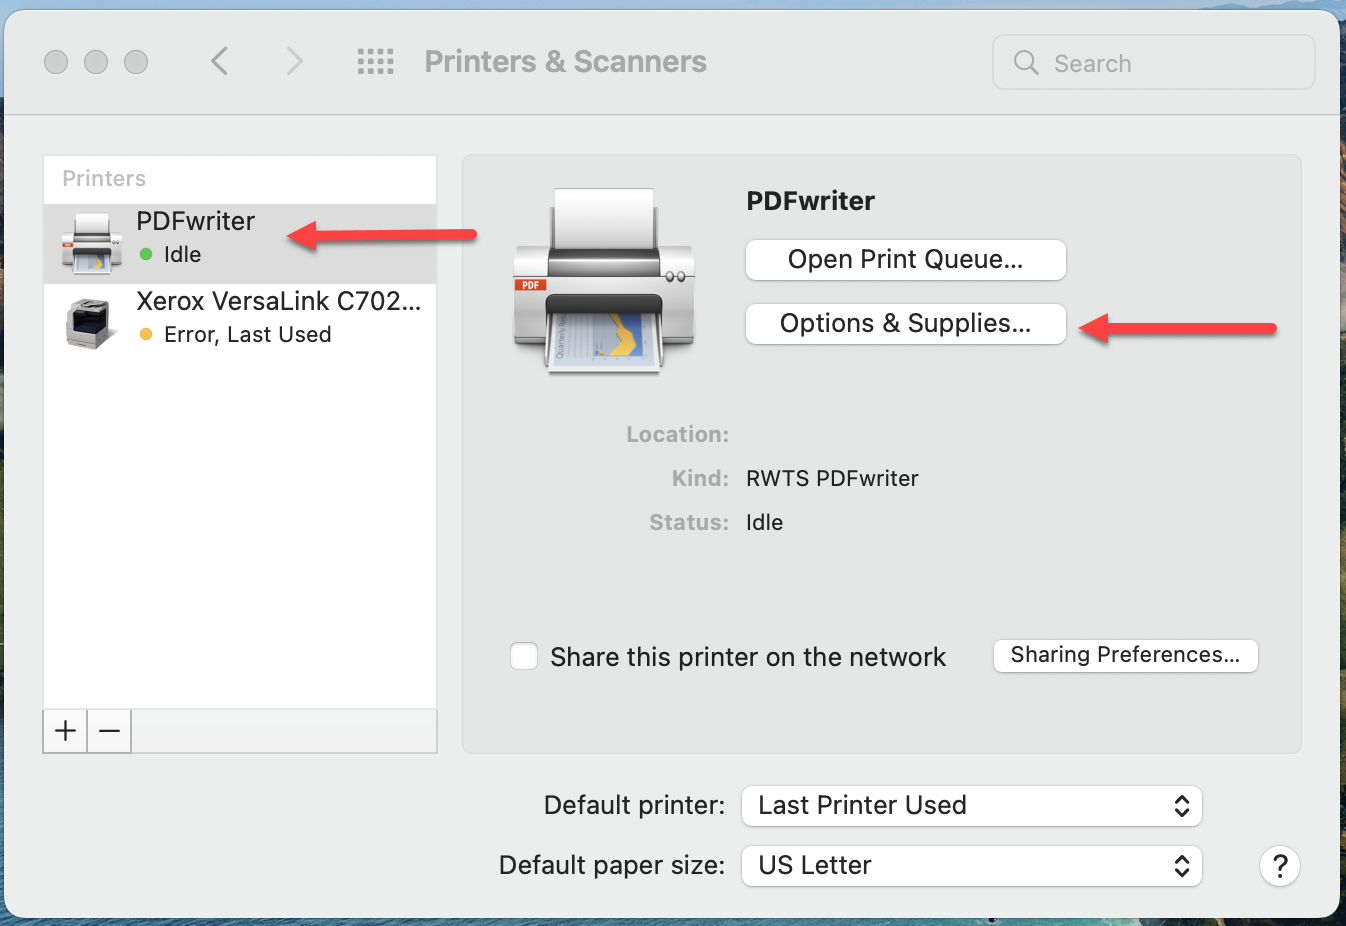
- Select Printers & Scanners in the list of icons that appears.
- Select the PDFwriter in the list of printers on the left.
- Click the Options & Supplies button on the right.
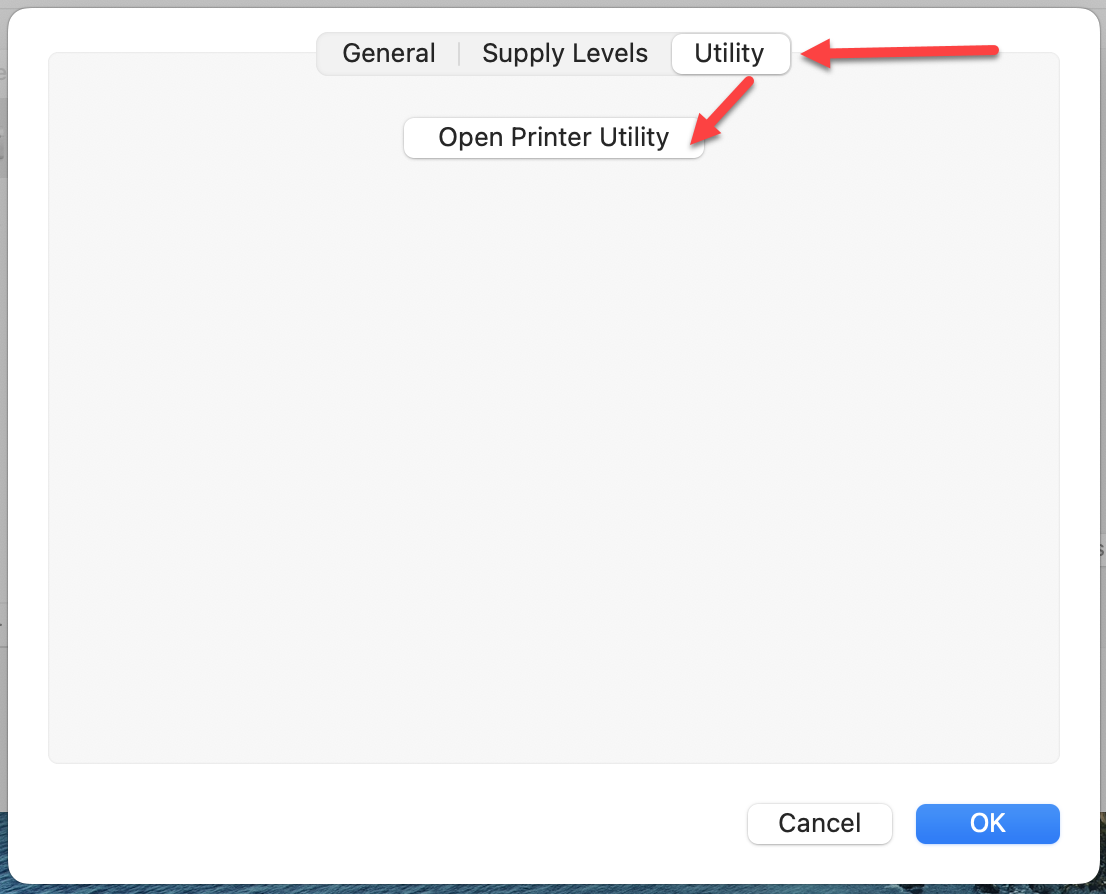
- Click the Utility tab at the top of the dialog box that opens.
- Click the Open Printer Utility button.
- This will open the PDFWriter Utility. Click the Create PDF Destination Folder button.
- Check to see what location is listed in the Where field and the name of the folder in the Save As field. This is where you will find your files. You can also change the location of the folder in the Where field, then click Save. Click Cancel to close without making any changes.


What if my PDF does not show seam allowance?
If you find your PDF file pattern is missing seam allowance, then print again after doing this first in EQ: Click FILE > Preferences > General > under Printing Options change the minimum line size in Pixels to 4. Click OK.


