
 Dear Jane Add-on
Follow the instructions below to use the Progress Chart project.
- Open EQ.
- Choose File > Open Project from the menu.
- Find and select DJ2_Progress Chart-MASTER.PJ8.
- Click OK. The Project Sketchbook will open.
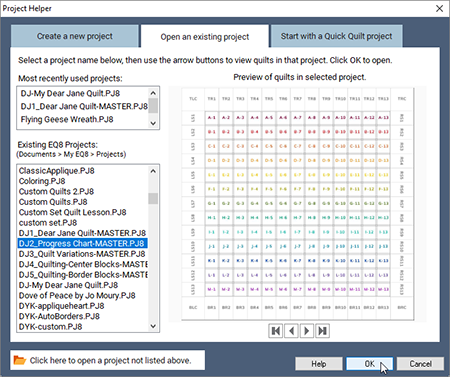
- Click the Quilts section on the left of the Sketchbook window.
- There is only 1 quilt in this project. Click Edit at the bottom of the Sketchbook window. The layout is now open on the Quilt Worktable.
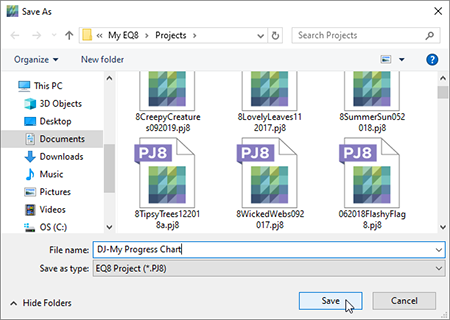
IMPORTANT STEPS!! You must save a copy of this project with a new name to avoid making changes to this “original” or “master” project file.
- Click File > Save As.
- The default location for saving projects is My EQ > Projects directory. If you are not in that location, please navigate there. For the File name, type DJ-My Progress Chart, then click Save.
Now that you have this project saved, you will need to open THIS project when you want to add more blocks to the layout. If you open the “MASTER” project, you will never find your in-progress layout.
Importing and Editing Photos of Sewn Blocks
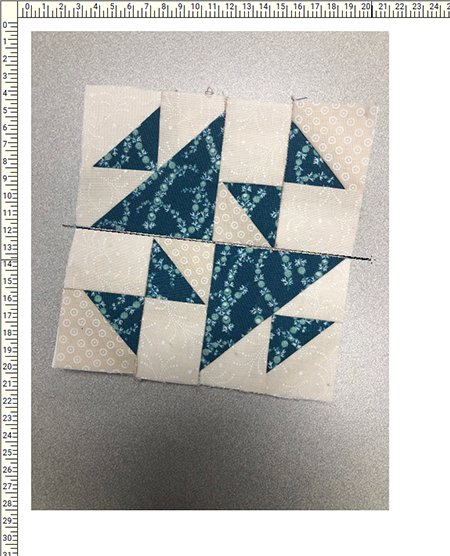
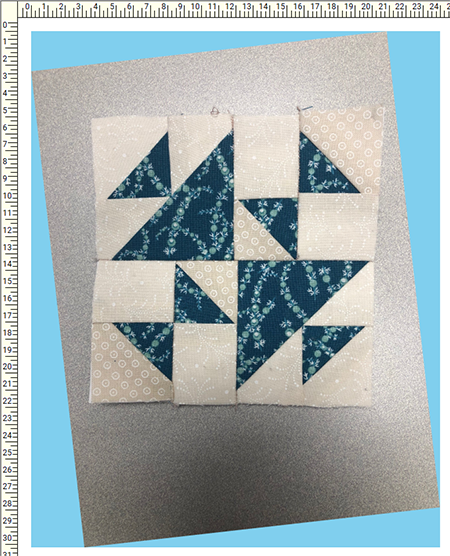
Before you can import photos of your sewn blocks, you should have already taken the pictures with a camera and transferred the images to your computer. (Tip: When taking photos, be sure your camera is as straight as possible to the block. Angled photos will not turn out as nice.)
- Click the Image Worktable button in the upper-right of the screen.
- On the Image tab and under Edit on the ribbon, choose Import Image.
- Navigate to the location where your photo is saved on your computer. Select it and click Open.
- If your block looks crooked, click the Rotate button in the left panel.
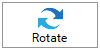
- Use the Rotate 90 or Rotate -90 buttons, if necessary.
- Click the Straighten button on the left. Your cursor will change to a crosshair.

- On your image, locate a seam line or edge of the block that you know should be perfectly horizontal or vertical.
- Position your cursor at one side of that line, then click, hold, and drag your mouse following the line of the block, then release. You are drawing a virtual line on top of a seam line or edge line. The virtual line will remain on your block.
- Click Apply Straighten in the panel on the left. The block will rotate the degree necessary to make your virtual line horizontal or vertical.

- Click the Fit in Window button to view the entire image on the screen.

- Click the Crop tool in the left panel.
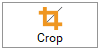
- Hover your mouse cursor over one of the black squares that surround your block. When the cursor changes to a Crop+Arrow, click, hold, and drag the black square inward to crop out any unwanted background of your photo, cropping out your seam allowance if possible.
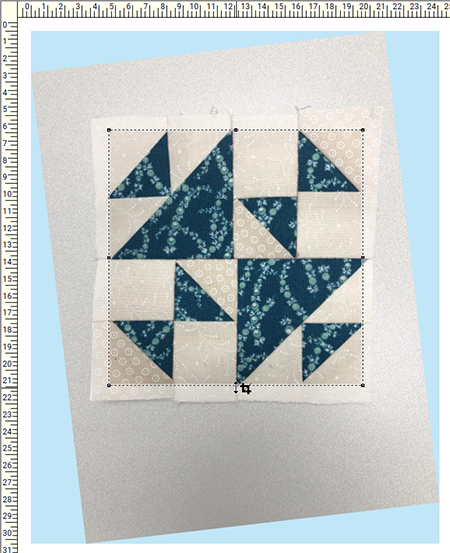
- When your crop box looks good, click Apply Crop in the left panel.

Note: When cropping a border triangle or kite, you will have unwanted parts of the photo in the background. That’s okay. If you wanted to make your photos look nicer, always take the photo with a white/solid background behind the block. Be sure to rotate your photo according to the setting in the quilt.

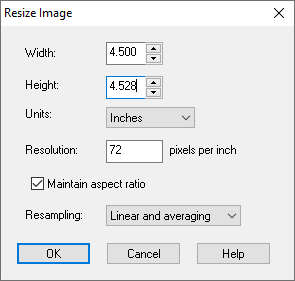
- Click the Resize Image tool in the left panel.
- In the box that appears, make sure it’s showing Inches.
- Depending on how you cropped, your block might not be perfectly square. That’s okay. With Maintain aspect ratio checked, change one of the dimensions (Width or Height) to 4.5.
- For triangles, make the smaller dimension 5. For kites, make one dimension 8.
- Make sure the resolution is 72 pixels per inch. (Since there are 225 blocks in this quilt, it’s very important that these image files are as small as possible, otherwise it will slow down your program. Do not use a resolution larger than 72.)
- Click OK.
- Click the Add to Project Sketchbook button.
- Repeat the previous steps for any other photos you might have.
Setting Photos into the Layout
- Click the Quilt Worktable button in the upper-right of the screen.
The progress chart layout should still be on the worktable, but if it is not, click the View Project Sketchbook button on the left toolbar, click the Quilts section, select the layout, then click Edit. - On the top ribbon, choose Photo Tools. You will see a photo viewer with all the place holder images.
- At the bottom of the photo viewer, scroll all the way to the right to find your block photo(s).
- Select your block photo and click on the appropriate space in the layout. This will replace the place holder image with your block image.
- Add as many block photos to the layout as you have available.
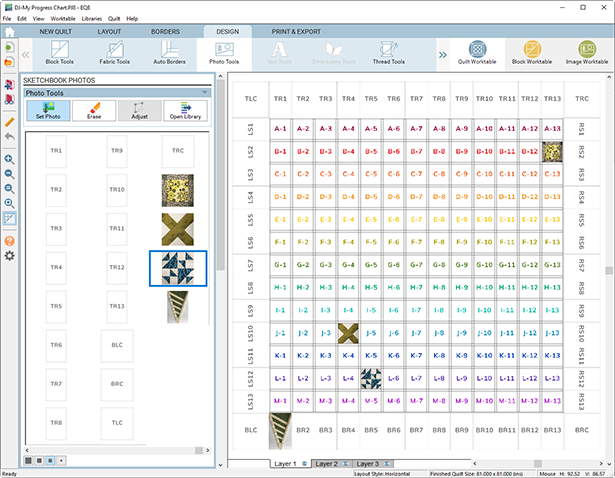
- Click the Add to Project Sketchbook button to save this version of your progress chart!
- Close EQ.
Updating your Progress
Once you’ve saved your progress chart and have started adding blocks to it, it’s very important that you continue to open the same file the next time you want to add more sewn blocks. You should NOT open the MASTER project file. You must open the project that you saved with a new name.
- Open EQ.
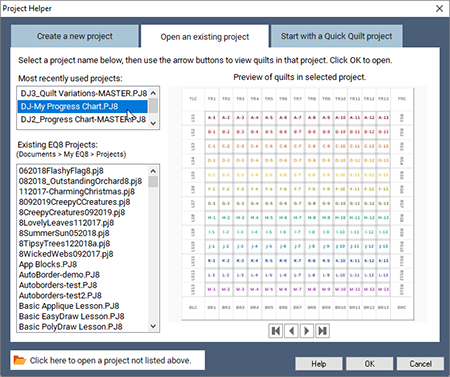
- Click File > Open Project, or on the Home screen, click Open an existing project.
You might find your “DJ-My Progress Chart.PJ8” file in the Most recently used projects list. But if you haven’t opened it in a while, you will want to look in the Existing EQ projects list. - Select it and click OK. The Project Sketchbook will appear.
- Click the Quilts section, then scroll to the right under the quilts to view the most current version of your layout.
- Click Edit to put this layout on the worktable.
- Repeat the previous steps to add more blocks to your layout.
As you add more sewn block photos to your project, you might consider cleaning out your Project Sketchbook to remove some of the earlier layouts. Once you have the earlier layouts removed, you can delete any photos in the Photos section that are no longer being used as well. Cleaning out the Sketchbook will keep your program running faster.


