
A custom set quilt layout gives you a “blank canvas” on which to set your blocks. In other words, your blocks do not pop into pre-determined spaces like they do in the other quilt layouts. This means that a custom set layout takes more time to set up, but the flexibility in design is worth the extra effort!
If you’d like to watch a video of this lesson, you can find it here: https://support.electricquilt.com/articles/design-a-custom-set-quilt-lesson/
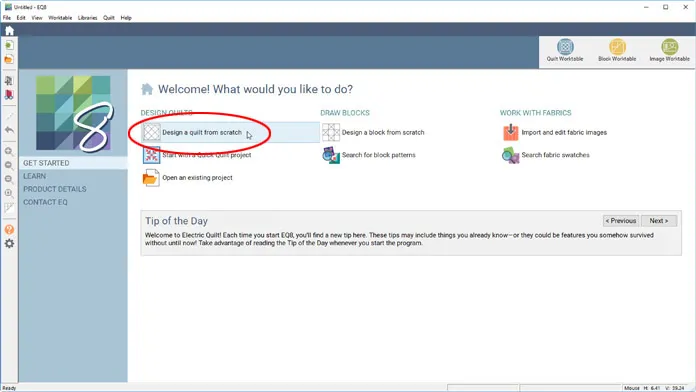
- Open EQ8 and you’ll see the Home Screen. Click Design a quilt from scratch.
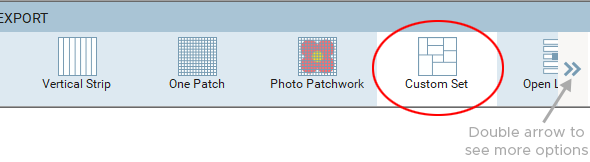
- You’ll be switched to the Quilt Worktable, with the NEW QUILT tab selected. In the ribbon, click on Custom Set. You may need to use the double arrow at the end of the ribbon to see the Custom Set option.
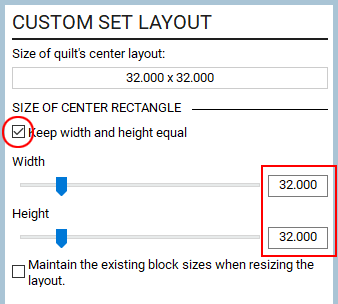
- Click the LAYOUT tab.

- Put a check in the box next to Keep width and height equal. Then use the slider bar to change one of the dimensions to 32.000. The other dimension will automatically change.
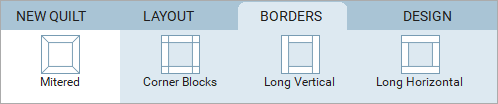
- Click the BORDERS tab.

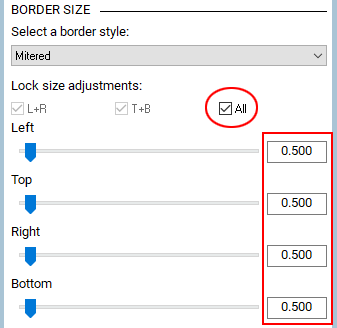
We’re not going to have a border on this quilt, but we’ll change the existing default border to mimic binding.
- In the ribbon, click Mitered.
- Under Lock size adjustments, click to put a check next to All (if there isn’t already a check there).
- Use one of the slider bars to change the dimension to 0.500. The other dimensions will automatically change.
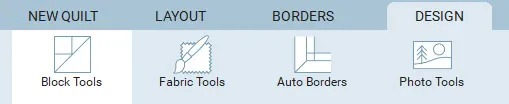
- Click the DESIGN tab and, if it’s not already selected, click Block Tools in the ribbon.
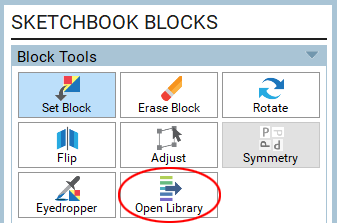
- EQ8 has a handful of standard blocks loaded in the project for you. Let’s grab a few more blocks for this quilt design. Click Open Library in the palette toolbox.
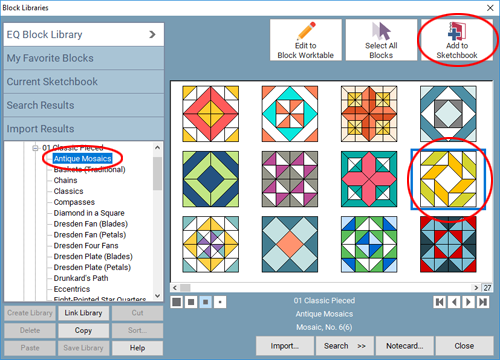
- The Block Library will open. On the left, you’ll see the block categories and styles. If you see a plus sign next to a listing, you can click on it to expand the listing and see more options.
- Under 01 Classic Pieced, click Antique Mosaics. Click on the block named Mosaic, No. 6 (6) and then click the Add to Sketchbook button. The block will “disappear” to let you know it’s been added to the Sketchbook. This is only temporary; the next time you visit this section of the library, the block will be back.
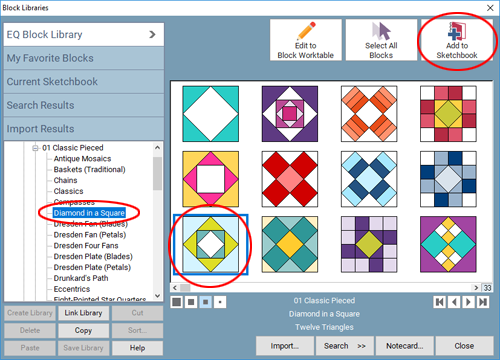
- Click Diamond in a Square on the left. Click on the third block (Twelve Triangles) to select it and click the Add to Sketchbook button.
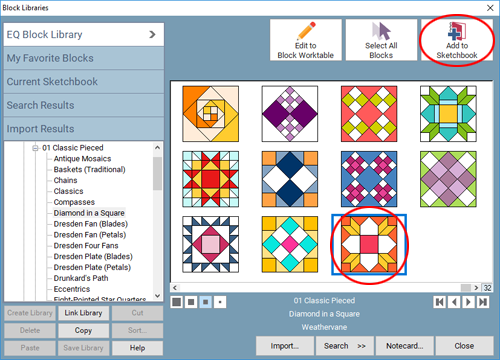
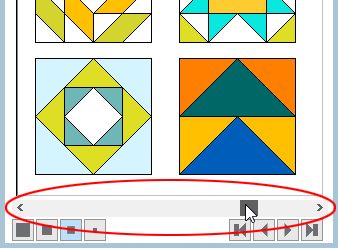
- Use the horizontal scrollbar below the blocks to scroll all the way to the right. Click on the block called Weathervane and click the Add to Sketchbook button.
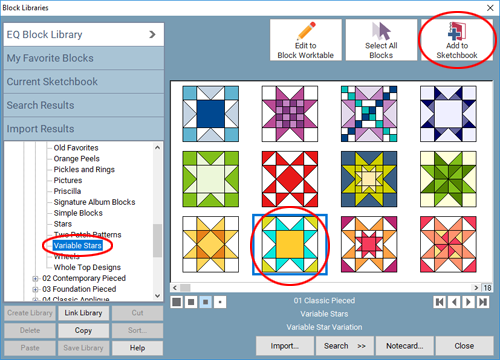
- Click Variable Stars on the left (use the vertical scrollbar to find it). Click on the sixth block (Variable Star Variation) to select it and click the Add to Sketchbook button.
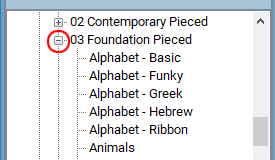
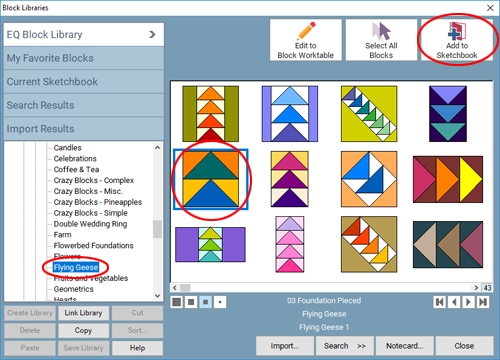
- Click on the plus sign next to 03 Foundation Pieced to see the choices in this category.
- Click Flying Geese on the left. Click on the second block (Flying Geese 1) to select it and click the Add to Sketchbook button.
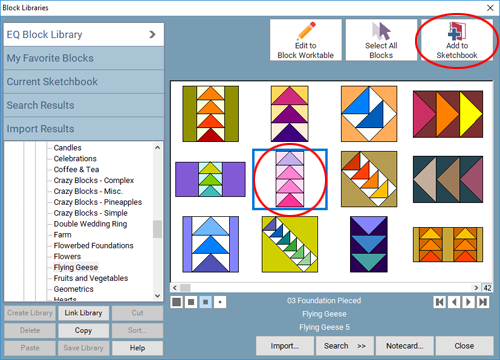
- Click on the block with four “geese” (Flying Geese 5) and click the Add to Sketchbook button.
- Click Close to put the library away.
- Now we’re back to the Quilt Worktable. The new blocks have been added after the default blocks, so drag the scrollbar below the blocks to the right to see the new blocks in the palette.
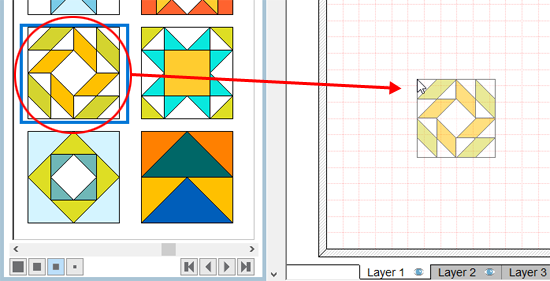
- When setting blocks on a custom set layout, you drag the blocks from the palette to the quilt layout. Click on the Mosaic block in the palette. Hold down you mouse button and drag the block over to the quilt. When you release the mouse, the block will set on the quilt.
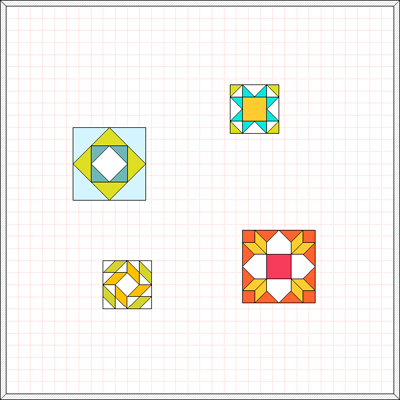
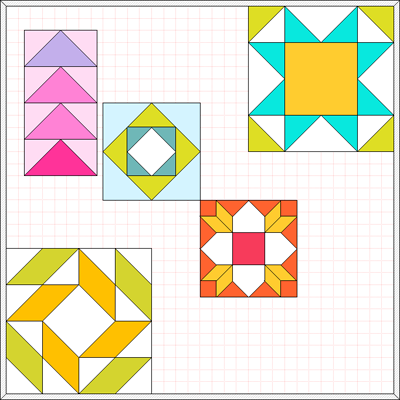
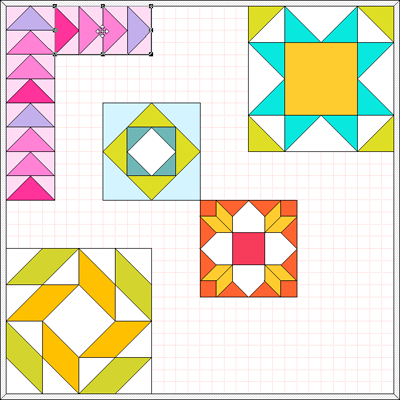
Arranging blocks on a custom set layout is a two-part process. First you set the block, then you use the Adjust tool to finalize the size and placement of the block. Let’s set three more blocks on the layout, then we can start fine-tuning the arrangement.
- Drag and drop the Twelve Triangles, Weathervane, and Variable Star Variation blocks onto the layout. Where they go right now doesn’t matter, but it is easier if you don’t stack them on top of each other.
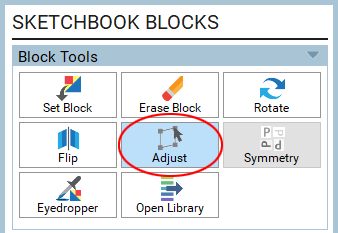
- Click the Adjust tool in the palette.
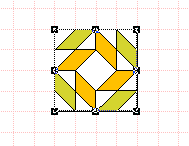
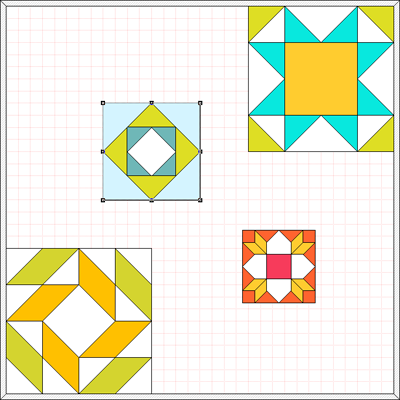
- Click on the Mosaic block in the quilt to select it. It will have black squares around it, indicating it is selected.
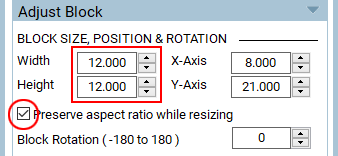
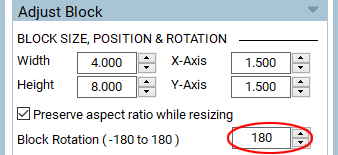
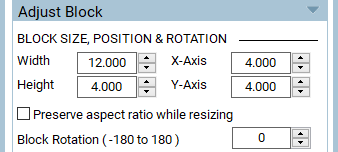
- Under Adjust Block in the palette on the left, put a check in the box next to Preserve aspect ratio while resizing. Change either the Width or Height to 12.000. If you choose to type in the size (rather than using the arrow buttons), after typing the number press the Enter key on your keyboard.
- Click on the Mosaic block in the quilt and drag it to the lower-left corner of the quilt.
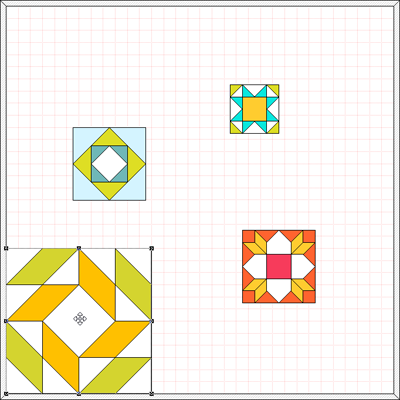
- You can double-check that it’s positioned correctly by looking at the X and Y coordinates in the palette.

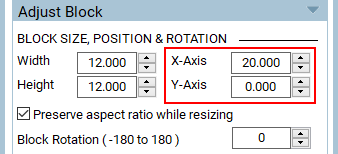
- Click on the Variable Star block on the quilt to select it. Change either the Width or Height to 12.000 in the palette.
- Drag the block to the upper-right corner of the quilt.
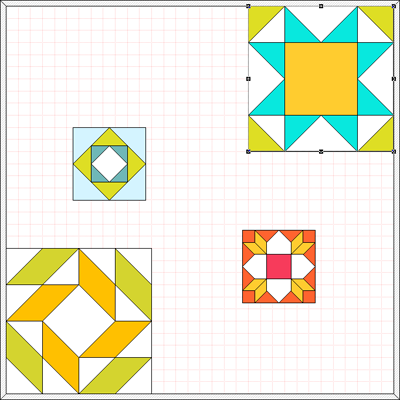
- Double-check the position in the palette.
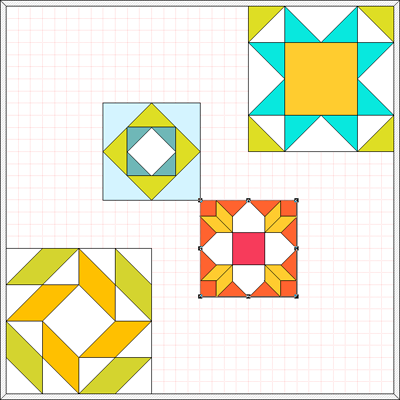
- Click on the Twelve Triangles block to select it. Change either the Width or Height to 8.000 and the other dimension will automatically change because Preserve aspect ratio is still checked.
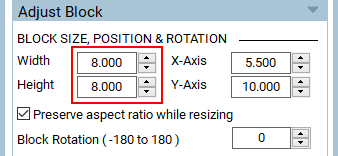
- Use the palette to position the block by setting both X-Axis and Y-Axis to 8.000.

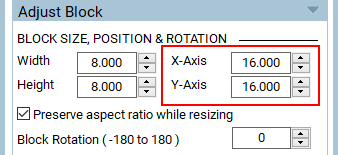
- Click on the Weathervane block to select it. Change either the Width or Height to 8.000.
- Use the palette to position the block by setting both X-Axis and Y-Axis to 16.000.
- Let’s save this in-progress version of the quilt. Click the Add to Project Sketchbook button.
- You’ll see a message explaining that you’re adding the quilt to the Sketchbook, but the project file has not been saved yet (that’s why it says Untitled at the top). Click OK. In the Save As box that appears, type Custom Set Quilt Lesson. Click the Save button to save the project file to your computer.
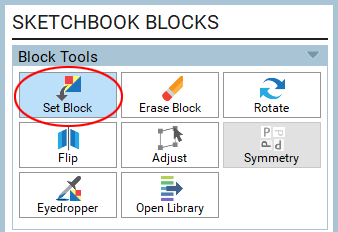
- Let’s fill in the rest of this layout. Click the Set Block tool.
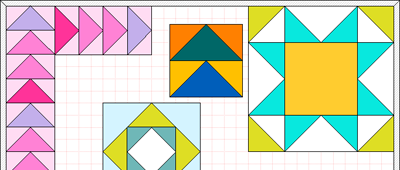
- In the palette, select the Flying Geese block with four geese. Drag it to the layout to set it.
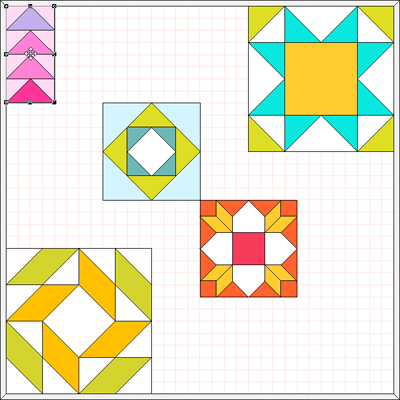
- Click the Adjust tool and then click on the Flying Geese block to select it.
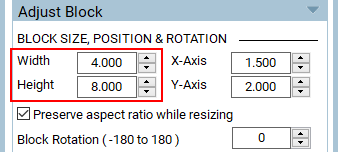
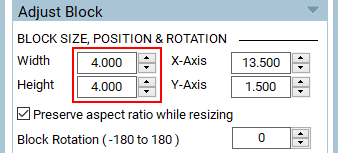
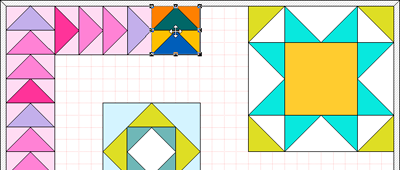
- Change the Width to 4.000. Because Preserve aspect ratio is checked, the block will resize proportionally and the Height will automatically change to 8.000.
- Drag the block to the upper-left corner of the quilt. (X-Axis: 0.000 Y-Axis: 0.000)
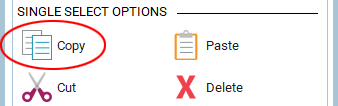
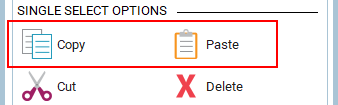
- While the block is still selected, click the Copy button in the palette. You may need to use the vertical scrollbar next to the palette to see this button.
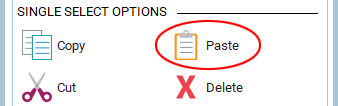
- Click the Paste button. Another copy of the flying geese will appear on the quilt and will be selected.
- Drag the new block below the first geese block. (X-Axis: 0.000 Y-Axis: 8.000)
- Click the Paste button again.
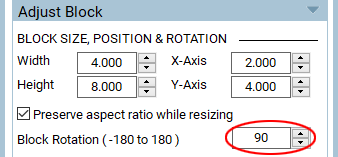
- With the new block selected, change the Block Rotation to 90 in the palette.
- Drag the block so that it is positioned along the top edge of the quilt, next to first geese block. (X-Axis: 12.000 Y-Axis: 0.000)
- We need a couple more geese so that it lines up with the Twelve Triangles block below. Click the Set Block tool. Find the Flying Geese block with two geese and drag it to the quilt.
- Click the Adjust tool and click on the two-geese block to select it. Change either the Width or Height to 4.000.
- Drag the block next to the last flying geese block we set. (X-Axis: 12.000 Y-Axis: 0.000)
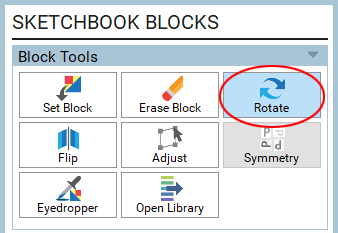
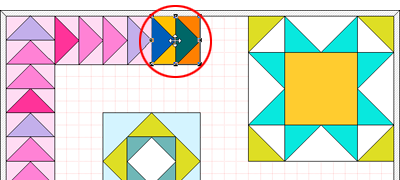
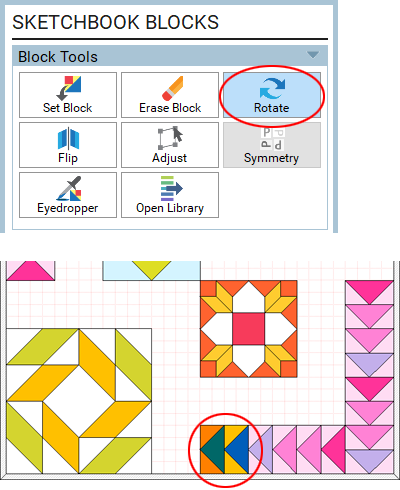
- The geese aren’t flying in the right direction! Click the Rotate tool.
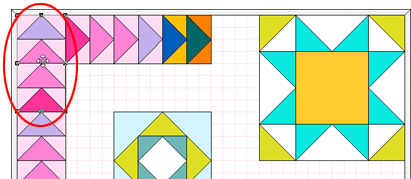
- Click on the two-geese block one time.
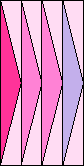
Why did we have to type in the Rotation degree in step 46, but this time we used the Rotate tool? We can use the Rotate tool for this block because it is a square. We had to type in the degrees for the four-geese block because it’s rectangular. When you use the Rotate tool, it rotates the block inside the boundaries of the block. If you used the Rotate tool on the four-geese block, it would look like this:
- Click the Adjust tool. Click on the four-geese block in the upper-left corner to select it.
- Click the Copy button, then the Paste button.
- In the palette, change the Block Rotation to 180.
- Drag the block to the lower-right corner of the quilt. (X-Axis: 32.000 Y-Axis: 32.000)
- Click the Copy button, then the Paste button.
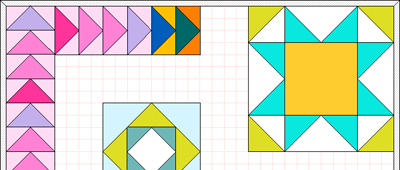
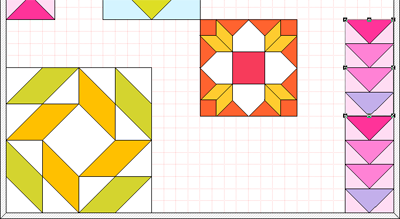
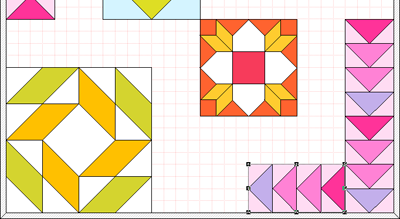
- Drag the new block into position as shown:
- Click the Paste button again to make another copy.
- In the palette, change the Block Rotation to -90.

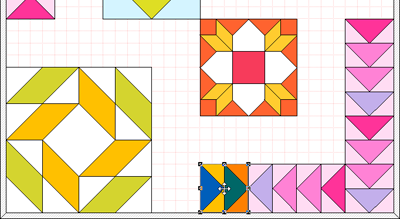
- Drag the new block into position as shown:
- Click the two-geese block to select it.
- Click the Copy button, then the Paste button.
- Drag the new block into position as shown:
- Click the Rotate tool and then click this block two times to rotate it appropriately.
- Click the Add to Project Sketchbook button to save this in-progress version of the quilt.
Now we’re going to fill in the rest of the quilt using solid blocks.
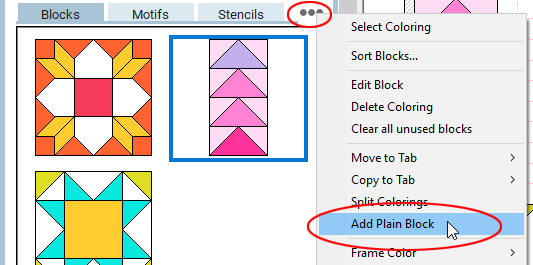
- Click the Set Block tool.
- Click the three-dot button in the palette and choose Add Plain Block. A solid cream square has been added to the end of the palette.
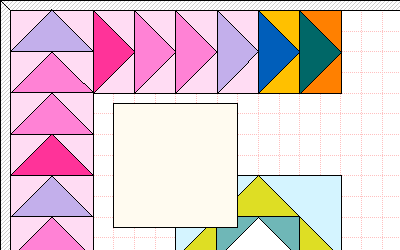
- Drag the plain block onto the quilt layout.
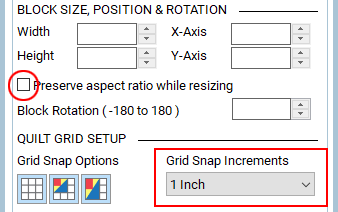
- Click the Adjust tool.
- In the palette, uncheck Preserve aspect ratio.
- Under QUILT GRID SETUP, change the Grid Snap Increments to 1 inch.
- Click the plain block on the quilt to select it. Hover your mouse over one of the selection boxes around the block until your cursor changes to a double-ended arrow.
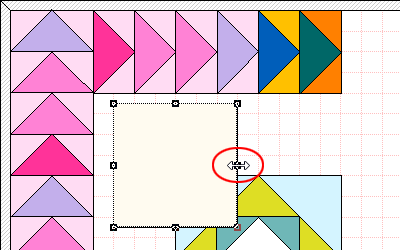
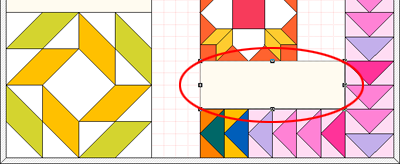
- When your cursor is a double-ended arrow, you can drag the “handle” to a new position to change the size and shape of the block. Drag the handles until you have a rectangle that looks like the one shown:
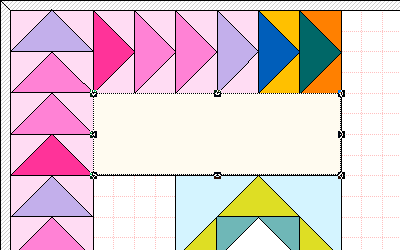
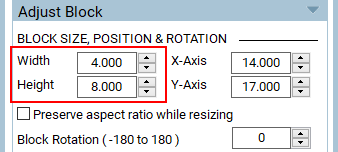
- You can double-check the size and position of this plain rectangle in the palette (or, if you prefer, just type in these numbers rather than dragging the handles):
- With the plain rectangle still selected, click the Copy button, then the Paste button.
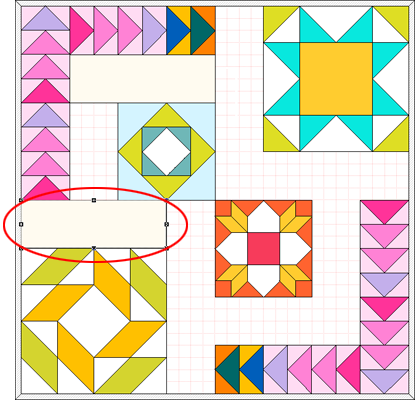
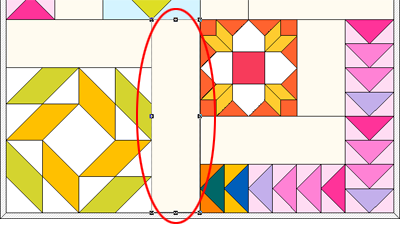
- Drag the new copy into position above the Mosaic block, as shown:
- Click the Paste button again and drag this rectangle below the Variable Star block.
- Click the Paste button again and drag this rectangle below the Weathervane block.
- Click the Paste button again.
- In the palette, change the size of this rectangle to Width: 4.000 and Height: 8.000.
- Drag the rectangle to the left of the Twelve Triangles block.
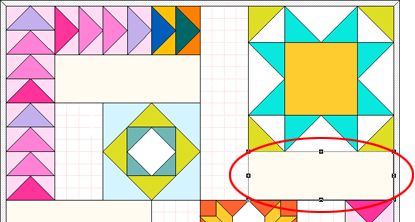
- With the rectangle still selected, click the Copy button, then the Paste button.
- Drag it to the right of the Weathervane block.

- Click the Paste button again.
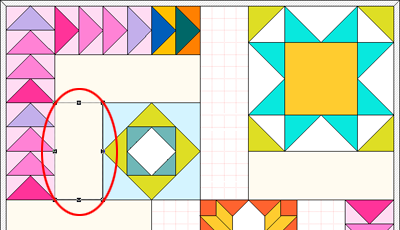
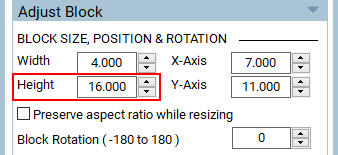
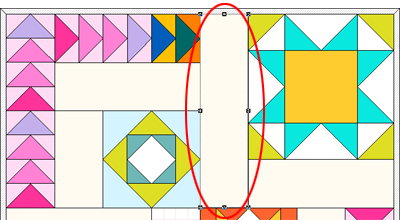
- Change the Height of this block to 16.000.
- Drag it into position to the left of the Variable Star block.
- Click the Copy button, then the Paste button.
- Drag this block into position next to the Mosaic block.
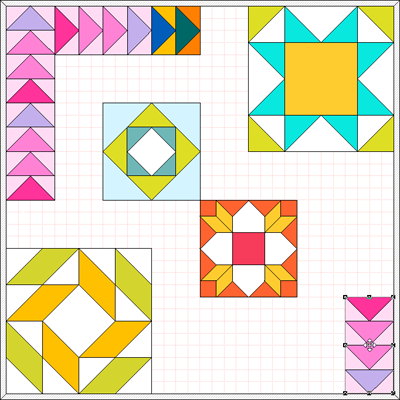
- The quilt design is done! Click the Add to Project Sketchbook button.
- Click Fabric Tools in the ribbon and use the tools to color the quilt however you’d like.
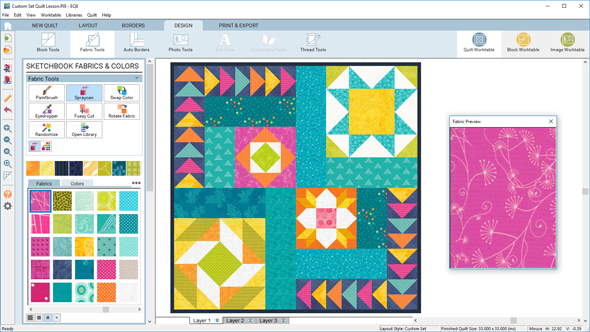
- Click the Add to Project Sketchbook button again to save the newly colored version of the design.
- If you’d like to print the patterns for this quilt, click the PRINT & EXPORT tab at the top of the screen.
- If you’re done working in EQ8, you can close the program by clicking the X at the top or clicking File > Exit (PC) or Electric Quilt 8 > Quit Electric Quilt 8 (Mac).


