

Let’s get to know the basics of drawing a PolyDraw block.
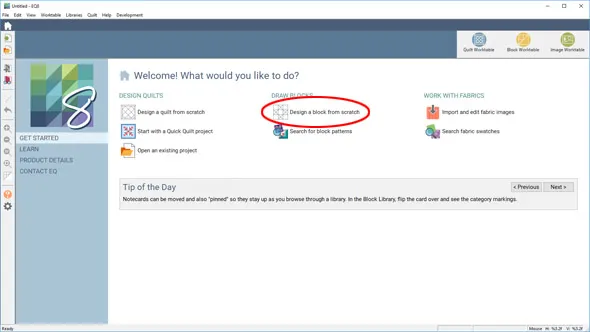
- Open EQ8. On the Home Screen, click Design a block from scratch.
- You’ll be switched to the Block Worktable with the NEW BLOCK tab selected. You can choose which kind of block you’d like to draw in the ribbon. You’ll see tips for the selected block style in the palette below.
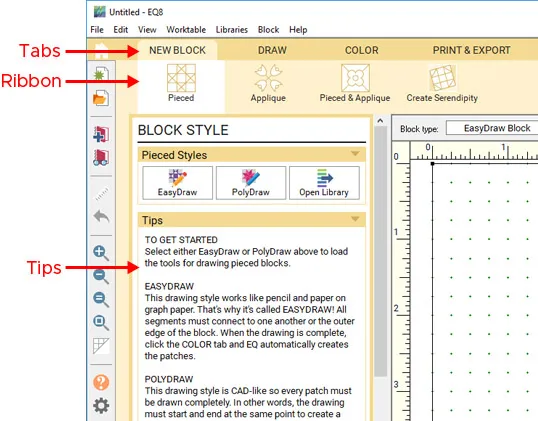
- Click Pieced on the ribbon, then PolyDraw in the palette. You’ll be switched to the DRAW tab of the worktable.
In PolyDraw, you construct the block by drawing closed patches (unlike EasyDraw where you draw straight or curved lines and the software creates the patches for you). You must start and stop at the same point to finish a patch. Double-clicking at the start/stop point will close the patch and release the tool from the worktable. The patches you can draw are determined by the grid and snap points you select.
- In the palette, under Grid Properties, you’ll see the available grids. Click the Octagon grid.

- Set Dimension 1 and Dimension 2 to 8. This determines the number of snap points on the grid. The available snap points change depending on the selected grid. For more information about the grids and their snap points, click here.
- In the Precision Bar above the worktable, set the Block Width and Height to 12.

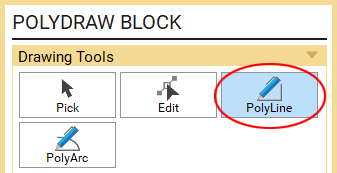
- Click the PolyLine tool in the palette (if it’s not already selected).
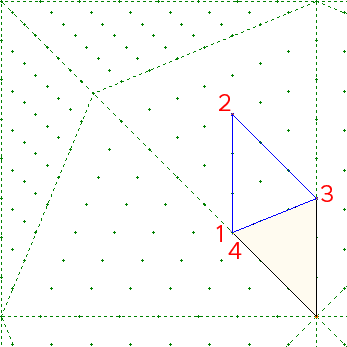
- Move your cursor to the center point of the block and double-click to anchor your line. As you move your cursor you’ll now see a blue line connected to it.
- Move your cursor up (without holding down the mouse) vertically three grid points and single-click to place a node.
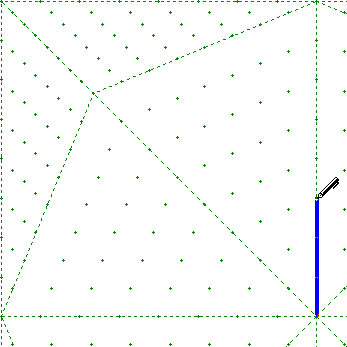
- Move your cursor to the other side of the “wedge” and single-click to place another node.
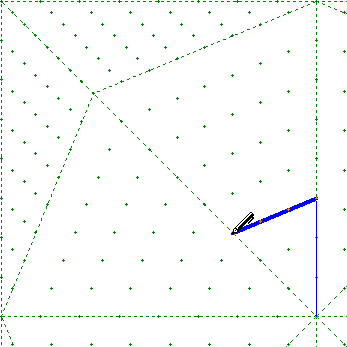
- Move your cursor back to the start point and double-click to finish the patch.
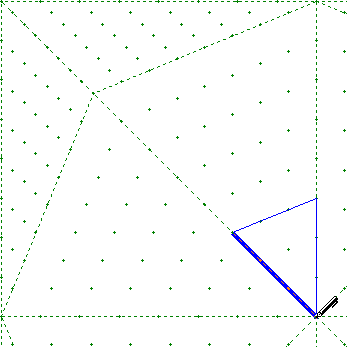
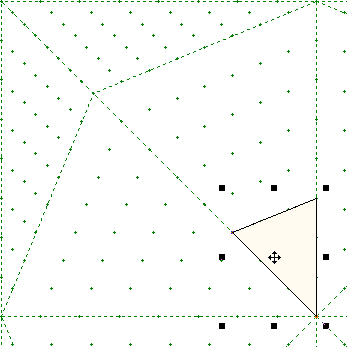
- You’ll know that the patch is closed because it will fill with a cream color and become selected with a crosshair in the middle.
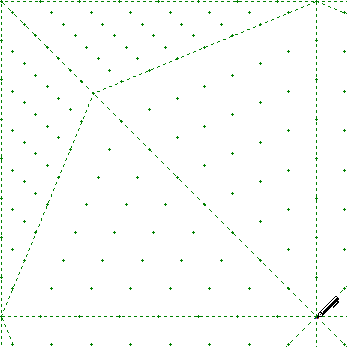
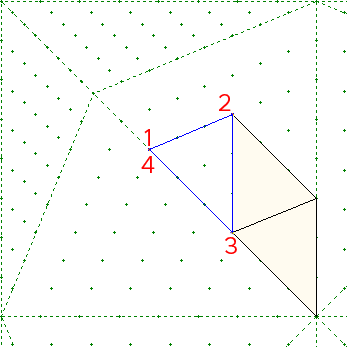
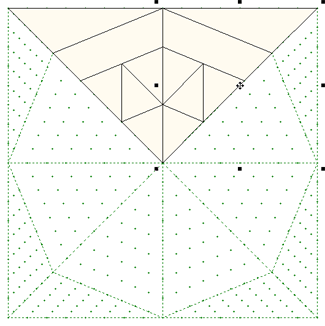
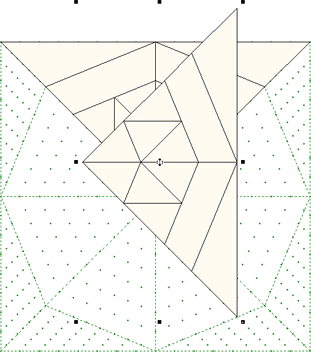
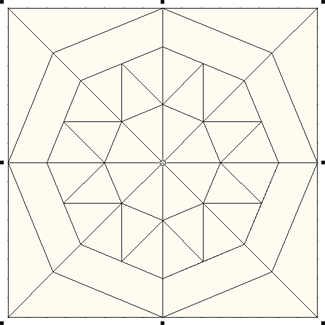
- Using the illustration below as a guide, draw another triangle above the first. Remember, double-click to start the patch, single-click to create the nodes of the patch, then double-click at the start point to close the patch.
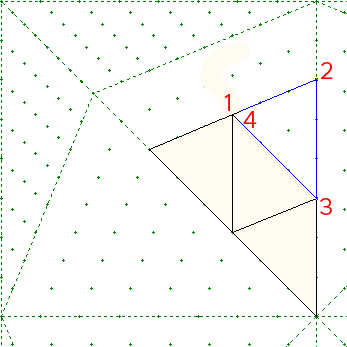
- Fill in the rest of the “wedge” by drawing the shapes illustrated below:

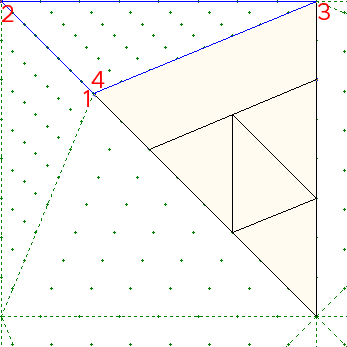
Believe it or not, all of the actual drawing is done! We’ll copy the shapes we’ve just drawn to fill in the rest of the block.
- Press CTRL+A (Command+A) on the keyboard to select all the patches. (You can also click Edit > Select All on the top menu bar.) Notice that the Pick tool has automatically been selected in the palette for you.
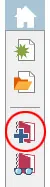
- Under Selected Patch Properties in the palette, click Clone.
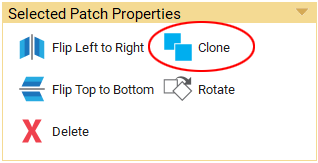
There will now be a second set of patches on the worktable and they will all be selected.
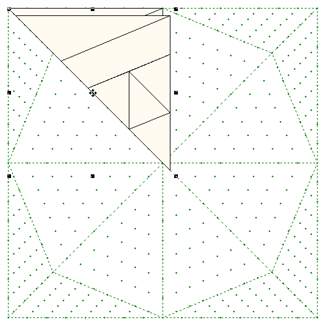
- In the palette, click Flip Left to Right.
- Position your cursor over the crosshair and click, hold, and drag the new patches next to the original set. We now have a quarter of the block filled in.
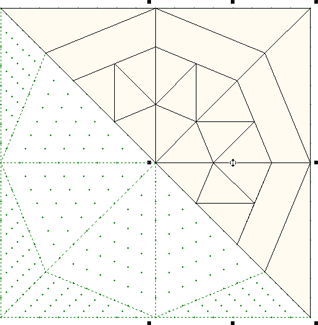
- Press CTRL+A (Command+A) to select all the patches again.

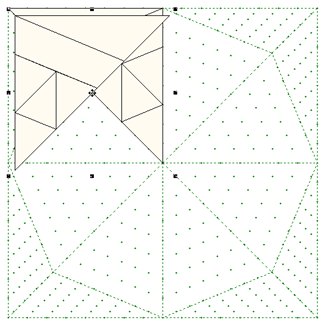
- In the palette, click Clone. Then click Rotate two times.
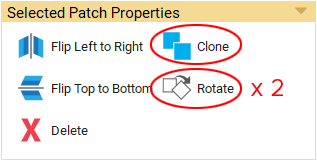
The Rotate button works differently for each of the PolyDraw grids. When using the Octagon grid, each click of the Rotate button will rotate the selected patch(es) by 45 degrees.
- Position your cursor over the black crosshair and drag the selected patches into place.
- Press CTRL+A (Command+A) to select all the patches again.
- In the palette, click Clone. Then click Rotate four times.
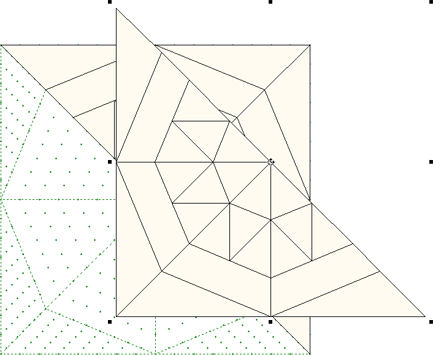
- Position your cursor over the black crosshair and drag the selected patches into place.
- The block is complete! Click the Add to Project Sketchbook button.
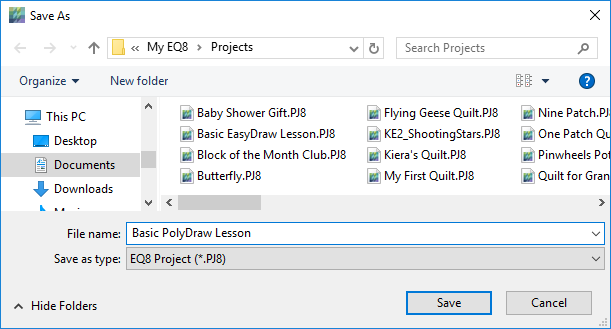
- You’ll see a message explaining that you’re adding the block to the Sketchbook, but the project file has not been saved yet (that’s why it says Untitled at the top of the screen). Click OK. In the Save As box that appears, type Basic PolyDraw Lesson. Click the Save button to save the project file to your computer.
- Click the COLOR tab at the top of the screen.

- Use the Paintbrush tool to color your block with fabrics or colors.
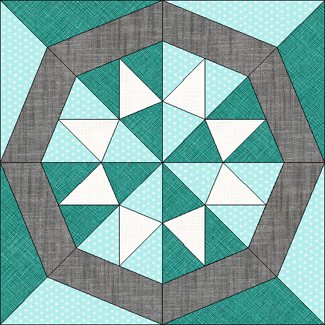
- Click Add to Project Sketchbook.

- If you are done working in EQ8, you can close the program by clicking the X at the top or clicking File > Exit (PC) or Electric Quilt 8 > Quit Electric Quilt 8 (Mac).


