
You’ll find a project of pre-designed quilt labels ready for you to use in the Quick Quilts. This lesson explains how to edit the labels with your own information.
Note for Mac users : A small number of users have reported issues printing, using print preview, changing printer fonts, or using the Applique Text tool on macOS Catalina. If you’re on a Mac and having trouble with the Applique Text tool, please see this article: macOS Catalina: Error attempting to use Applique Text tool.
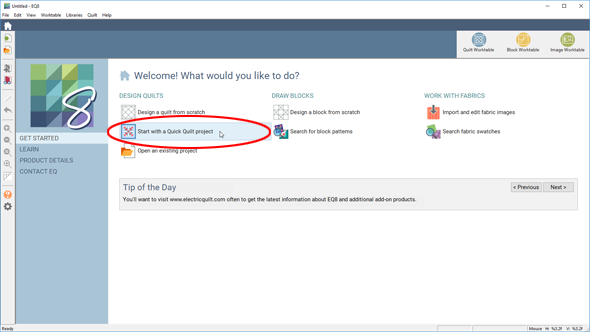
- Open EQ8. On the Home Screen, click Start with a Quick Quilt project.
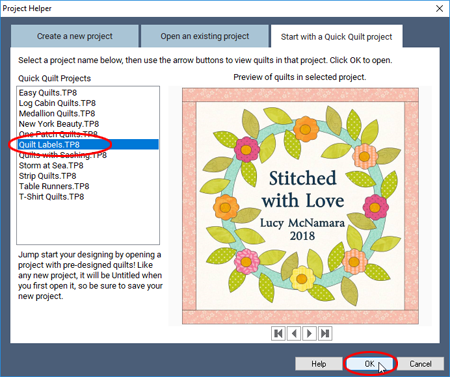
- The Project Helper will appear. In the list of projects on the left, click Quilt Labels.TPJ then click OK.
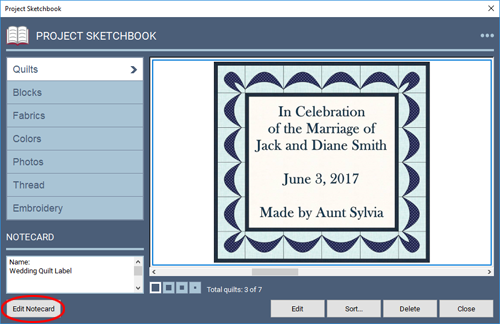
- The Project Sketchbook will open. Click the Quilts section on the left (if it’s not already selected).
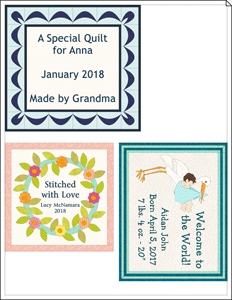
- Use the horizontal scrollbar below the quilts to find the label named Wedding Quilt Label.
- Click the Edit Notecard button in the lower-left corner of the Sketchbook.
- Notice that the notecard provides some quick steps to edit and print these designs for labels. We’ll go through these steps in a bit more detail. Click the X in the upper-right corner of the notecard to close it.

- Click the Edit button to put the design on the Quilt Worktable.

- (Optional) If you’d like to make any changes to the fabrics, click Fabric Tools in the ribbon and color the design however you’d like using the tools available.

- Click the Layer 2 tab below the quilt.

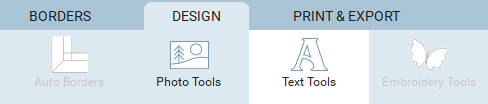
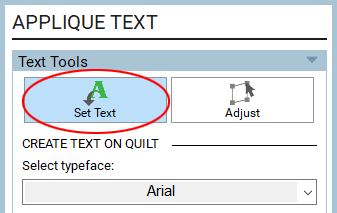
- In the ribbon, click Text Tools.
- The Set Text tool will be selected in the palette (if it’s not, click to select it).
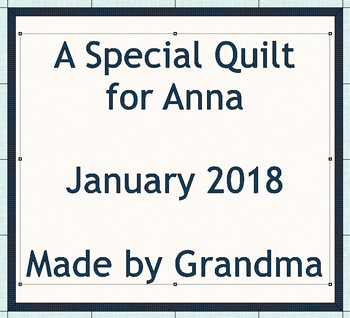
- Click in the text box on the quilt to place your cursor there.
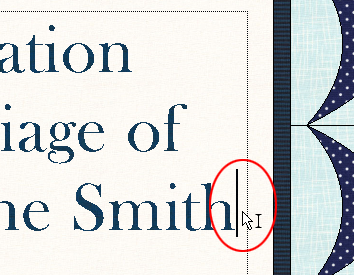
- You can click right after the word(s) you’d like to replace, then use the Backspace key on your keyboard to get rid of the text.
- After you’ve cleared the text, type what you’d like. Press the Enter key on your keyboard to start a new line of text.
- Repeat steps 13 and 14 to replace any type you’d like.
- While your cursor is still active in the text box, you can change the font style, size, and other formatting in the palette. All text within a text box must be the same font. If you’d like to use different fonts for different words, make separate text boxes for each font.
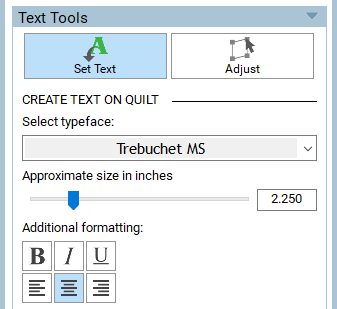
- If your text is no longer centered on the label, click the Adjust tool in the palette.
- Click the text box to select it, then click the Center Horizontally and Center Vertically buttons in the palette.
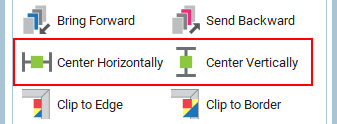
The text box will now be centered on the quilt.
- Click the Add to Project Sketchbook button.
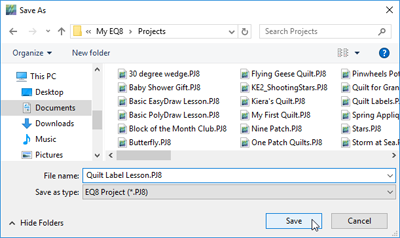
- You’ll see a message explaining that you’re adding the quilt to the Sketchbook, but the project file has not been saved yet (that’s why it says Untitled at the top of the screen). Click OK. In the Save As box that appears, type Quilt Label Lesson. Click the Save button to save the project file to your computer.
Now we’ll go through the steps of how to print this design.
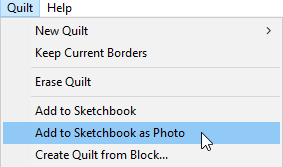
- On the top menu bar, click Quilt > Add to Sketchbook as Photo.
- Click the View Project Sketchbook button.
- Click the Photos section on the left. You’ll see the “photo” of the quilt label and it will have a blue outline, indicating it is selected. Click the Edit button and then choose to Image Worktable.

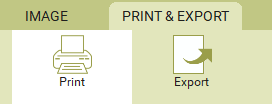
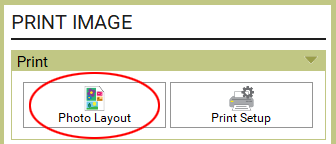
- On the Image Worktable, click the PRINT & EXPORT tab.
- In the palette, click Photo Layout.
- On the Photo Layout screen, you’ll see a blank page and a column on the right. The column displays all the photos saved in the Sketchbook. There’s only one photo in this Sketchbook (the quilt label).
- Click and drag the photo from the right to the blank page. You’ll see a transparent thumbnail of the photo when you drag it over the page.
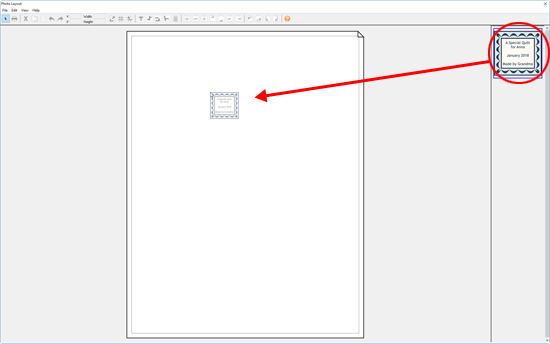
- When you release the mouse, you’ll see a message asking if you want to scale the image to fit on the page. Click Yes.
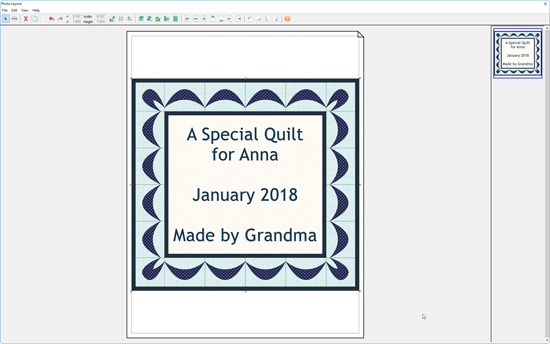
- The label will take up the full width of the page, minus the margins. If you like this size, you can click the Print button to print the label. If you want to resize the label, move on to step 30.
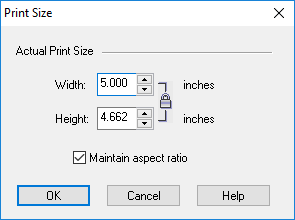
- The quilt label should still be selected (if it’s not, click on it to select it). Click the Resize button on the toolbar (beside the Width and Height boxes).

- In the Print Size window, make sure Maintain aspect ratio is checked. You can then change one of the dimensions and the other will resize proportionally. Using the arrows, change the Width to 5.000 and click OK.
- You’ll see the label is now resized on the Photo Layout page. You can click and drag the label to a different part of the page. Just make sure you keep the label within the dotted lines that indicate the margins of the page.
If you had more than one quilt label saved in the Photos section of the Sketchbook, you could drag multiple labels onto the page. This is a great way to make the most of your printable fabric sheets!
- If you’d like to print the label, click the Print button. If you do not wish to print at this time, click the X at the top of the screen to close the Photo Layout.
- If you’re done working in EQ8, you can close the program by clicking the X at the top or clicking File > Exit (PC) or Electric Quilt 8 > Quit Electric Quilt 8 (Mac).


