 EQ Mini
Start a New Quilt
- Start EQ Mini.
- When the Welcome to EQ Mini box displays, click Close.
- When the Tip of the Day appears, read as many tips as you like or just click Close.
- Click Horizontal Strip Layout along the left to see the sample on-point layouts.

- Click the first sample. Notice the gray frame turns blue when you click on it.
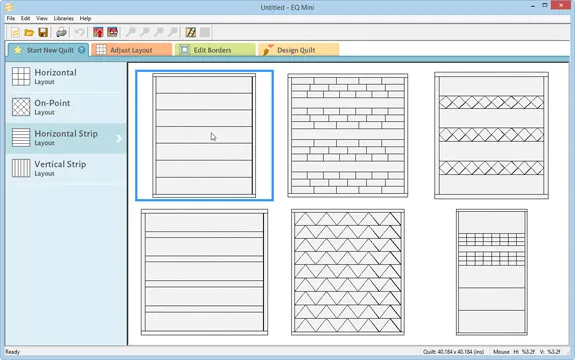
- Click the Adjust Layout tab along the top. You can see the overall size of the quilt with its borders on the bottom status bar and it’s 62 inches by 74 inches. Let’s turn this layout into a crib size quilt.

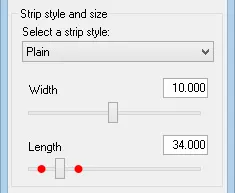
- Drag the rectangle for Length to the left until you reach 34.000. You may need to click right or left of the rectangle to make fine adjustment to the number. Notice the overall size on the status bar now says 38.000 x 74.000 (ins).


Note: Sometimes it might be hard to get the exact number you need by sliding the rectangle left or right in the palette. You can also adjust the numbers by clicking directly on the horizontal line that the slider rectangle is on, as indicated by the red dots in the image below. You can also type the desired number in the integer boxes.
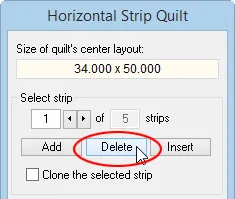
- Click the Delete button in the palette. This will change the quilt from 7 strips to 6.
- Click the Delete button again. Now our quilt has 5 strips and the status bar shows 38.000 x 54.000 (ins).

Name the Project
Remember that the project name appears at the very top of the EQ Mini window. This project says Untitled. Let’s name this project.
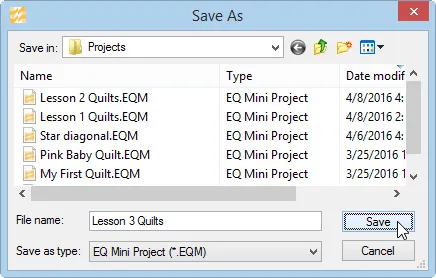
- On the top toolbar click the Save button
 . The Save As box will display.
 - In the File name box type Lesson 3 Quilts.
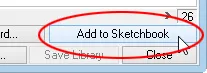
- Click Save. The box will close. Notice the project name Untitled has been replaced with Lesson 3 Quilts. Now that our project is named, we don’t need to click the Save button anymore. Now we’ll just be clicking Add to Sketchbook.
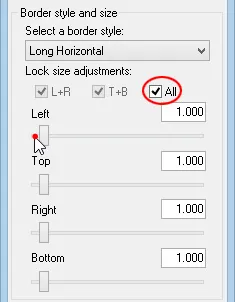
- Click the Edit Borders tab along the top. The Borders palette will display.

- Let’s make this border just a bit narrower. Make sure there is a check in front of All. Click directly on the line to the left of the rectangle for Left. Click until the border size is 1.000. Now the quilt has a 1 inch border and the status bar shows 36.000 x 52.000 (ins) for our finished size.

Color the Strips and Border
- Click the Design Quilt tab along the top. Let’s search the Fabric Library by color to find some new fabrics for this design.
- Click the Paintbrush tool
 .
.
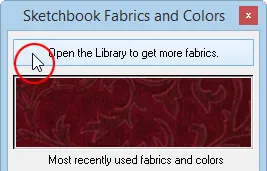
- Click Open the Library to get more fabrics.
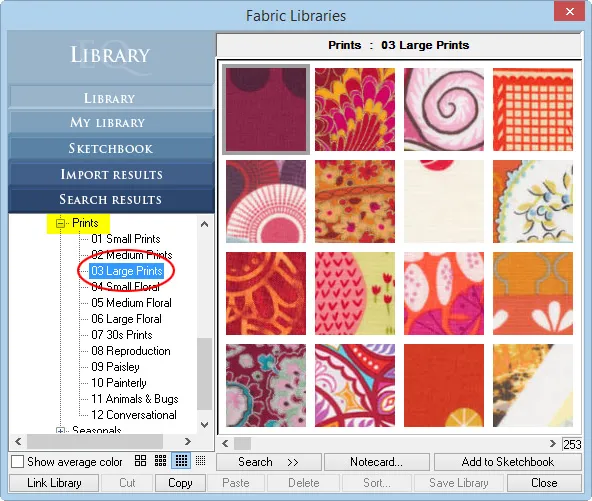
- Scroll down until you see the Prints library. Click the plus sign (+) in front of the word Prints to open that library.
- Click 03 Large Prints to display the fabrics in this style.
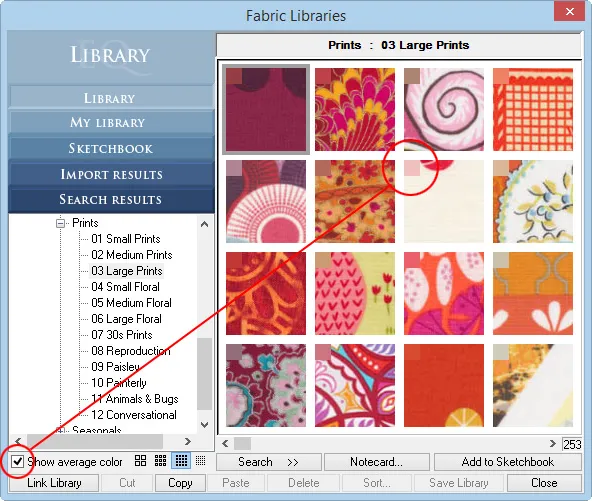
- In the lower left of the Fabric Libraries box, you see a checkbox option for Show Average Color. Click to place a check in the box.
When this option is checked, each fabric swatch will have a small rectangle in the upper-left corner that shows the average color of that fabric swatch. Remember that this is the average of all the colors in the swatch. Since we are looking at large prints, you may not see all the colors in this view.
- Scroll until you find a fabric that you like. Be sure to pay attention to the average colors. In the next few steps we’re going to use the average color of a fabric to find fabrics with a similar average color. So for this example, stay away from average colors that look gray or muddy. We want bright fabrics in our search results.
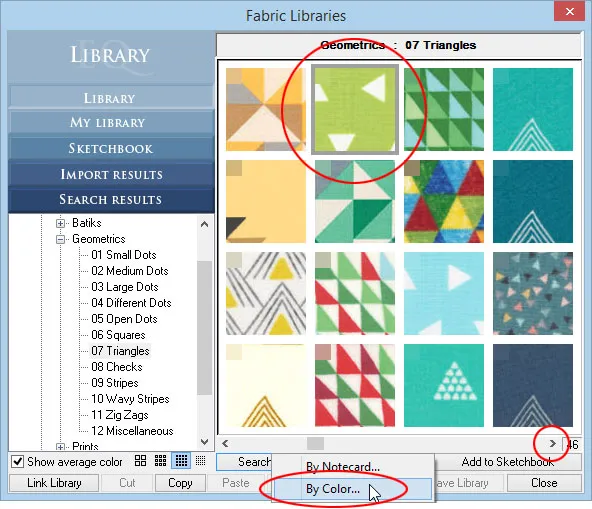
- Click directly on the fabric to select it.
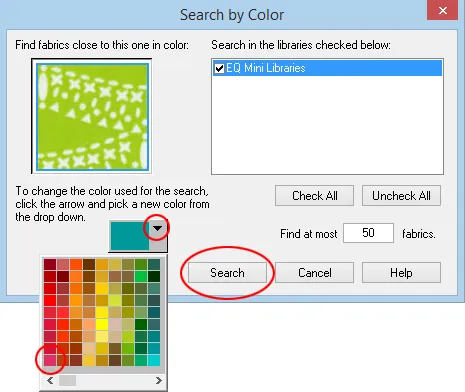
- Click the Search button to display a menu with two options.
- Click By Color… to display the Search by Color box.
- We don’t need to make any changes in this box. It will find as many as 50 fabrics that have an average color close to the color of the fabric selected. Click Search.
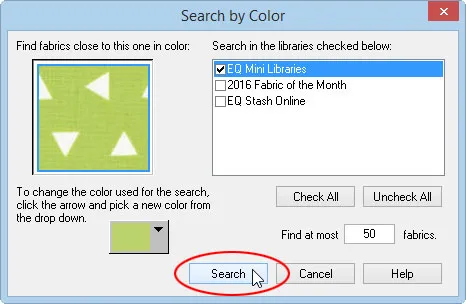
Note: You can change the color you are searching for by using the solid color selector, but you may get unexpected results. You will always be happier with your search results if you return to the library and select a fabric with the desired average color.
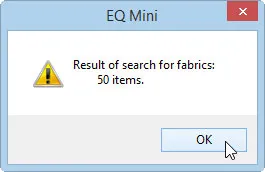
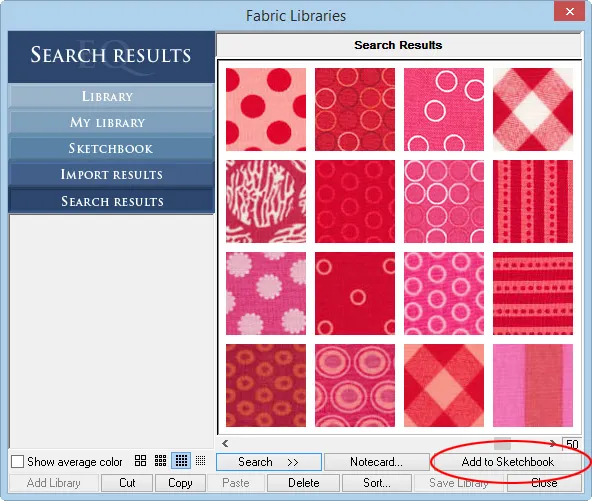
- You will see a message telling you how many fabrics were found. Click OK. Notice that we are viewing the fabrics on the Search Results tab.
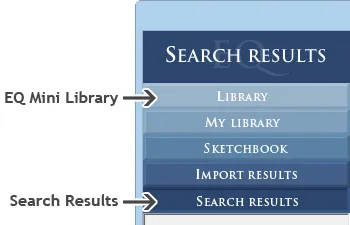
- Click the Library section. This is where we started the search.
- Click Search Results. This shows the results of our search.
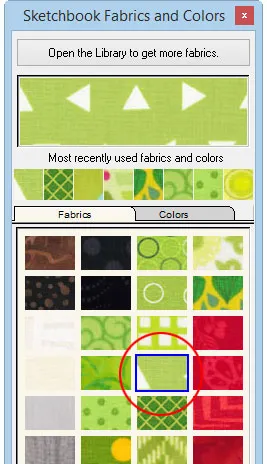
- Click directly on a fabric and click Add to Sketchbook. Scroll through the fabrics and add as many as you like to the Sketchbook. Our quilt has 5 strips and a border so you’ll want to add at least 6 new fabrics. If you like, add them all.
Note: You may see a message that the fabric is already in the Sketchbook. For this lesson, the message means that the fabric is part of the default fabrics that are included with every project.
- Click Close. The new fabrics from the library will now appear in the palette, but they will be at the end. Use the scrollbar along the bottom of the palette to scroll to the end.
- With the Paintbrush tool selected, click any fabric in the palette and click on a strip in the quilt.
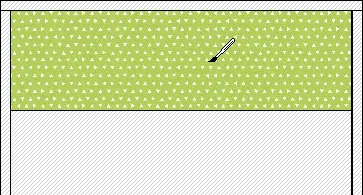
- Click another fabric in the palette and click on a strip.
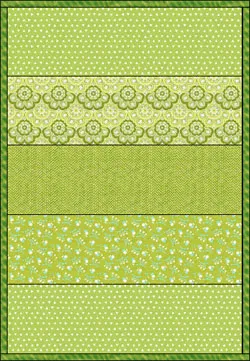
- Continue to place fabric in the strips until you are happy with your design.
Note: The fabric will scale when set into the quilt.
- Click a fabric in the palette that you have not used in any of the strips. Color the border with this fabric. Remember that you can replace any fabric with a new fabric simply by clicking. There is no need to erase.
Add to Sketchbook and Name Quilt
- The quilt is complete. Click the Add to Sketchbook button (the red button with the red arrow on the top toolbar
 ) to make this quilt part of your project.
 - Click the View Sketchbook button (the red button with the eyeglasses on the top toolbar
 ) to see the Project Sketchbook. The Sketchbook will appear.
 - You should see your quilt when the Sketchbook displays. If you don’t, click the Quilts section along the left.
- Click the Notecard button to display it. Let’s name this quilt.
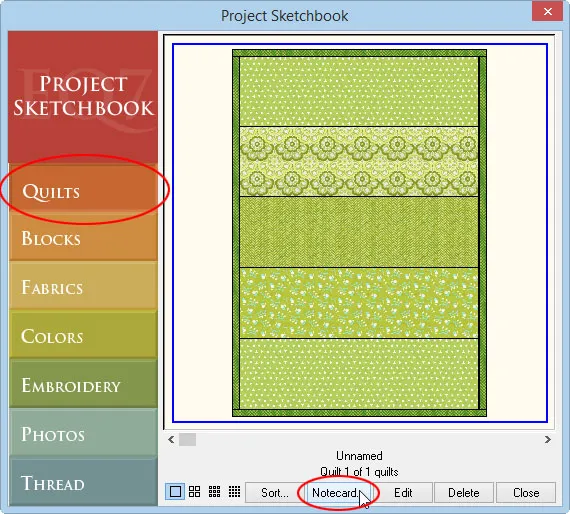
- Type Lesson 3: Quilt 1 on the Name line.
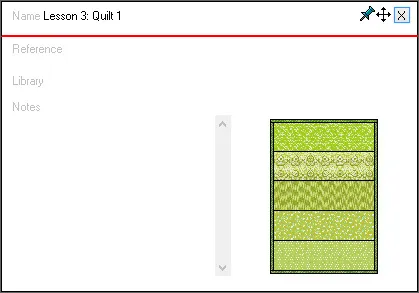
- Click the X in the top-right corner of the notecard to close it. You will see Lesson 3: Quilt 1 below the quilt.

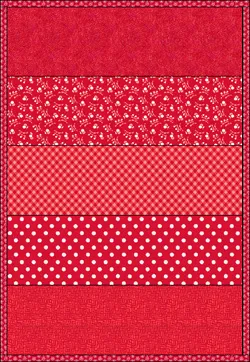
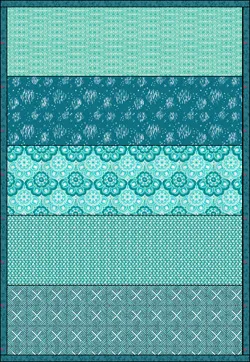
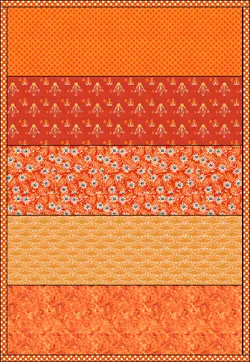
This quilt is quite simple in design. It’s great for showing off a larger fabric print that you love, or keep the fabric simple and make the quilting your emphasis. The 10-inch wide strips allow for fun quilting options or even straight-line quilting. This quilt also works great as a baby quilt – maybe in flannel. The possibilities go on and on.
- Click Close in the bottom-right corner of the Sketchbook.
Printing
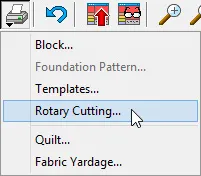
- Click the Select tool
 and click on any strip. Notice the green frame around the strip.
 - Click the Print button on the top toolbar and choose Rotary Cutting. Rotary Cutting charts in EQ Mini are for individual blocks. In this case, for the strip.
- We don’t need to make any other changes in this box.
- Click Preview.
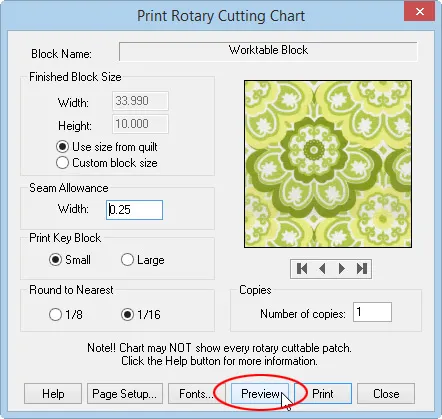
- Click the Zoom In button. Click and hold down your left mouse button as you drag the mouse down and to the right, forming a box around the area you would like to see larger.

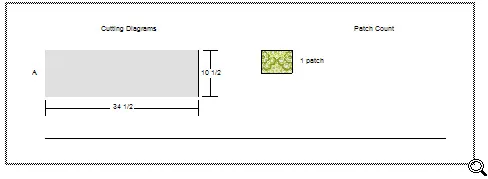
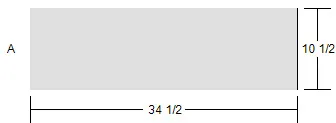
When you release the mouse, the screen will zoom in on this area of the page. We can see that the chart tells us to cut a strip 34½ by 10½ which makes perfect sense since our strips on the Adjust Layout tab were 34 by 10. The extra half-inch is for the quarter-inch seam allowance around the strip.
- Click Print at the top of the preview. (Or click Close if you don’t want to print now.)

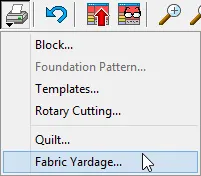
- Click the Print button on the top toolbar and choose Fabric Yardage.
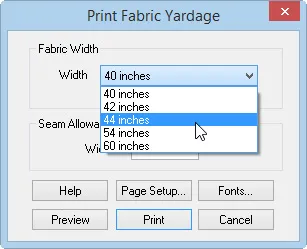
- In the Print Fabric Yardage box, click the down arrow next to Fabric Width, and click 44 inches. We will leave the 0.25 inch seam allowance.
- Click Preview.
- Click the Zoom In button and again drag a marquee-select box around the top of the page.
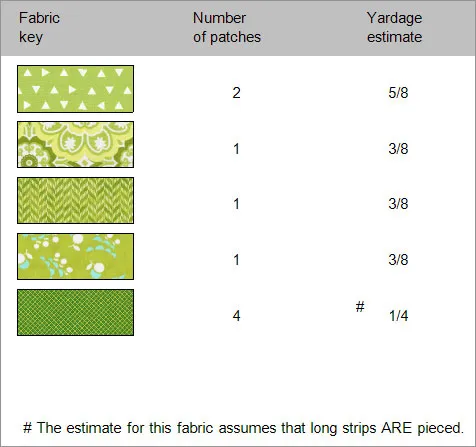
You’ll see that each strip requires 3/8 yard of fabric. Notice the number symbol (#) next the fabric for the border. This symbol indicates that EQ has estimated the fabric assuming that you will cut and piece strips together for the border.
- Click Print at the top of the preview.
Note: Remember that you can always round up when buying yardage. Getting an extra 1/4 yard of each fabric will be better than running out. And there are always ample ways to use leftover fabric!
- Click the Print button in the top toolbar and choose Quilt.

- Under Printing Style, choose Showing fabrics.
- Click Preview.
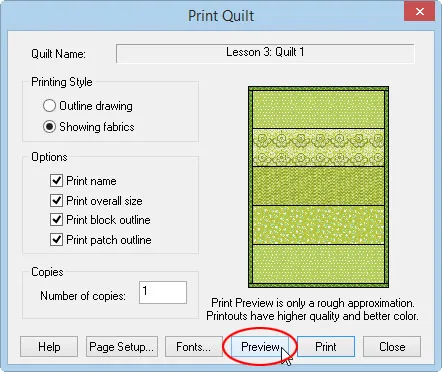
- Click Print at the top of the preview. Now you have a printout of your quilt design, a rotary cutting chart for each strip and the fabric yardage for your quilt.
- If you want to do more during this session of EQ Mini, then see the homework assignment at the end of this lesson. Otherwise, continue to the next step.
- Click File > Exit to close EQ Mini.
You’re done with Lesson 3. You have learned to search for fabrics by color and more printing options as well as reviewing the basic steps for starting a new project, naming it and saving it.
If you want a little homework…
- Go back to the Fabric Library and use the Search by Color feature.
- Click the down arrow for the color selector in the Search by Color box. Use the scrollbar to find a color.
- Click on the color chip to select it and then click Search.
- Add 10+ fabrics to the Sketchbook.
- Repeat the same steps for two more colors.
- Close the Fabric Library and click the Paintbrush tool. Scroll to the end of the palette to find the newly added fabrics. Create three new colorways for the strip quilt and add them to the Sketchbook.