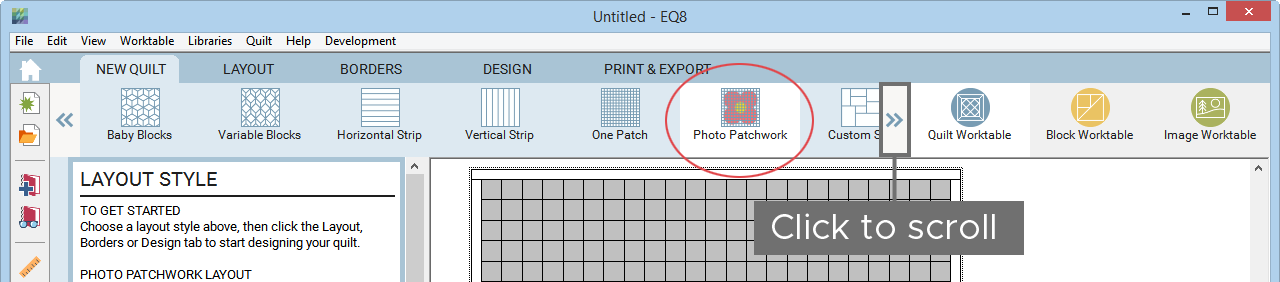
On the Quilt Worktable click the NEW QUILT tab and on the ribbon below choose Photo Patchwork. You may need to scroll in the ribbon to find this option.
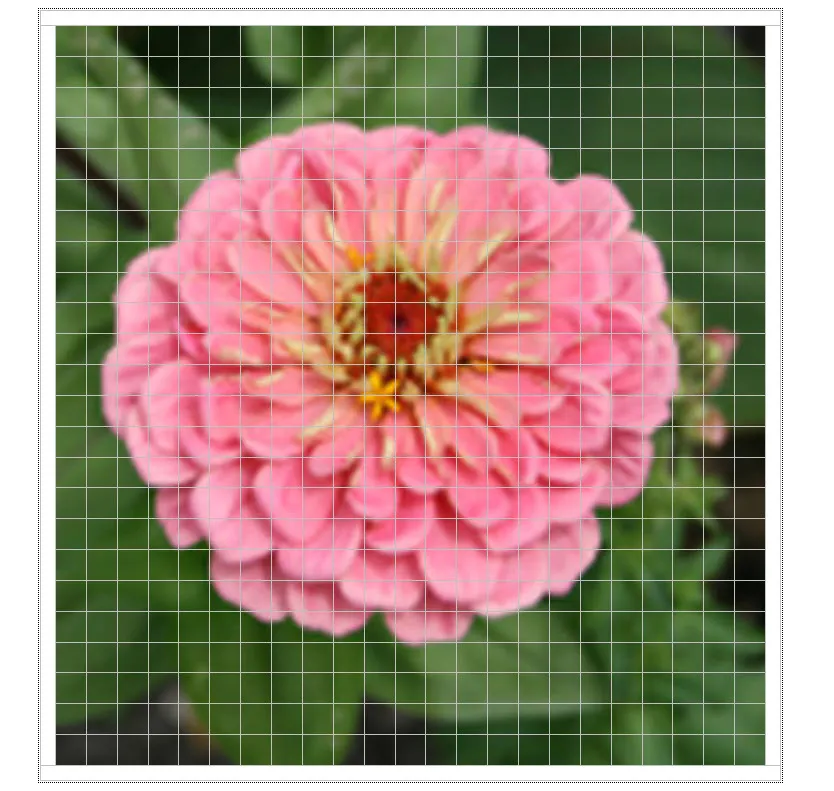
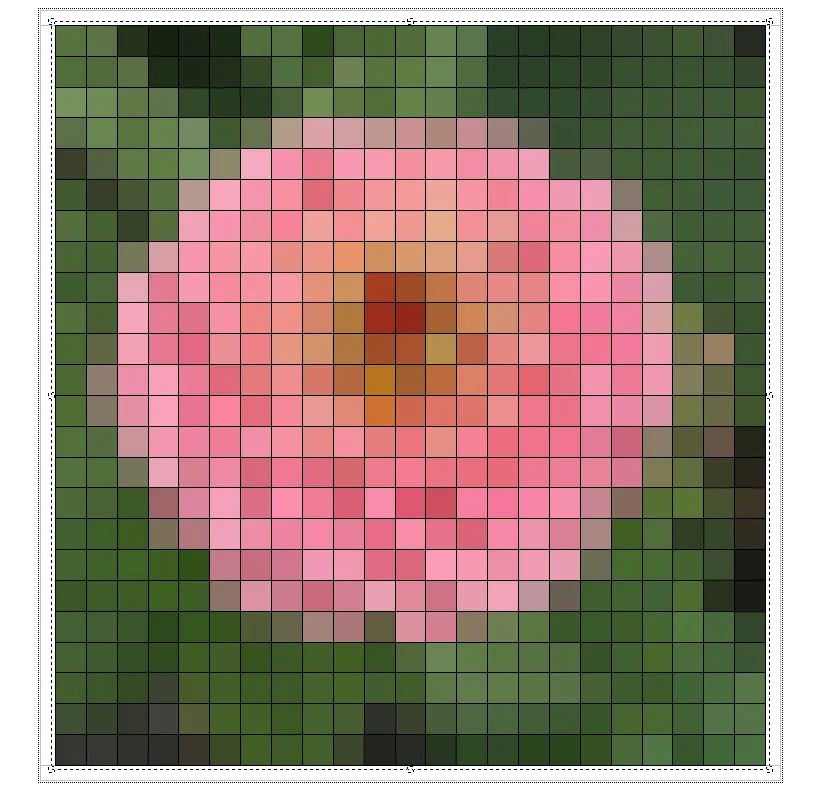
This layout style lets you place a photo on your quilt, no matter its size, and instantly turn it into a large, mosaic-like quilt. Read Turning a Photo into a Quilt to learn how to create your own Photo Patchwork.
One Patch layouts are made up of a single patch that repeats throughout the quilt. Remember that these are patches and not blocks. Each patch can be colored individually with prints or solids. Pieced blocks cannot be set into the patches.
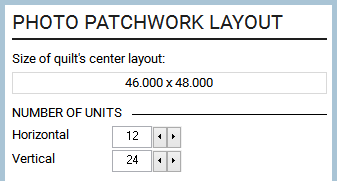
To adjust the layout, click the LAYOUT tab.
![]()
Use the arrows to set the number of patches horizontally and vertically. It’s important to remember that the shape of the patch plays a significant role in determining how the patches are counted.
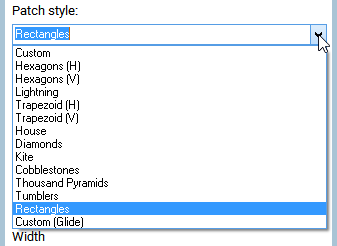
There are 14 patch styles to choose from including two custom styles. Click the down arrow to view the list of styles. Click on the style name to select it.
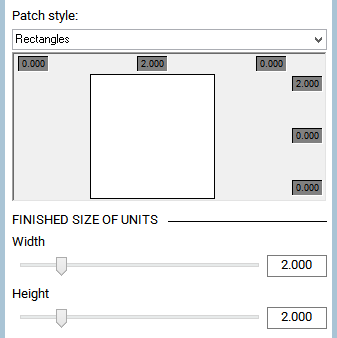
A small sample patch will appear in the palette with the length of each side of the patch indicated. The overall size of the patches can be adjusted using the slider bar. Some patch styles allow adjustment to width and height separately.
To start designing a Photo Patchwork quilt, select the Import Photo tool in the palette of the DESIGN tab.