

Note: Facebook required that we change the way the Share to Facebook feature works in Electric Quilt software. Therefore, some printed instructions may no longer be accurate. Use this page for the most up-to-date instructions. Please be sure your EQ8 is running at least version 1.0.5.0 (Windows) or 3.0.5.0 (Mac) to use this updated feature. Learn how to update EQ8 here >
Exporting to Facebook
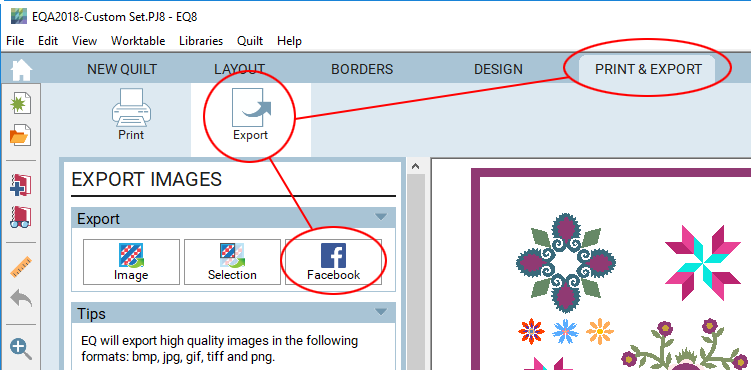
- On the Quilt Worktable, click the PRINT & EXPORT tab and then Export on the ribbon. Click Facebook in the palette.
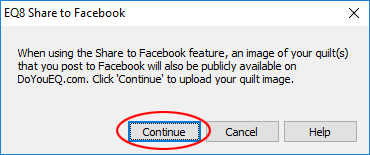
- The first time you use this feature, you will see this message. This is to let you know that when using this feature, an image of your quilt is uploaded to our DoYouEQ.com website. This happens because Facebook cannot use the image of your quilt directly from EQ8 (or EQ Mini) software. Click Continue to allow your image to be uploaded to DoYouEQ.com. You will not see this message again, unless you Restore Default Settings and/or reinstall your software on this computer.
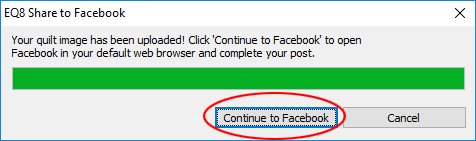
- Next, your image is uploaded to DoYouEQ.com. You will see this message when it is completed. Click Continue to Facebook to create your Facebook post.
- Facebook will open in your default web browser. If you are not logged into Facebook, you will be prompted to do so. Once logged in, you will see this screen. Type a message to go along with your quilt, or leave it blank. It’s up to you what you put here. EQ software automatically adds the #EQ8 to every post. You can delete that hashtag by clicking the X. (But we’d love if you’d leave it on!) You can also add your own hashtags, tag friends, etc. like you would on a regular Facebook post.
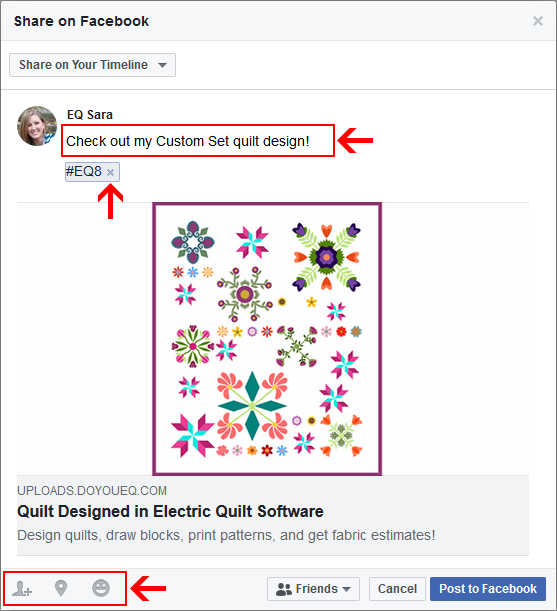
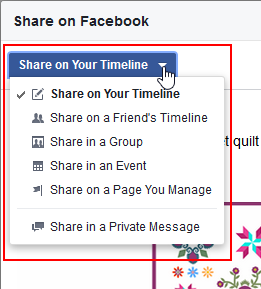
- Decide where you want to share your quilt image. Most users will only use the default Share on Your Timeline option. This posts the quilt directly to your Facebook page and will show up in your Friends’ Facebook feeds. Use the additional options to post your quilt image to different Groups, Pages, etc.
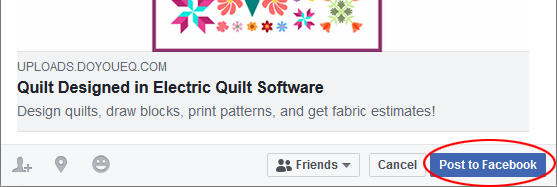
- When you’re ready to post your quilt image, click Post to Facebook.
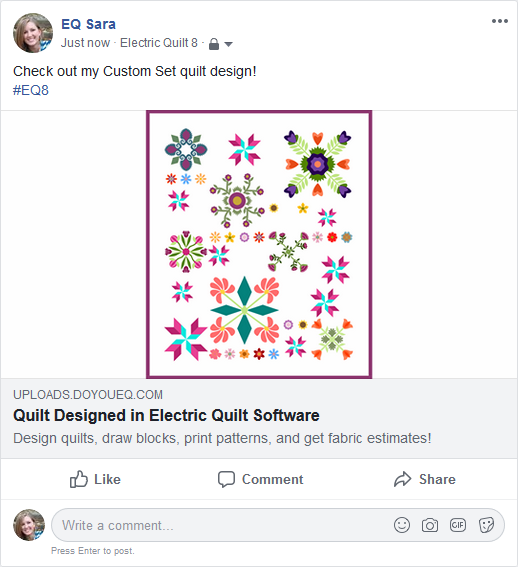
- Success! Go to your Facebook page to see your post. Your friends will see this in their Facebook feeds and hopefully they will Like and Comment on it!
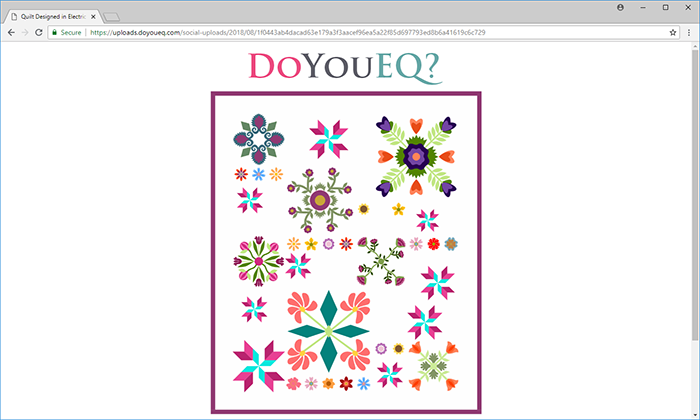
- To view the quilt larger, simply click on the quilt in the Facebook post. A larger image of your quilt will display in a new tab, like below.
Note: The Export to Facebook option is only available on the Quilt Worktable.
Tip: Before step 1, you need to decide whether or not you want the patch lines of the quilt turned on. What you see on the screen is what will be uploaded for Facebook. Remember, to turn patch lines off, click this button on the left toolbar in EQ8.
![]()


