
Creating custom libraries in the My Favorites section lets you save your favorite items in a library so you can use them anytime you use EQ8. This is a great way to save any of your most frequently used items. This article explains how to create a My Favorite Photos library but you can also create custom libraries full of Blocks, Fabrics, Layouts, Embroideries, and Threads.
Creating a Custom Library
- Click Libraries > Photo Library
- Click My Favorite Photos at the top-left of the dialog box.
- Click Create Library at the bottom-left of the dialog box.

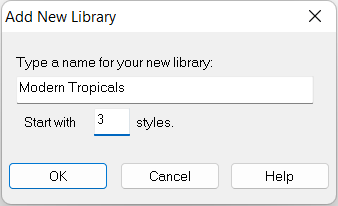
- The Add New Library dialog box will display.

- Type a name for the library. Use a name that will help remind you of the types of items in this category.
For example: Maine Vacation describes the type of photos in the library so it will help to differentiate between different libraries. - Enter a number for how many styles (sub-categories) you will have under the main library or category. You can always add more styles later.
In this example there are three styles. Each style can have just a few photos or, hundreds. - Click OK. The new library will be displayed on the left of the dialog box under My Custom Libraries.
- Click the plus (+) sign next to the new library to display the styles.


Changing the Name of a Library

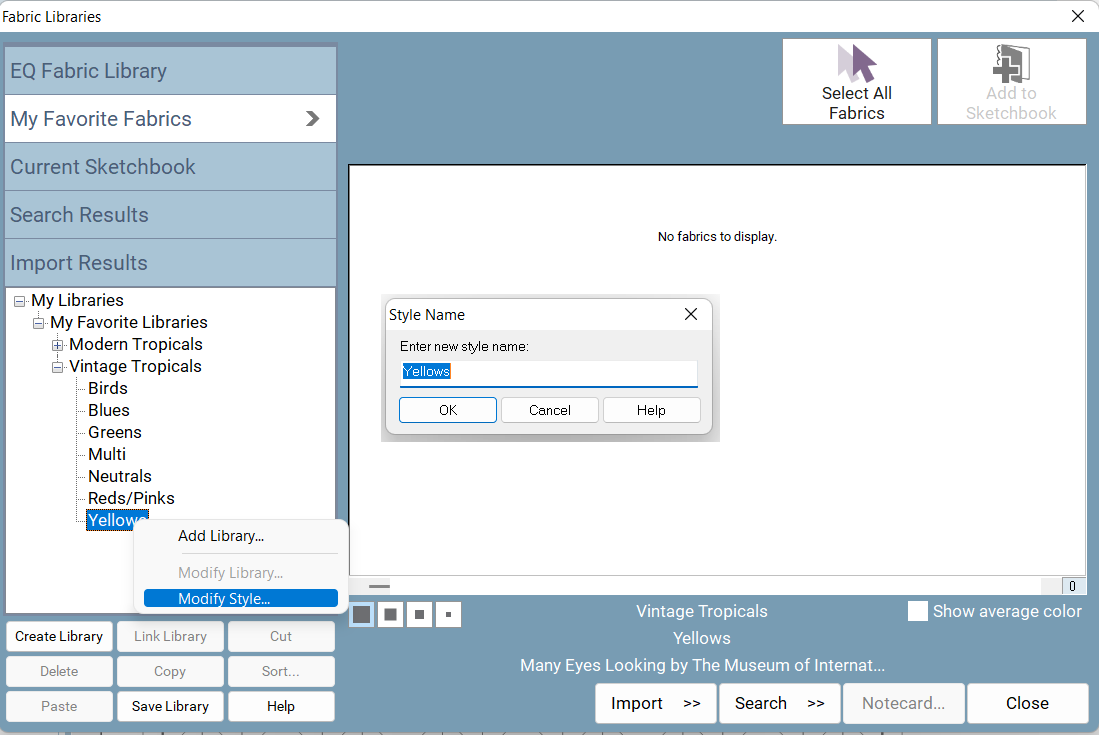
Changing the Name of a Style

Changing the Number of Styles
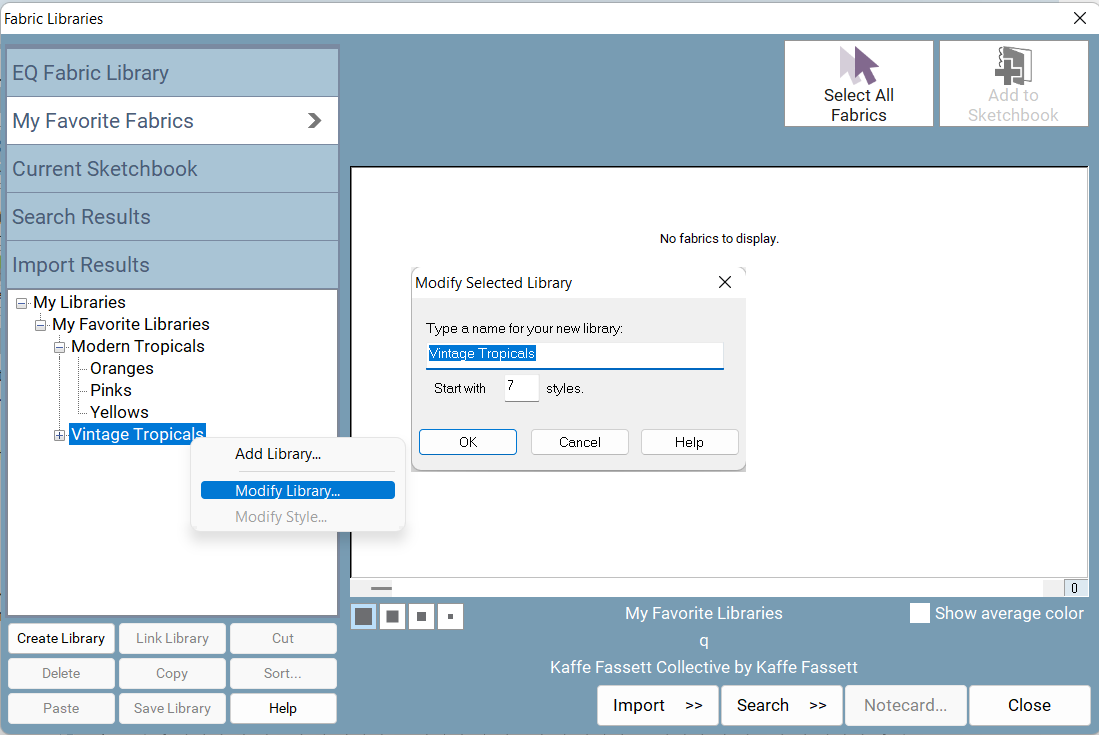
- Right-click on the library name
- Choose Modify Library
- Type a new number under Start with __ Styles
- Click OK


Adding Photos to a Custom Library
One option is to import your own photos.
The other option is to use photos are already in EQ8.
- Navigate to where the photos are from within the Photos Library.
For example, if you’ve imported the photos go to the Import Results section of your Photo Library. (Do not try to copy them from the Project Sketchbook window.)

- Click with your mouse to select the items you want to add to the custom library. The photos will have a blue outline when they are selected.
Hold the Shift key on your keyboard to select a range of items.
Use the the Ctrl/Cmd key on your keyboard to select individual items.
Click the Select All Photos button to select all the items at once. - Click Copy at the bottom of the library dialog box.

- Click the My Favorite section.
- Click the plus (+) sign to open the custom library and to display the styles.
- Click on the style you want the threads in.
- Click the Paste button to paste the items into this style.

- Click Save Library at the bottom of the library dialog box. A prompt will display telling you that your items have been saved in the library.
- Click OK.
- Click Close to close the library.

Depending on the photo you may want it in multiple styles. Repeat steps 3-10 to add it to each different style.


Notes:
You cannot delete a custom library from within EQ8. To delete a custom library, go to the Documents folder on your computer. Double-click to open the My EQ8 folder, then the User folder. The User folder holds all your custom libraries. Find the library you want to delete. Click with your mouse to select it. Right-click and choose Delete, or simply hit the Delete key on your keyboard. The custom library and its styles will be removed from My Library.
Each custom library has a different file extension according to the library it was created in. Here are the types of files you will find in the User folder:
| Block = .BLK
Fabric = .FAB Layout = .QLT |
Photo = .PIX
Thread = .THD Embroidery = .EBR |
Do not use Windows Explorer to rename files. If you want to rename a custom Library file, use the Library dialog.


