

Welcome to EQ8! Let’s get to know this new workspace by designing a quilt together! If you’d like to watch a video of this lesson, you can find it here:
https://support.electricquilt.com/articles/lets-get-started-basic-quilt-design/
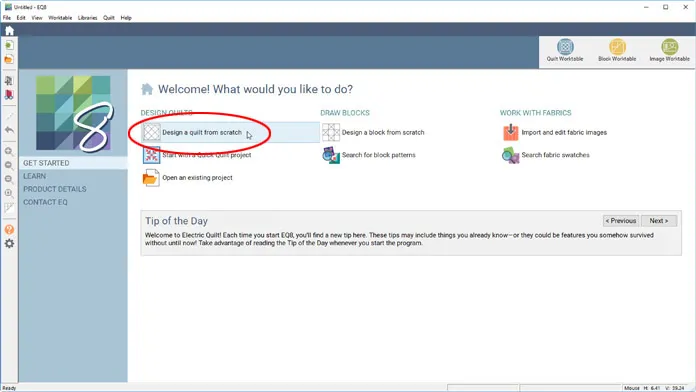
- Open EQ8 and you’ll see the Home Screen. The Home Screen helps direct you to the appropriate worktable for what you’d like to do. We’re going to design a quilt, so click Design a quilt from scratch.
- You’ll be switched to the Quilt Worktable, with the NEW QUILT tab selected. You can choose which layout style you’d like to use in the ribbon. Click on a couple of different styles to read the tips in the palette.
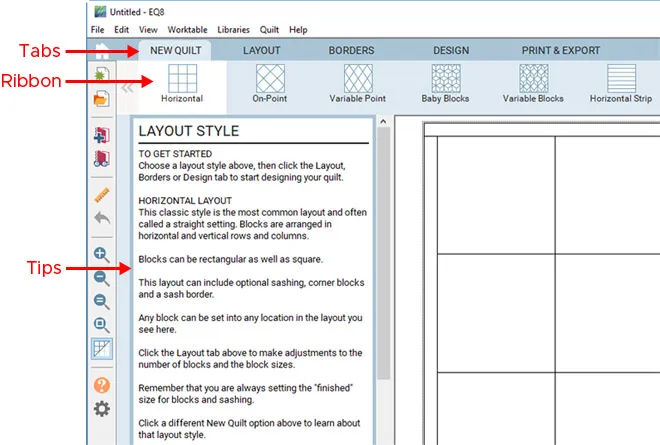
- We’ll stick with the basics in this lesson, so click on Horizontal.
- Click the LAYOUT tab.

- Change the Number of Blocks for both Horizontal and Vertical to 3.
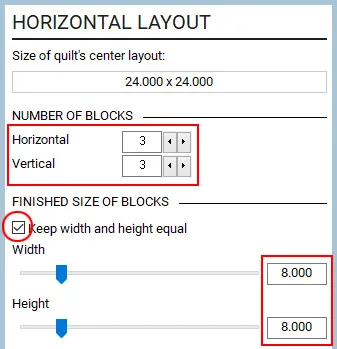
- Put a check in the box next to Keep width and height equal, then change either the Width or Height to 8.000” and the other dimension will automatically change.
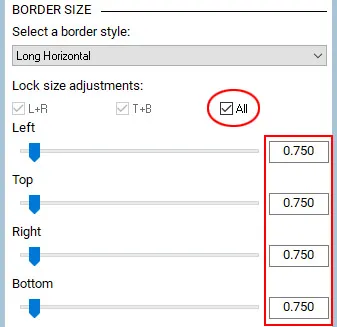
IMPORTANT: In EQ8 you are working in finished sizes (the final size of your block after all the seams have been sewn). EQ8 adds the seam allowance for you when you print the patterns. - Click the BORDERS tab. You’ll see the border styles in the ribbon. Use the double arrows on the ribbon to see all the styles.

- We’ll stick with Long Horizontal for the first border. Under Lock size adjustments, make sure there is a check next to All. Then change one of the sides to 0.75” and the other sides will change.
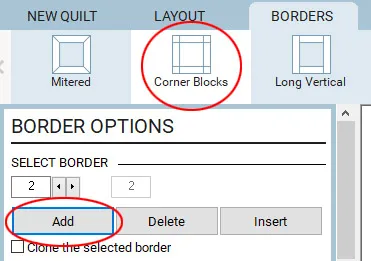
- Click the Add button to add a second border to the quilt. Choose Corner Blocks in the ribbon, and change the size to 2.50”.
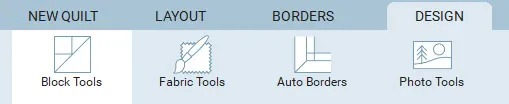
- Click the DESIGN tab and, if it’s not already selected, click Block Tools in the ribbon. Click the Set Block tool in the palette toolbox.
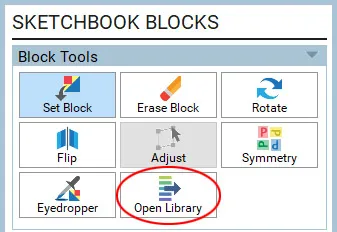
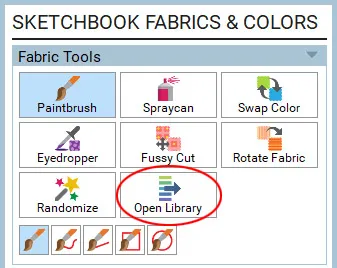
- EQ8 has a handful of standard blocks loaded in the project for you. There are over 6,700 designs in the Block Library, so let’s grab a few other blocks for this quilt design. Click Open Library in the palette.
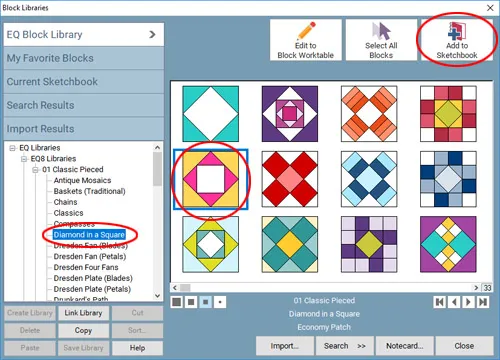
- The Block Library will open. On the left, you’ll see the block categories and styles. If you see a plus sign next to a listing, you can click on it to expand the listing and see more options.
- Under 01 Classic Pieced, click Diamond in a Square. Click on the second block (Economy Patch) in the viewer and then click the Add to Sketchbook button. The block will “disappear” to let you know it’s been added to the Sketchbook. This is only temporary; the next time you visit this section of the library, the block will be back.
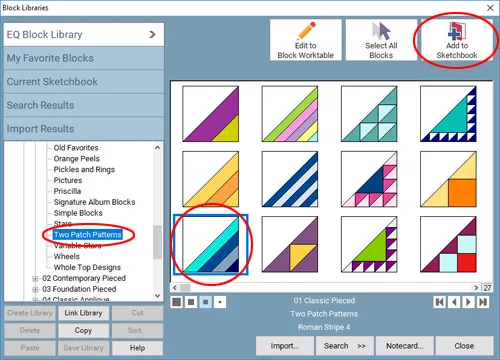
- Click Two Patch Patterns on the left (you’ll need to use the vertical scrollbar to find it). Click on the third block (Roman Stripe 4) to select it and click the Add to Sketchbook button.
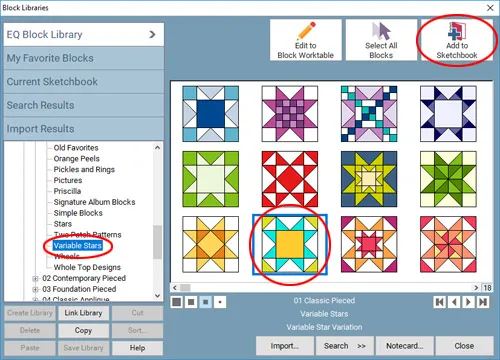
- Click Variable Stars on the left. Click on the sixth block (Variable Star Variation) to select it and click the Add to Sketchbook button.
- Click Close to put the library away.
- Now we’re back to the Quilt Worktable. The new blocks have been added after the default blocks, so drag the scrollbar to the right to see the new blocks in the palette. Click on the Variable Star Variation block to select it.
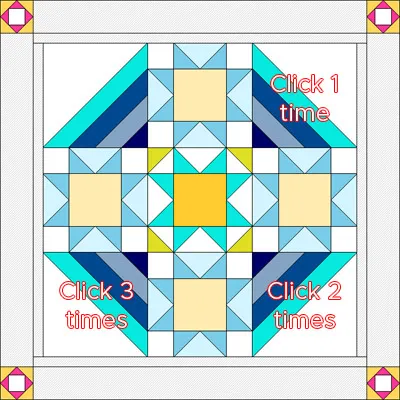
- Click on the center block space in the quilt to set the block.
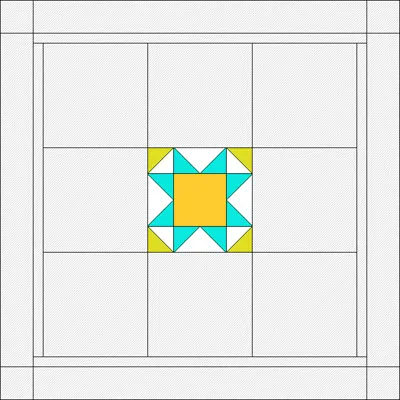
- Click on the Roman Stripe 4 block in the palette to select it. Click on the four corner block spaces in the quilt to set the block.
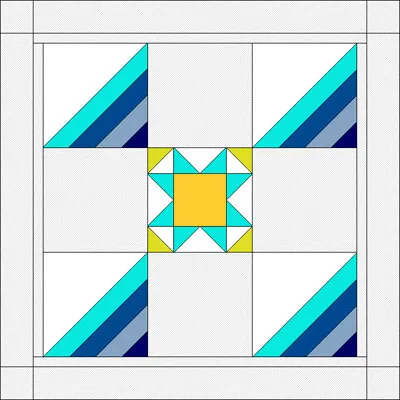
- Use the scrollbar under the Blocks palette to find the EQ Default Variable Star block. Click on the four remaining spaces in the quilt to set this block.
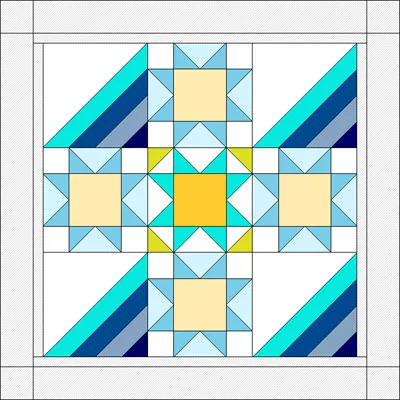
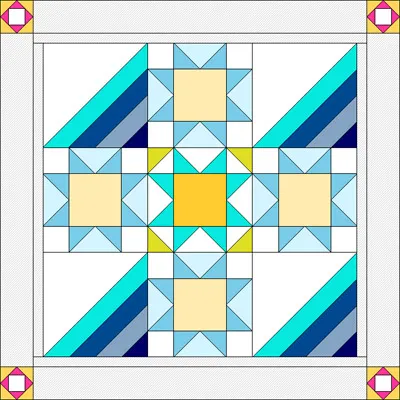
- You can set blocks in border spaces too. Use the scrollbar under the Blocks palette to find the Economy Patch block. Click the four corner spaces in the second border to set the block.
- Let’s get those stripe blocks rotated. Click the Rotate tool.
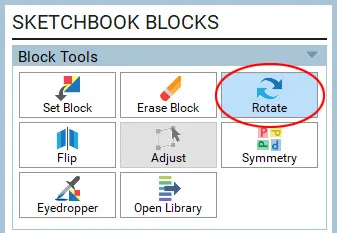
- The block in the top-left corner is oriented correctly. Click once on the top-right block to rotate 90 degrees. Click twice on the bottom-right block to rotate 180 degrees. Click three times on the block in the bottom-left corner to rotate 270 degrees.
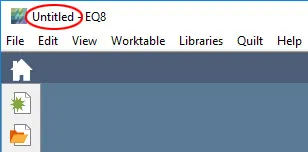
- Let’s save this version of the quilt. But first, take a look at the top of your screen. Notice that it says Untitled – EQ8 (for some users, this will be on the left side of the title bar, for others it will be in the center). When it says Untitled at the top of the screen, it means that you are working in an unsaved project file. If you close EQ8 now (and ignore the warning message that your project has not been saved), all the work you’ve done in the program will be lost.
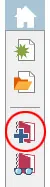
- Click the Add to Project Sketchbook button on the main toolbar.
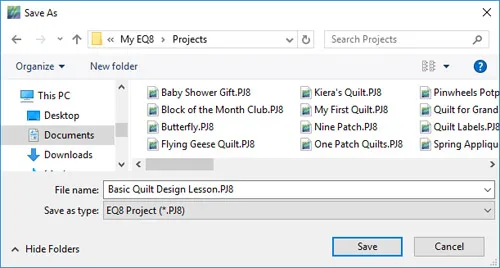
- You’ll see a message explaining that you’re adding the quilt to the Sketchbook, but the project file has not been saved yet (that’s why it says Untitled at the top). Click OK. In the Save As box that appears, type Basic Quilt Design Lesson. Click the Save button to save the project file to your computer.
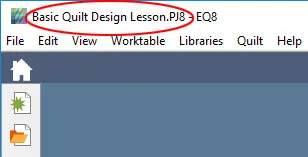
- Look at the top of the screen again. Now it says Basic Quilt Design Lesson.PJ8 – EQ8. So we know this project file is saved, and every time we click the Add to Project Sketchbook button, the item we are adding will be saved in this “named” project file.
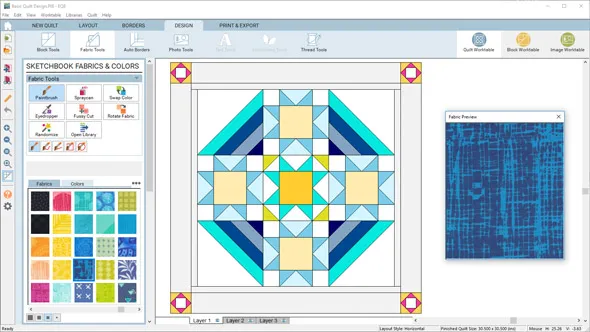
- In the ribbon, click Fabric Tools and click the Paintbrush tool in the palette (if it’s not already selected).
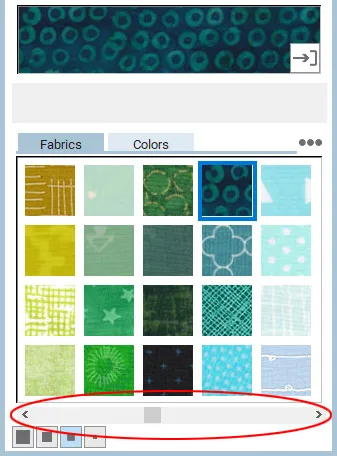
- Drag the scrollbar under the swatches in the palette to browse through the default fabrics that are loaded with every project.
- We can add more fabrics to the project, just like we added more blocks. There are over 6,200 fabrics in the Fabric Library. Click Open Library in the palette toolbox.
- The Fabric Library will open. The Fabric Library has three main categories for the built-in fabrics: Colors, Manufacturer Basics, and Themes. If you see a plus sign next to a listing, you can click on it to expand the listing and see more options. Click on a fabric to select it, then click the Add to Sketchbook button. The fabric will “disappear” to let you know it’s been added to the Sketchbook. This is only temporary; the next time you visit this section of the library, the fabric will be back.
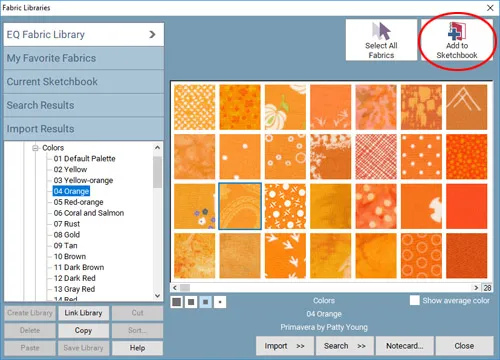
- Browse through the fabrics and add 10-15 new fabrics to your project. Click Close when you’re done.
- The new fabrics have been added after the default fabrics, so drag the scrollbar to the right to see the new fabrics in the palette. Click on a fabric to select it. You’ll see the selected fabric in a larger preview above.
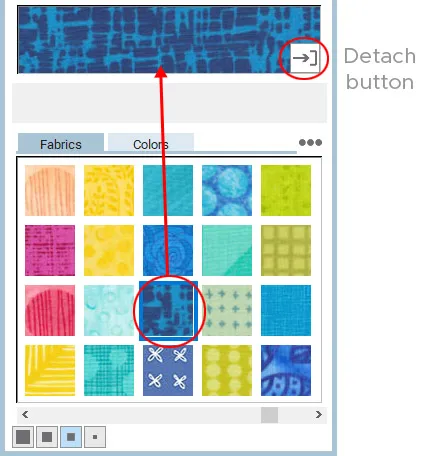
- Click the Detach button on the fabric preview. You can now see the selected fabric swatch in a larger window that “floats” on the worktable. Click on the title bar of the window to drag it to a new location. Hover your mouse over one of the edges or corners of the window until you see a double-headed arrow, then click and drag to make the window larger or smaller.
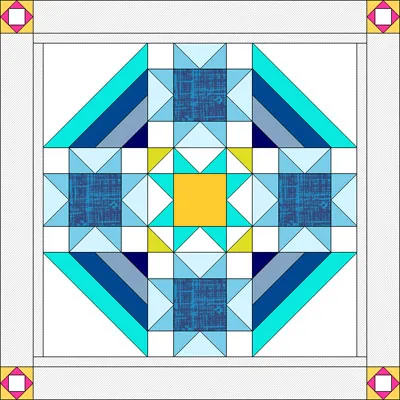
If you’d like the fabric preview back in the palette, click the X at the top of the preview window. - Let’s start coloring this quilt! The Paintbrush tool colors one patch at a time. Click on the large center square of one of the Variable Star blocks to color it with the fabric.
- There are keyboard shortcuts to make coloring faster too. Hold down the CTRL key (Command key) on your keyboard and click on the large center square in a different Variable Star block. This will color the center squares on all the matching blocks. (Remember that the Variable Star in the center is a variation block, so it’s not the same as the four default stars.)
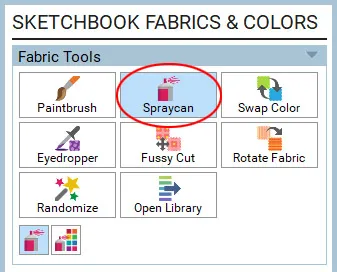
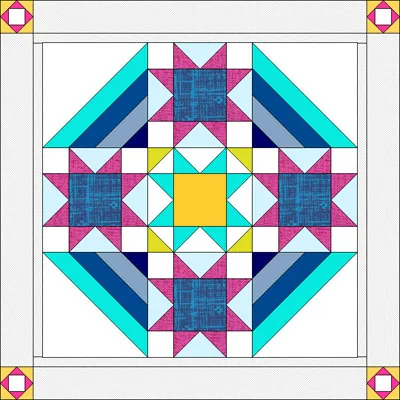
- Click the Spraycan tool. The Spraycan colors all matching patches in a block at the same time. Choose a different fabric in the palette.
- Click one of the star point patches in one of the Variable Star blocks. All the star points in the block will color.

- The CTRL key/Command key shortcut works with the Spraycan too. Hold down the CTRL key (Command key) on your keyboard and click on a star point patch in one of the other Variable Star blocks. All the star points in all the Variable Star blocks will color.
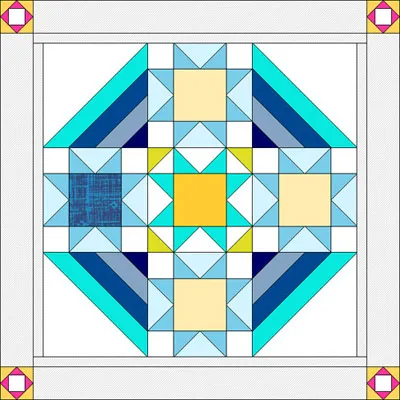
- Color the remaining blocks in the center of the quilt and the borders using the Paintbrush and/or Spraycan tools. If you color the wrong patch, or don’t like the fabric you picked, just pick a different fabric and click on the patch to re-color it.
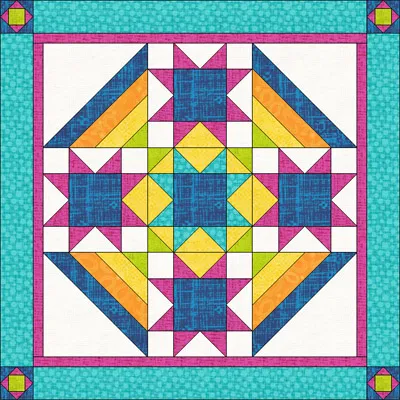
- Click Add to Project Sketchbook.
- Let’s take a quick look at where things go when we add them to the Project Sketchbook. Click the View Project Sketchbook button.

- The Project Sketchbook window opens. Click the Quilts section on the left. You’ll see the last quilt that was added to the sketchbook.
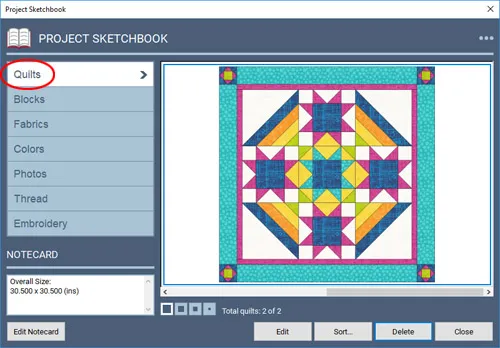
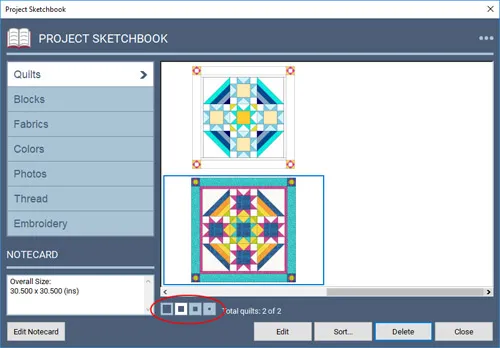
- Notice under the quilts that it says Total quilts: 2 of 2. That means there are currently two quilts saved in this sketchbook. You can use the scrollbar under the quilt to see the others. Or click a display button with a smaller square to see more quilts at once.
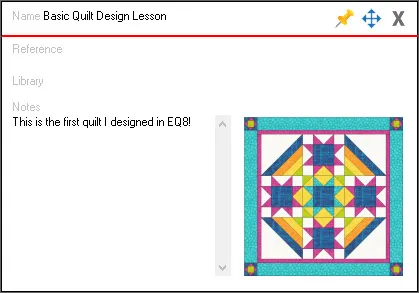
- Every item in EQ8 has a “notecard” where you can name the item and save any design notes. Click on the quilt colored with fabrics to select it, then click the Edit Notecard button in the lower-left corner of the sketchbook.
- On the notecard, type a name for the quilt and any design notes you’d like. When finished, click the X in the upper-right corner to close the notecard.
- Click the Blocks section on the left. The default blocks are first, followed by the blocks added from the Block Library. Drag the scrollbar below the blocks to see more designs.
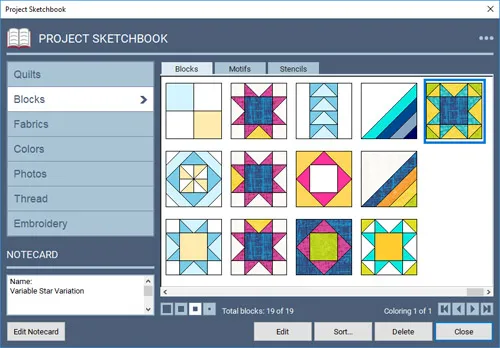
Blocks colorings are saved in “stacks” of 2 so, depending on how you’ve colored your blocks, you may see multiple copies of the same block colored in different ways. - Click Close.
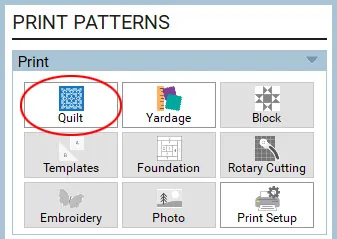
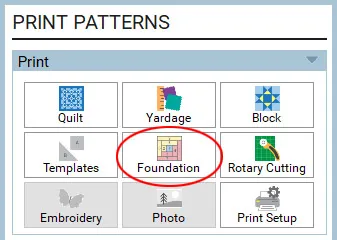
- We’re back on the Quilt Worktable again. Let’s print some patterns for this quilt design. Click the Print & Export tab.

- Until you click on a block in the quilt to select it for printing, you will only see the print options for quilts enabled in the palette. Click Quilt. This option prints a picture of your quilt.
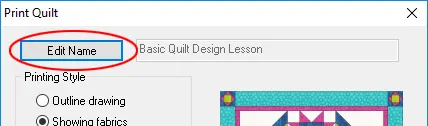
- In the Print Quilt window, you’ll see options to customize your printout on the left. Notice that the name we gave this quilt on the notecard (back in step 44) is shown here. This name appears at the top of the printout. If you’d like to change the name, click Edit Name, type a new name, then click Apply. This will also change the name of the quilt on the notecard.
- Choose the printing style and options you’d like on the left, then click Preview.

- The print preview screen shows you what your printout will look like. If you’d like to make any changes to the options before printing, close the print preview screen, make changes to the options, then Preview again. If you’re happy with the printout, click Print.
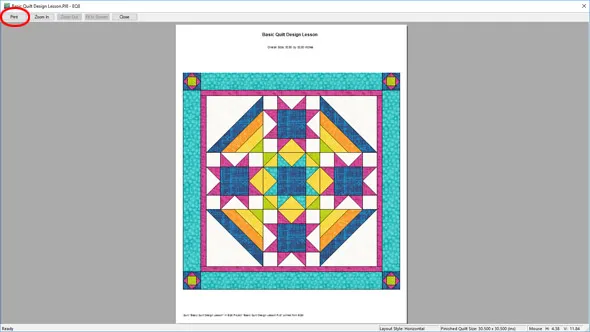
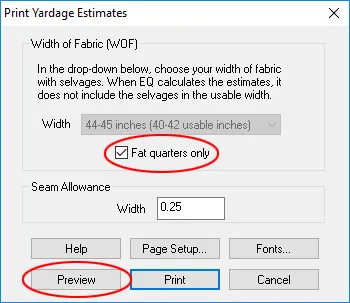
If you don’t want to print at this time, click Close in the print preview, then Close in the Print Quilt window. - Let’s take a look at a fabric yardage estimate. Click Yardage in the palette.
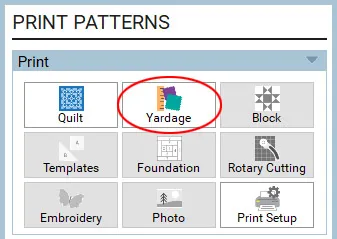
- In the Print Yardage Estimates window, choose the Width of fabric you plan to use. Or click to put a checkmark next to Fat quarters only. Then click Preview.
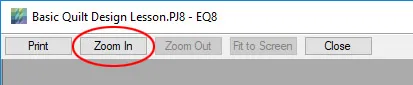
- Again, the print preview screen shows you what your printout will look like. Let’s zoom in and take a closer look. Click Zoom In at the top of the screen.
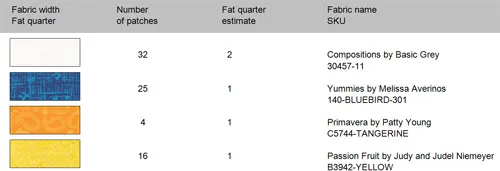
- To zoom in on a section, click and hold down your mouse button as you drag a box around the area you’d like to see closer. When you release the mouse button, the area will zoom.
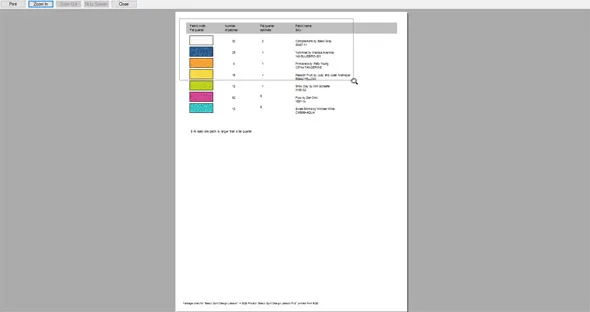
- The yardage estimate will show the fabric, the number of patches in the quilt that use the fabric, the yardage or number of fat quarters needed and the name of the fabric and sku number (as they appear on the notecard). If you’re happy with the printout, click Print.
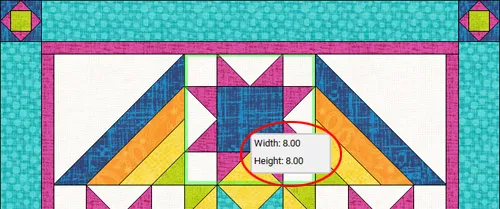
If you don’t want to print at this time, click Close in the print preview, then Cancel in the Print Yardage Estimates window. - To print patterns for the individual blocks, we first need to select the block. Click one of the Variable Star blocks on the quilt. The block will have a green outline and the size of the block will appear. This is the size set for the block spaces on the LAYOUT tab in step 6.
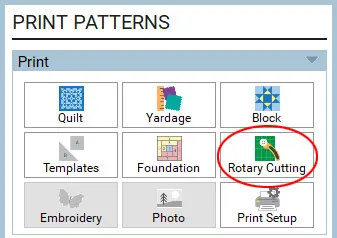
- Now you’ll see that the other printing options are enabled in the palette. Click Rotary Cutting.
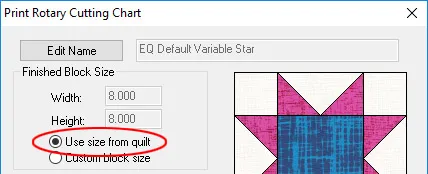
- In the Rotary Cutting window, notice that Use size from quilt is automatically selected under Finished Block Size. This ensures that we’re printing the pattern at the size we choose on the LAYOUT tab.
IMPORTANT: Remember that in EQ8 you are working in finished sizes (the final size of your block after all the seams have been sewn). EQ8 adds the seam allowance for you when you print the patterns. - If you’d like to change any of the other settings for the printout, do so now. To learn more about Rounding in rotary cutting, click here.
- Click the Preview button.

- Here’s the rotary cutting chart for the Variable Star block. Click the Zoom In button and click, hold, and drag a box around the cutting diagrams for patches A-C on the first page.
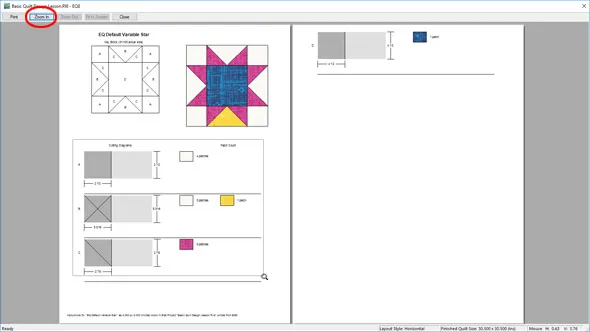
- Let’s talk about how to interpret these diagrams. The patch counts listed beside the fabric swatches are for one block. So, if you are cutting fabric for all four blocks in the quilt, you’ll want to multiply each patch count by four (assuming you’ve colored all four blocks the same way). If you colored your blocks differently than the illustrations, you may see more or fewer swatches beside the cutting diagrams.
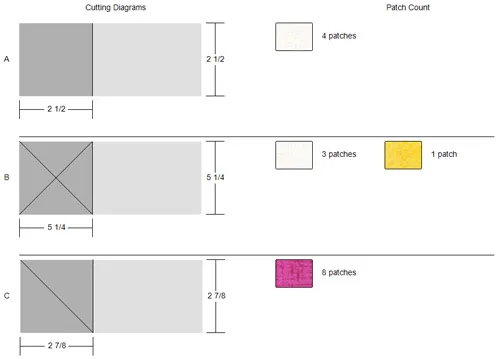
Here’s how to read the diagrams for each patch:
Patch A – Cut a strip of fabric 2.5” wide. Cut 2.5” squares from the strip. You need 4 squares total (again, this is for one Variable Star block).
Patch B – Cut a strip of fabric 5.25” wide. Cut a 5.25” square from the strip. Then sub-cut the square diagonally in both directions to yield four quarter-square triangles. You need 4 triangles total.
Patch C – Cut a strip of fabric 2.875” wide. Cut 2.875” squares from the strip. Then sub-cut the squares diagonally in one direction to make half-square triangles. You need 8 triangles total (so you would cut 4 squares, and cut each in half diagonally to yield 8 triangles).
Patch D (on page 2, not pictured above) – Cut a strip of fabric 4.5” wide. Cut a 4.5” square from the strip. You need 1 square. - Click Print. Or, if you don’t want to print at this time, click Close in the print preview, then Close in the Print Rotary Cutting Chart window.
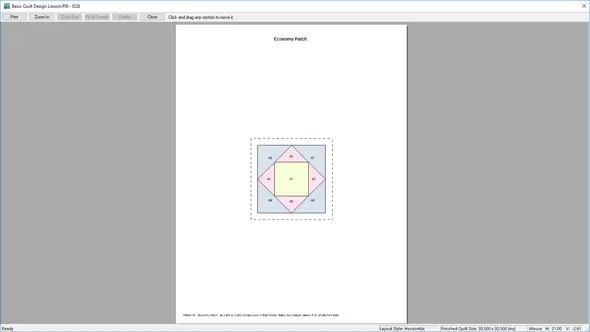
- Let’s take a look at one last printout. Click on one of the Economy Patch blocks in the second border.
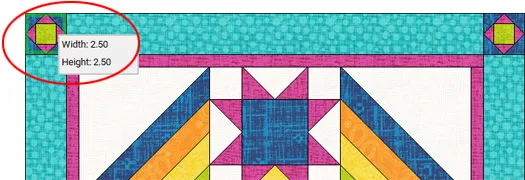
- Click Foundation in the palette.
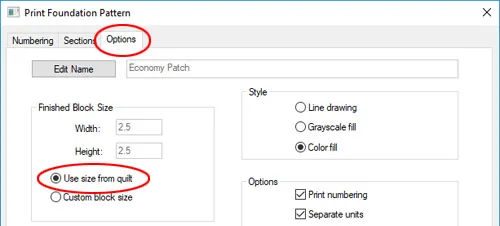
- In the Print Foundation Pattern window, you can change the way a foundation pattern is sectioned and numbered on the Sections and Numbering tabs. Because this is a block from the library, and is already sectioned and numbered appropriately, we’ll go straight to the Options tab.
- Make sure that Use size from quilt is selected under Finished Block Size. For more information about the other options available, click here.
- Click Preview.
- Click Print. Or, if you don’t want to print at this time, click Close in the print preview, then Close in the Print Foundation Pattern window.
- Congratulations! You’ve designed a quilt from scratch and printed patterns so you can start sewing what you’ve designed! If you’re done working in EQ8, you can close the program by clicking the X at the top or clicking File > Exit (PC) or Electric Quilt 8 > Quit Electric Quilt 8 (Mac).


