Want to create SVG files from EQ8 printouts? Start here!
Let’s get to know the basics of using Electric Quilt 8 (EQ8) template printouts with Brother ScanNCut machines.
Brother ScanNCut machines have the ability to scan printouts to create digital cut files. Below are instructions for scanning templates printed from EQ8 into the Brother ScanNCut and then cutting the fabric for your quilt.
If you want to create SVG files from EQ8 PDFs that you can use with Brother CanvasWorks software, follow these instructions instead >>
Scanning and editing an EQ8 PDF in Brother ScanNCut
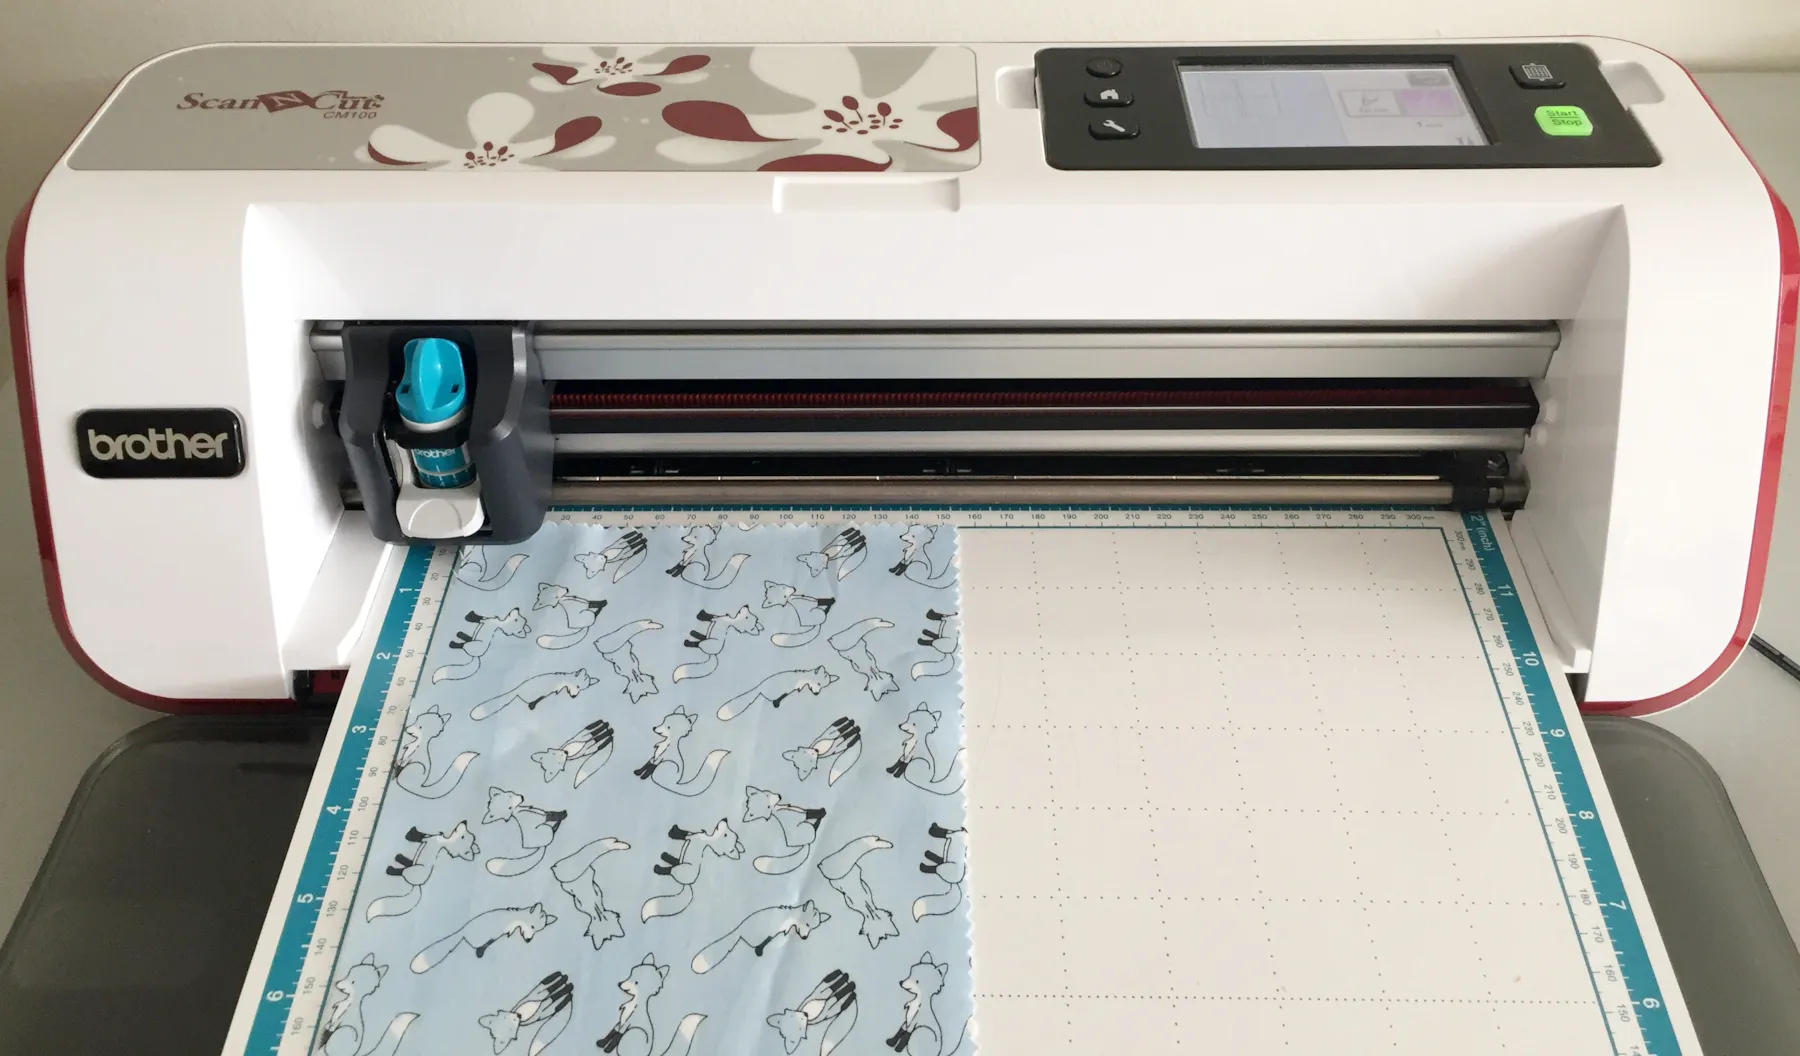
Note: We are using the Brother ScanNCut CM100 for this tutorial. Steps may differ if you have a newer model.
- Follow these instructions to select the block that you want to make and create a printout that is optimized for conversion to SVG >>
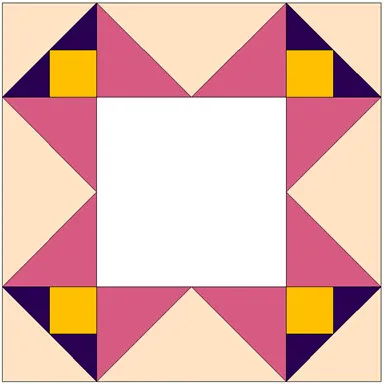
For this lesson, we are using the block Aunt Lee’s Frame, which is one of the 6,000+ blocks that come preloaded in EQ8. You can find this block in the EQ8 Block Library under 02 Contemporary Pieced > Frames. We have printed the templates to make this block at a custom size of 12×12 inches.

- Trim your printouts to remove the tiling lines and the footer. Then place your templates on the Scan and Cut mat. Here we did some extra trimming so that we could fit the template from the second page onto the mat alongside the templates from the first page.

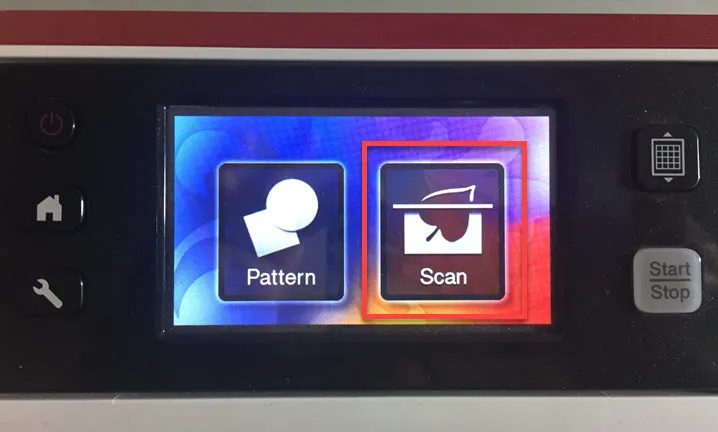
- Turn on your Brother ScanNCut. Press the Home Button on the top of the machine if it does not already open to the Home Page.
- Select Scan on the display screen.
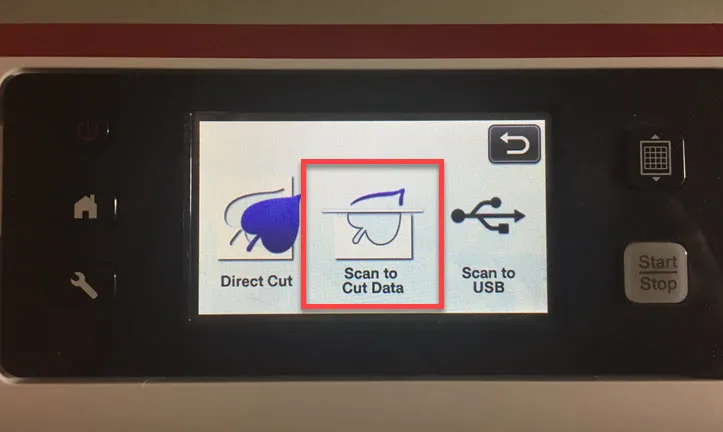
- Select Scan to Cut Data.
- Load the cutting mat into the machine by pressing the grid button next to the screen.
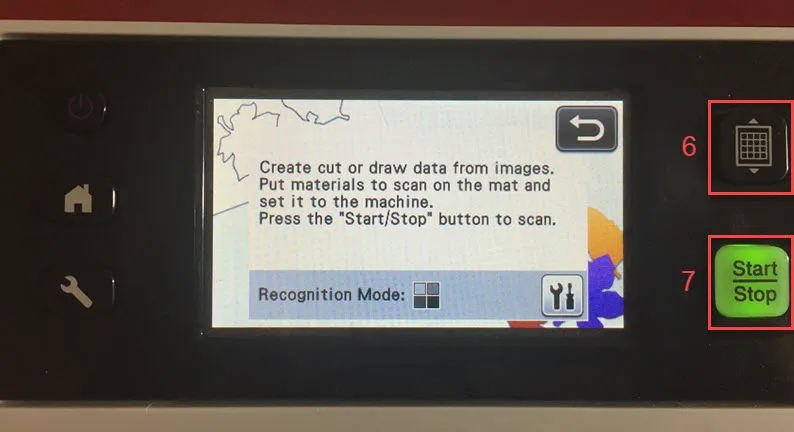
- Press the Start/Stop button next to the screen to begin the scan.
- When the scan is complete, unload the mat by pressing the grid button next to the screen.
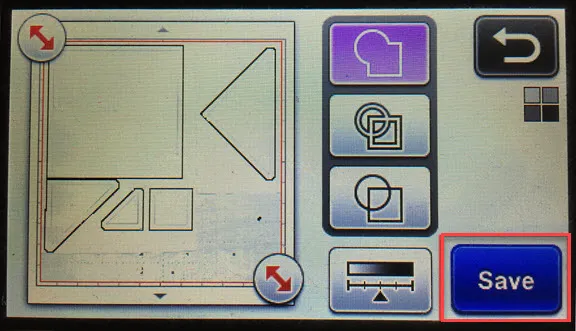
- Select Outline on the display screen to have the machine recognize only the outside edges of the patches as cut lines.

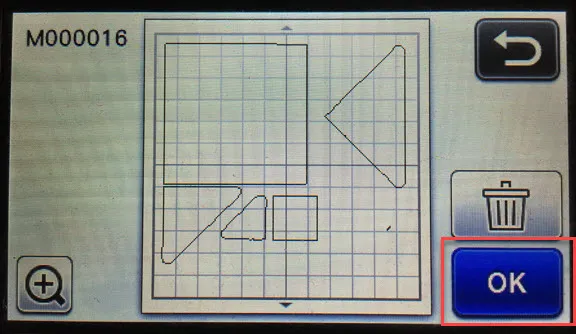
- Press Save.
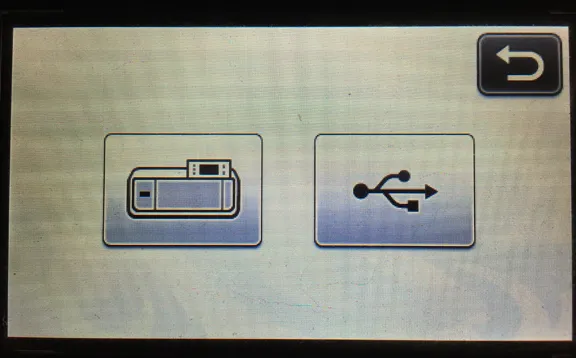
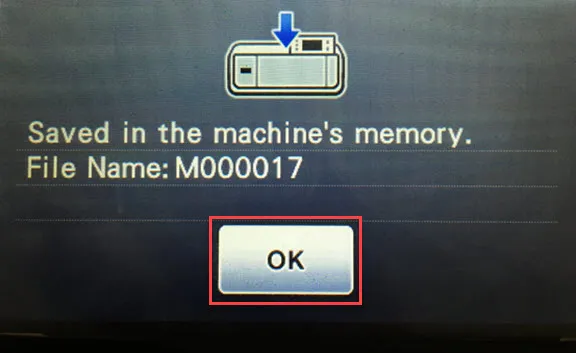
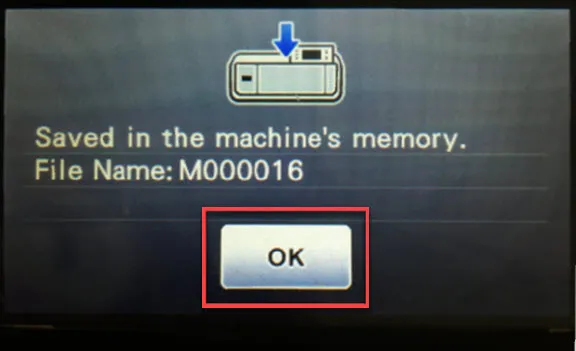
- Select either to machine memory (button on the left) or to USB (button on the right).

- We selected machine memory. The ScanNCut gave the file a default name and number. Press OK on the confirmation screen.
- Go back to the home screen by clicking the Home button next to the screen.
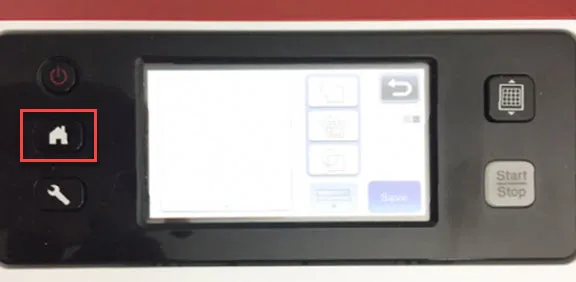
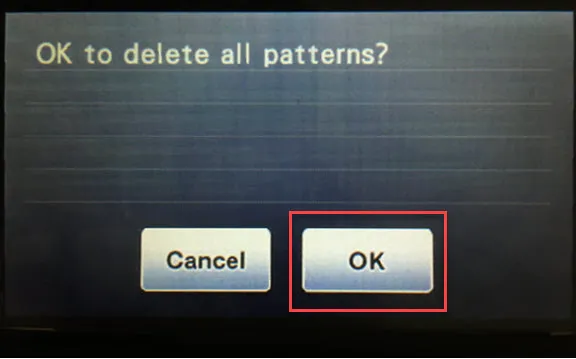
- The ScanNCut will ask “Okay to delete all patterns?” Click OK. This just clears the pattern that you were working on so that you can start a new project. It does not delete the pattern from your machine or USB.
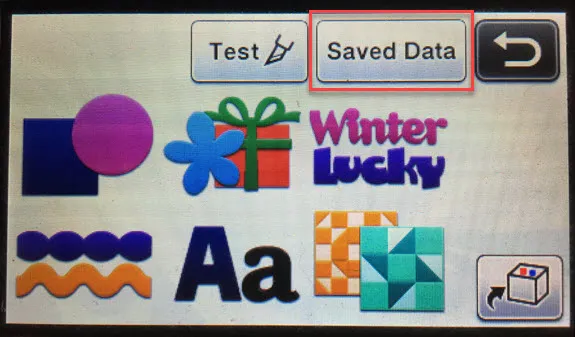
- Select Pattern on the display screen.
- Select Saved Data.
- Select the location where you saved your pattern in step 11, either to the machine or to a USB. We saved to the machine so selected that option.
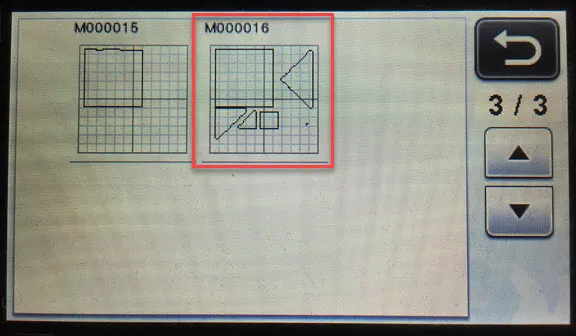
- Scroll through the list of saved files until you find the scan and select it. On our machine it was the last file in the list. If you saved to a USB, navigate to the file location on the USB and select it.

- Press OK on the confirmation screen.

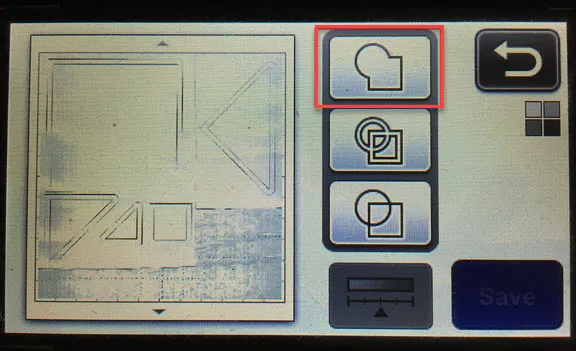
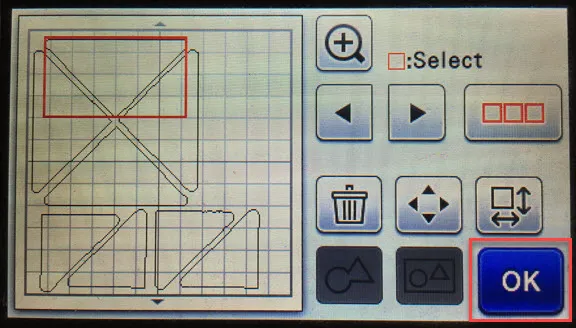
- Select the button in the upper left of the display screen that has a red highlighted square, a black circle and a black triangle. This button lets us make edits to the scan.

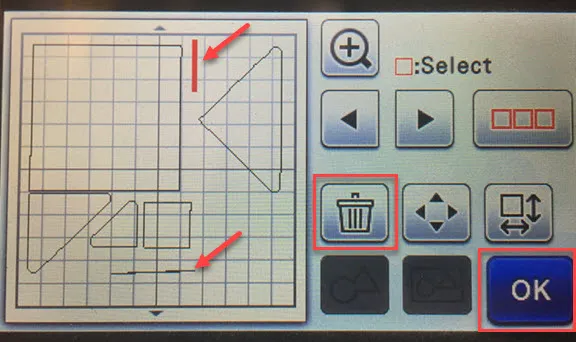
- If you do not have any extra lines or marks, skip to step 24 below. If you have them, delete any extra lines or small dots. These are from the edges of the paper. Highlight the extra lines and dots by clicking on them and then press the trash can. Confirm that you want to delete. When you are done cleaning up the scan click OK to return to the previous screen.
- Click Save. Select where you want to save the cleaned up file. We are saving to the machine again.

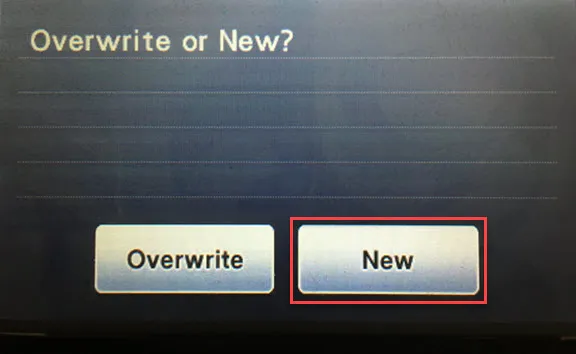
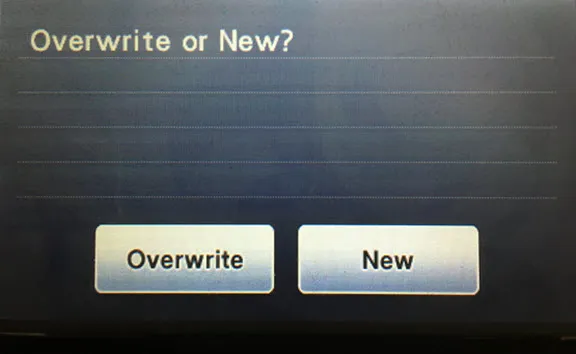
- The ScanNCut will ask if you want to overwrite the file. Select Overwrite since this is just a cleaned up version of the original scan. You can select New if you want to keep both the original and the cleaned up file. The machine will confirm where it saved the file and the name of file. Click OK.
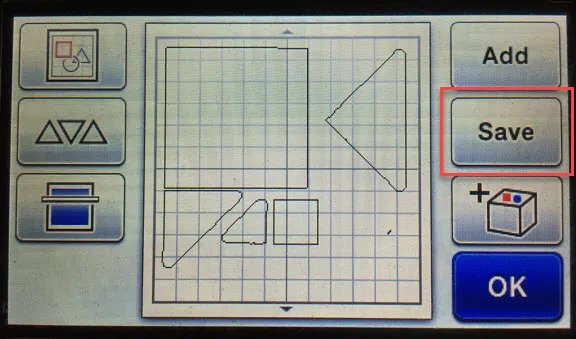
- Now we can edit and save different versions of the scan so that we get the right number of pieces to make a whole block. We will use the coloring suggested by EQ8 as our guide.
- Select the edit tool, with the red highlighted square, a black circle and a black triangle, again.
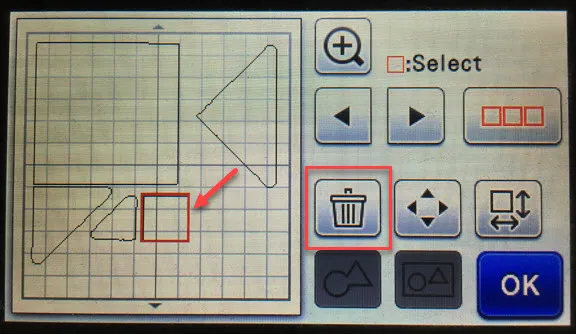
- Delete all of the triangle patches and the small square by selecting them individually, clicking the trash can icon and confirming that you want to delete them. This will leave just the large center block. Click OK.
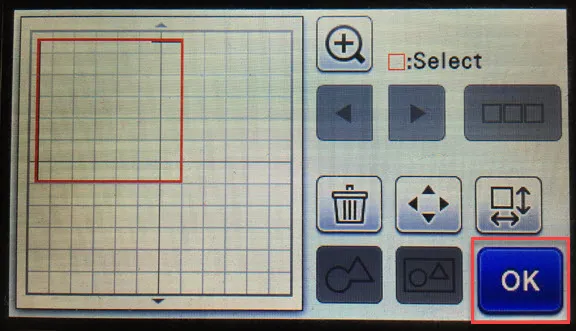
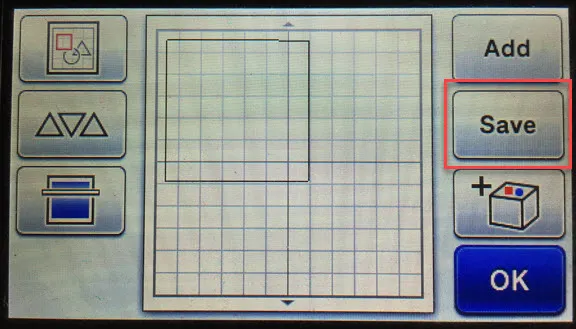
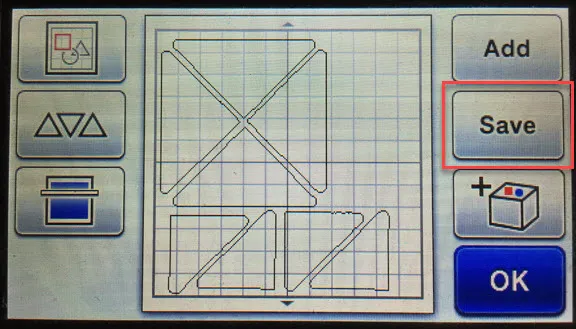
- Click Save.

- Select where you want to save the file. We will continue to save to the machine. Select New file. We want to be able to go back to the original to create the other cut files for the different fabric colors.

- ScanNCut will confirm the save location and the new file name. You may find it helpful to write down which file names go to which projects so you can easily find them on your machine later. Click Ok to go back to the cut screen.

- Select the Cut option.

- Load your fabric for the center patch onto your cutting mat and then press the Grid button next to the screen to load the cutting mat into the machine.
Note: You may need to stabilize your fabric in some way, depending on which version of the ScanNCut you own. Follow ScanNCut’s directions for using fabric with your model for best results.

- Click the Start/Stop button next to the screen to begin cutting.
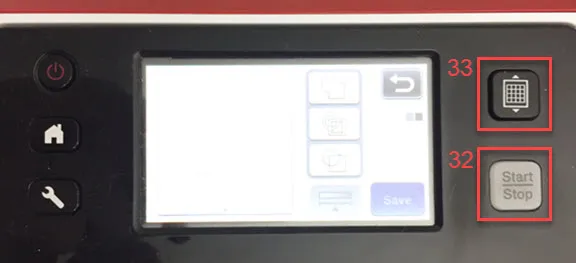
- Click the Grid button next to the screen to unload the mat from machine when it is finished cutting.
- Click the Home button next to the screen. The ScanNCut will ask “Okay to delete all patterns?” Click OK, because we have already saved this file. Again, this does not delete the saved pattern from your machine or USB. It just clears the pattern that you were working on so that you can start a new project.
- Now we will cut the large and medium triangles. Repeat steps #15-19 to find your original saved scan that had all of the templates. Select that file.
- Select the edit tool, with the red highlighted square, a black circle and a black triangle.
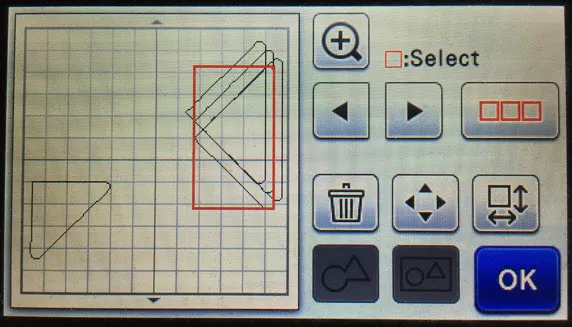
- To create a file with just the large and medium triangles, delete the large square, small square, and smallest triangle by selecting them individually, clicking the trashcan icon, and confirming that you want to delete them.
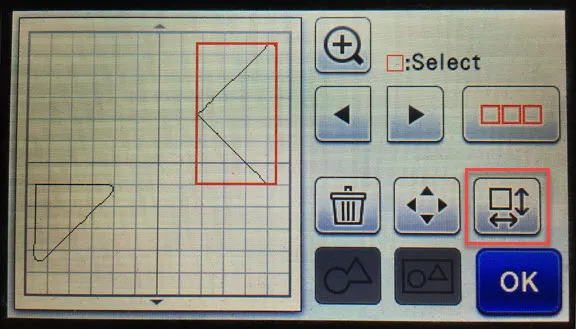
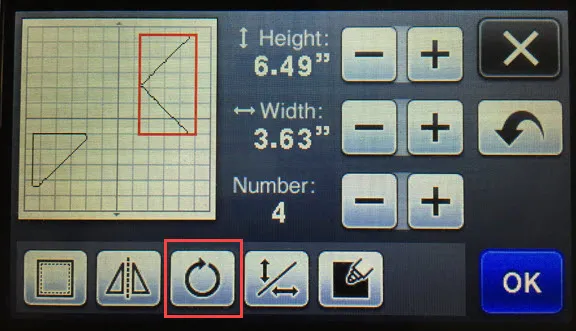
- You will end up with a screen that looks like this. Select the larger triangle. Select the button with the square and vertical and horizontal arrows.

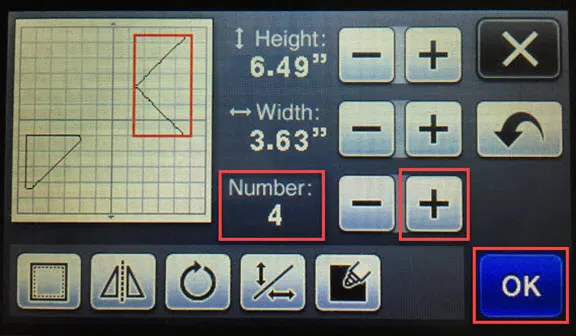
- This screen tells you about the patch and can be used to rotate and edit the pieces. We want to duplicate this patch 4 times so that we have all the pieces we need. Click the + button next to the number until it reads 4. Then click OK. Now you have 4 copies of this patch.

- You can move the patches individually on this screen. Don’t hesitate to use the Zoom button if needed.
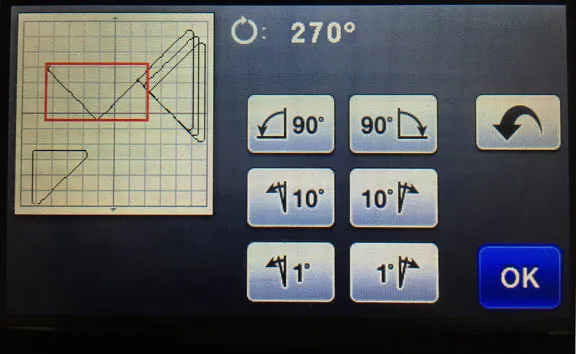
- To rotate a patch, select it and click the square and arrows button again. Click the rotate tool (a circle with an arrow).

- Make sure the patch is far enough away from edges of mat and rotate. If the patch is too close to the edge it may skip rotation options that would force it to be off the cutting mat. You can refine the rotation amount with the three options provided on this screen. The Top buttons rotate the patch in 90 degree increments, the middle buttons rotate in 10 degree increments, and bottom buttons rotate in 1 degree increments. Click OK when you are done rotating and moving the larger triangle patches.
- Repeat steps #38 to 42 for the smaller triangles, again creating 4 of them. Click OK when you are finished editing and moving the patches.

- Click Save. Select where you want to save the file. We will continue to save to the machine. Select New file. We want to be able to go back to the original to create the other cut files for the different fabric colors. ScanNCut will confirm the save location and the new file name.
- Repeat steps #30-33 to cut these shapes from your fabric.
- Repeat steps #34-45 until you have cut files with all the patches and all the colors. You can also save all the files and then go back to cut at a later date.
- Once you have all of your patches cut, sew your block together! Because you have saved all of the files you can easily use or modify these again to make more blocks in different colorways in the future.