Want to create SVG files from EQ8 printouts? Start here!
EQ8 does not directly produce SVG files, but this lesson will help you learn how to convert EQ8’s PDF Template printouts into an SVG file.
SVG (scalable vector graphic) is a unique type of image format. This popular vector file can be imported into many different software applications on the market, including digital cutting machines, embroidery machines, longarm software, and more.
Convert an EQ8 PDF into an SVG File
Note: For this lesson we are using InkScape, a free design software. However, you can also use Adobe Illustrator or any other design software that produces SVG files to do this conversion.
- Follow these instructions to select the block that you want to make and create a PDF that is optimized for conversion to SVG >>
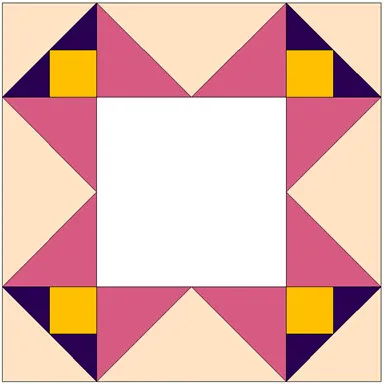
For this lesson, we are using the block Aunt Lee’s Frame, which is one of the 6,000+ blocks that come preloaded in EQ8. You can find this block in the EQ8 Block Library under 02 Contemporary Pieced > Frames. We have printed the templates to make this block at a custom size of 12×12 inches.

- Open Inkscape or your chosen vector producing design program.
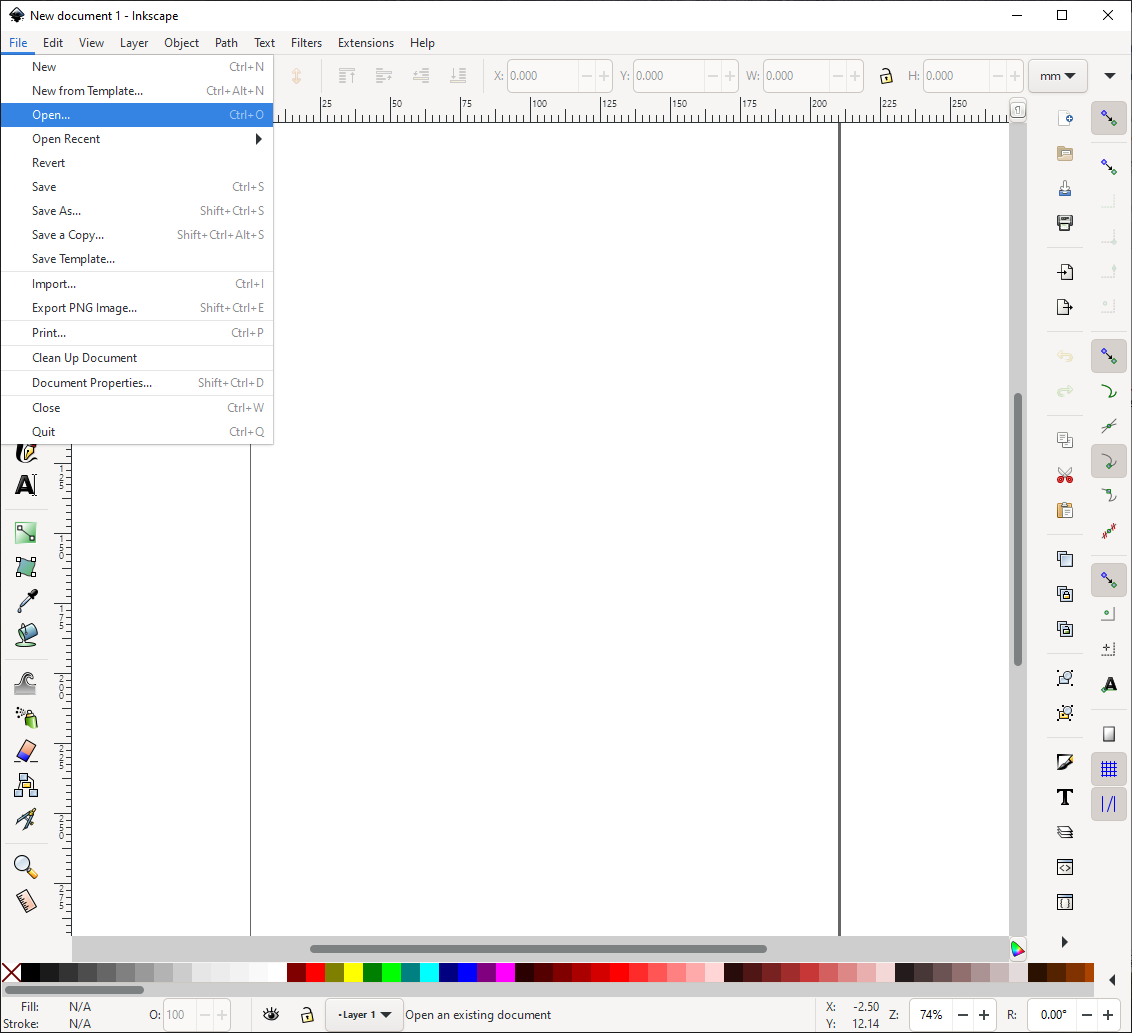
- In Inkscape, go to File > Open. On Mac you will need to first select New Document and then go to File > Open.

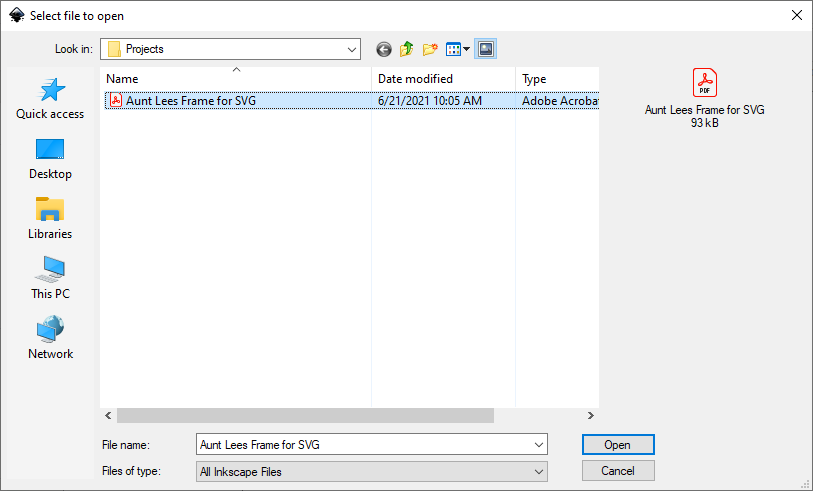
- Navigate to the PDF file you created from EQ8’s print templates option. Click on the file to select it and then click Open.
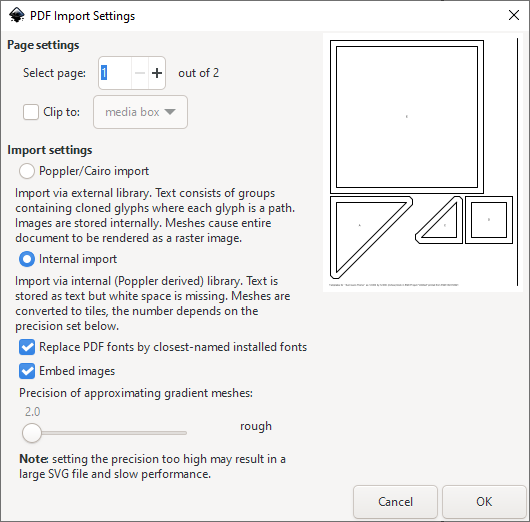
- If your PDF is more than one page the program will ask which page you want to convert. Select page 1. Leave the default settings as shown here and click OK. We’ll return to this step to complete the conversion of the other pages later.

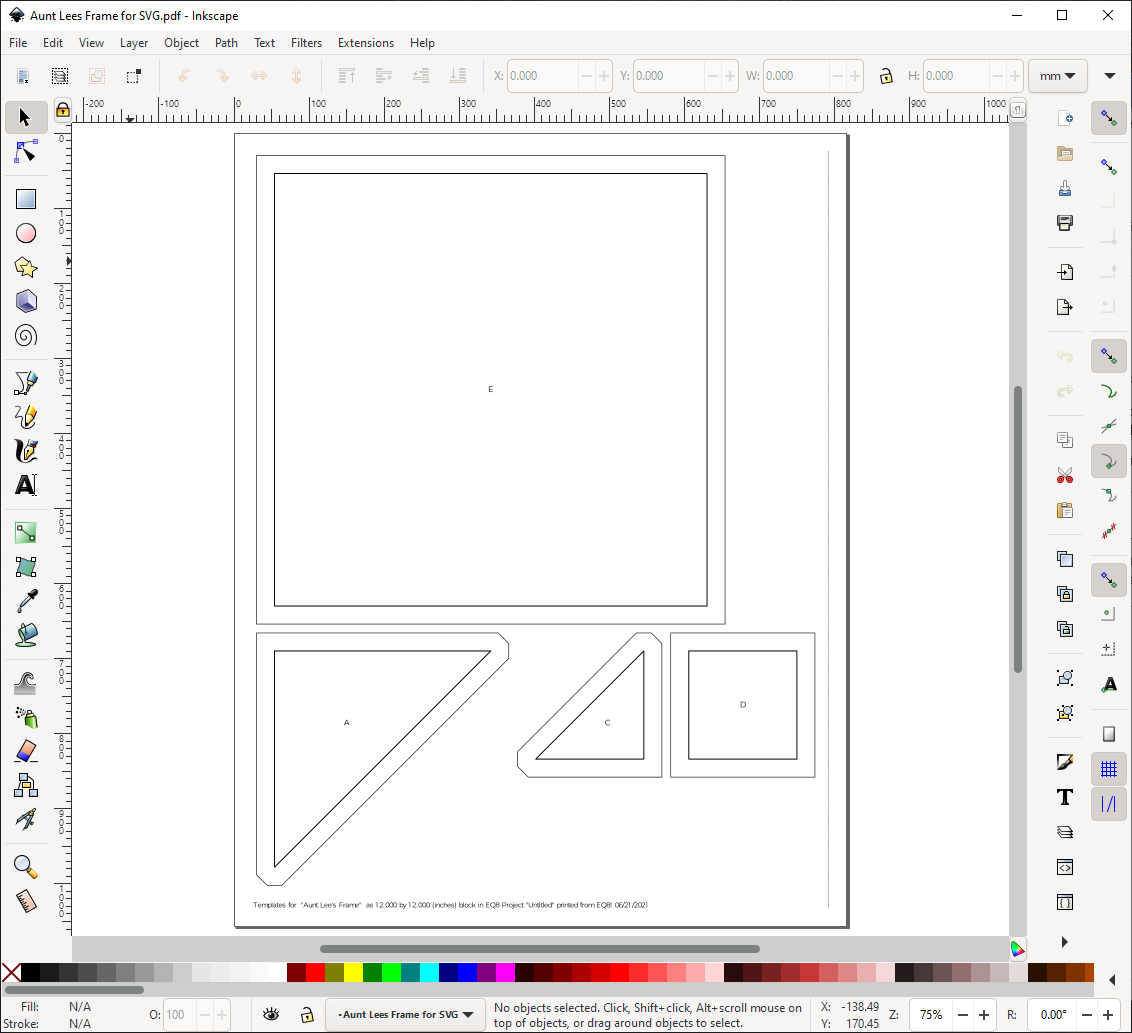
- The first page will open in InkScape. Now we will edit the image to remove unnecessary lines.

- We want to keep only the exterior cut lines of the patch. To delete the extra pieces, select the element by clicking on it and then press the delete key on your keyboard. Delete the footer, text labels on the patches, the tiling line on the right side of the page, and the interior sew lines of the patches. If you did not remove the key block and headings when you first created your PDF you will want to delete those as well. You can click and drag with your mouse to draw a box around multiple elements and select them all at once. This is particularly helpful for deleting the footer. If you accidentally delete something you wanted to keep you can hold down the Ctrl key and type Z (or hold the Command key and type Z on Mac) to undo your error.
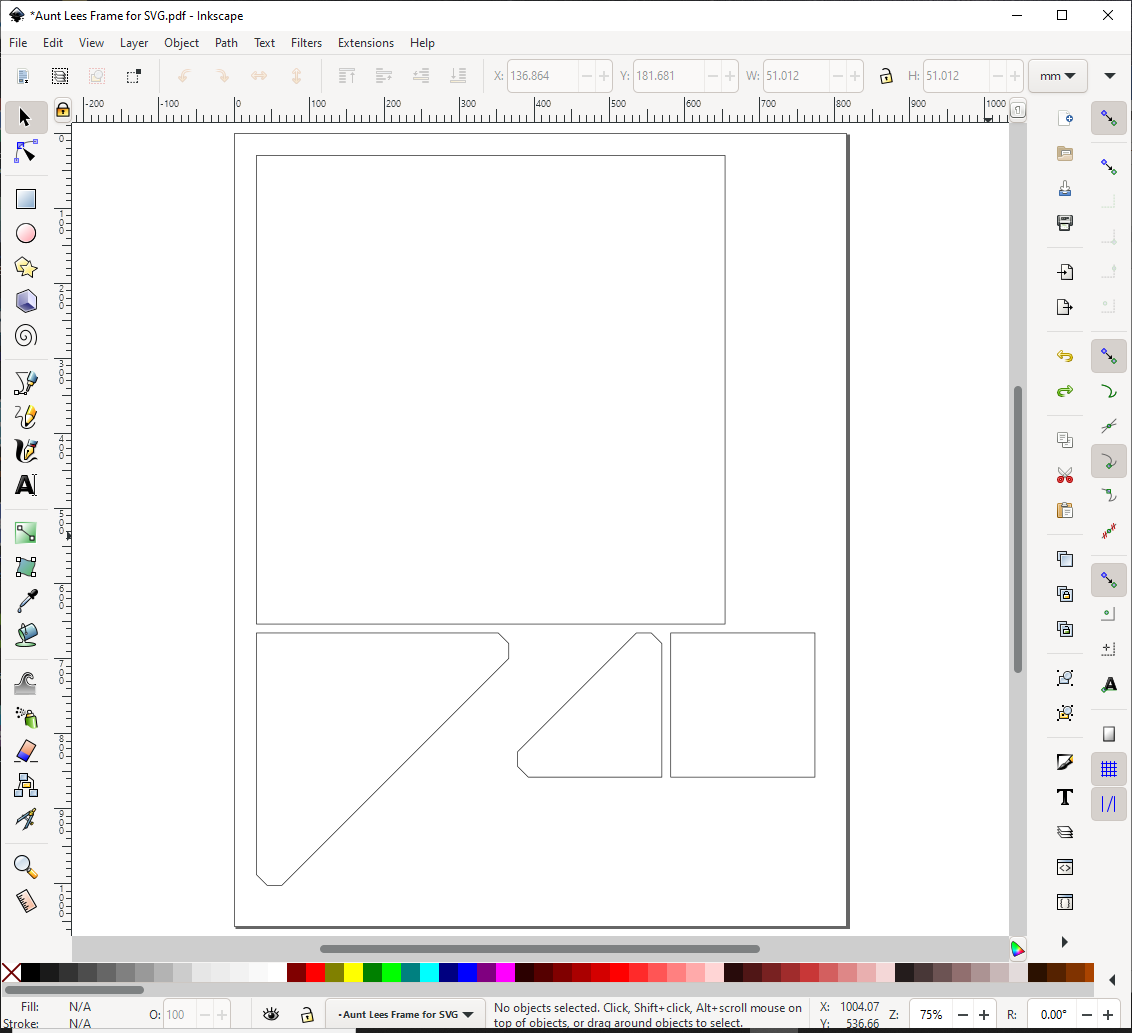
Your page should look like this when you are finished deleting.

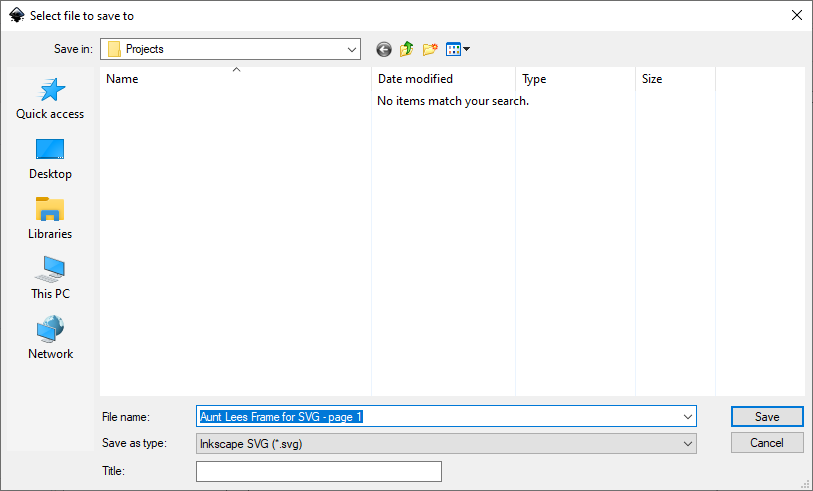
- Now that the file is ready, we will convert it into an SVG file. Go to File > Save As. Select where you want to save the file on your computer. Then in the Save as type: dropdown box select Inkscape SVG (*.svg). Give your file a name and click the Save button. I recommend appending the page number to your file if the original PDF had more than one page.

- Go to File > Close to close the new SVG file. Then repeat steps #3 to 9 for each page in the PDF.
- You can now open your SVG file in your digital cutting machine software or another SVG reading software. If you had to make more than one file for each of the pages, you can usually open and insert multiple images in your SVG reading software and can combine the different pages into one file from there. Duplicate, edit, and modify each patch as you desire for cutting in your SVG reading software.
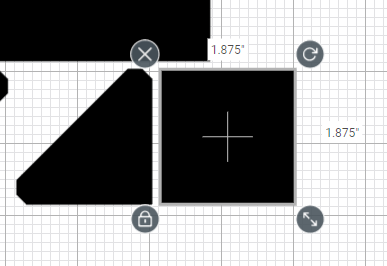
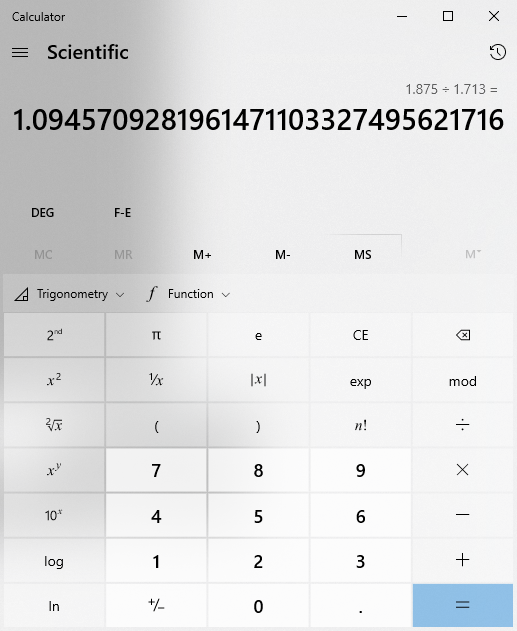
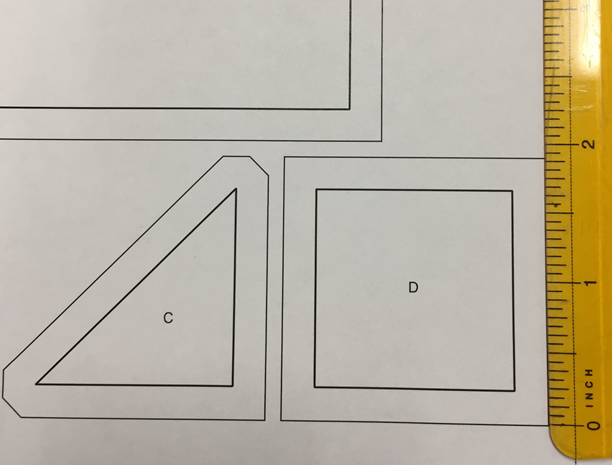
- Note that different SVG reading software may import the SVG files at different sizes due to differences in dpi and scaling. You may need to manually scale all of the pieces in order to have them appear at the correct size. To check the scale of the file in your particular software, first print out a copy of the PDF that you exported from EQ8. Measure one of the patches, preferably a square patch if one is available and note the length of one side. In the below example the patch is 1 7/8 inches or 1.875.
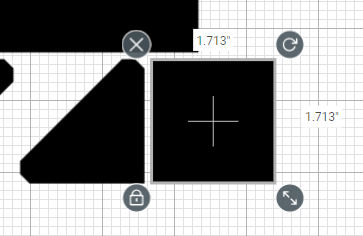
- In your SVG reading software select the same patch and ensure that the cut size shown on the same side matches the measurement from the PDF. If they do match then you can proceed with editing and cutting from the file. If they do not match, make a note of the dimension found in the SVG reading software. In this example we are using Cricut Design Space and you can see that the same square patch is only 1.713″, meaning it is smaller than it should be.
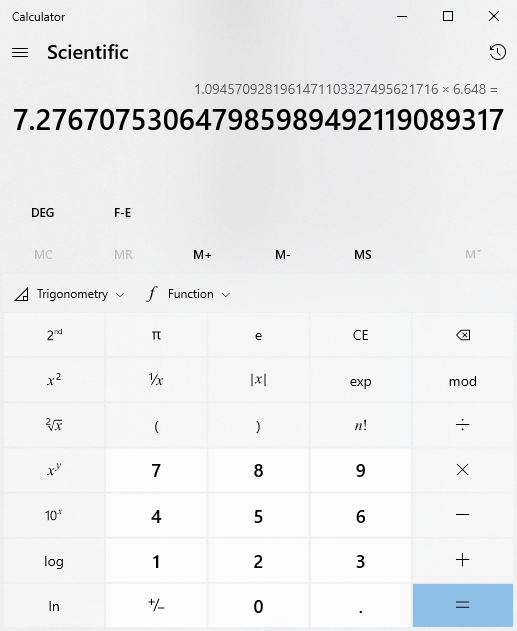
- If the measurements do not match, use a calculator to divide the size of the patch on the PDF by the size of the patch in your SVG reading software. The resulting scale number will be more than 1 if the patch is too small and less than 1 if the patch is too large. In this example we divided the 1.875″ from the measurement we took from the printout by the measurement from Cricut Design Space. The result is 1.095 when you round to three decimal places.

- In your SVG reading software, select all the patches simultaneously and note one of the dimensions for the selected group. In this example we noted the width of all of the selected shapes, which is 6.648″.
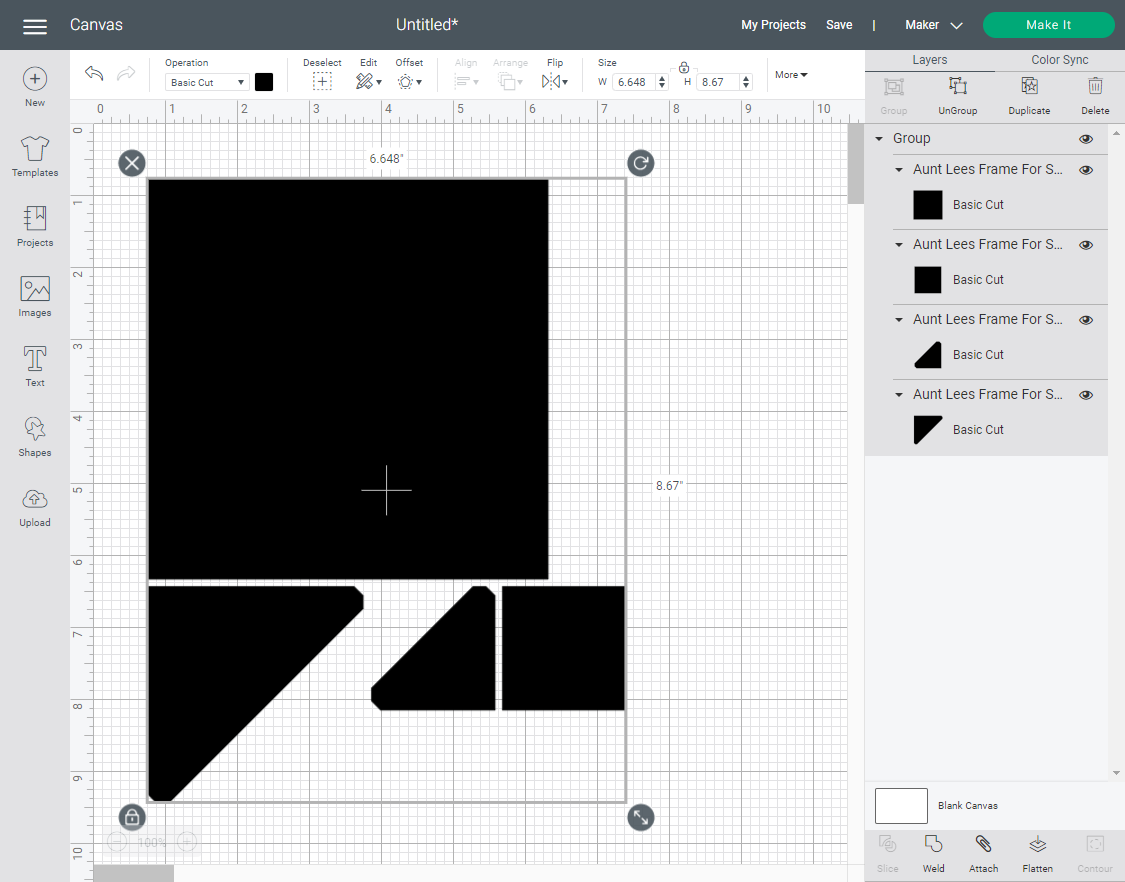
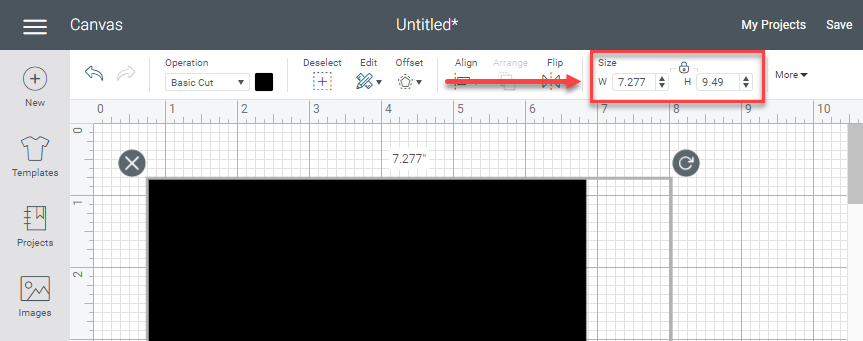
- Multiply this dimension of all of the shapes by the scale number we calculated in step #13 above. Round up or down as needed. In this example we multiplied the scale number we got in step #13 by the 6.648″ width dimension from step #14. The result is 7.277″ rounded to three decimal places.

- Make sure that you have all patches selected and/or grouped and that the aspect ratio lock is on. Then enter the scaled dimension into the field where you can resize your elements in the SVG software. In this example, we have updated the width, the dimension we checked in step #14 with the scaled measurement that we calculated in step #15.

- Ungroup the patches and check the measurements of the patch you selected again to ensure they now match the measurement of the printed PDF. If the measurements match then you can save the updates to your file and proceed with working with the files. If the measurements do not match, first check your math in steps #11 to 16, then close the file without saving and repeat those steps. In this example, we can see that the measurement of the square in Cricut Design Space now matches the measurement we took from the printed PDF.