 BlockBase+
Let’s get to know the basics of using BlockBase+ SVG files in Cricut Design Space.
SVG (scalable vector graphic) is a unique type of image format. This popular vector file can be imported into many different software applications on the market, including digital cutting machines, embroidery machines, longarm software, and more.
NOTE: If you are having issues with sizing in Cricut Design Space, please make sure your version is up-to-date, or version 6.9.163 or newer. Also check step 12 for information on how to correct sizing issues in Cricut Design Space.
- Follow these instructions for exporting SVG files from BlockBase+ >>
SVG files for use in Cricut Design Space should be exported from BlockBase+ with the Resolution option set to 72 dots per inch (dpi).
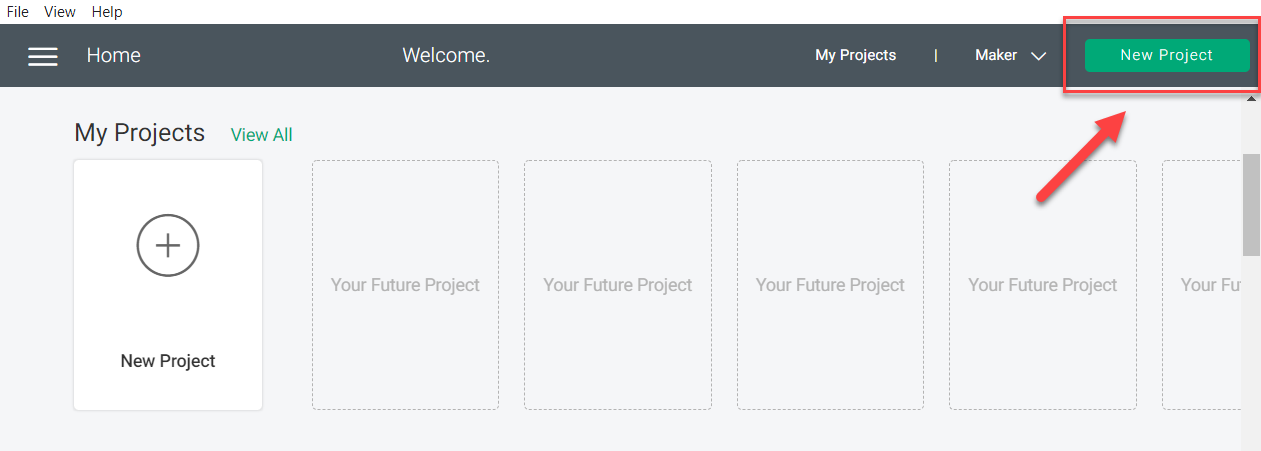
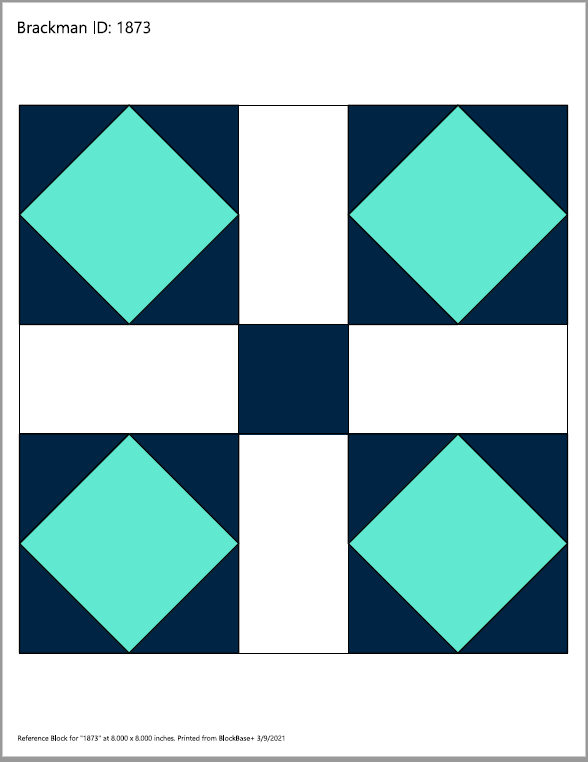
For this lesson, we are using block 1873 which can be found in the 10 Unequal 9 Patch Small Center > 04 Blocks with Unpieced Bars category in BlockBase+. - Open Cricut Design Space, Log In to your account with Cricut, and you will see the Home Screen. Click the green New Project button in the upper right hand corner.
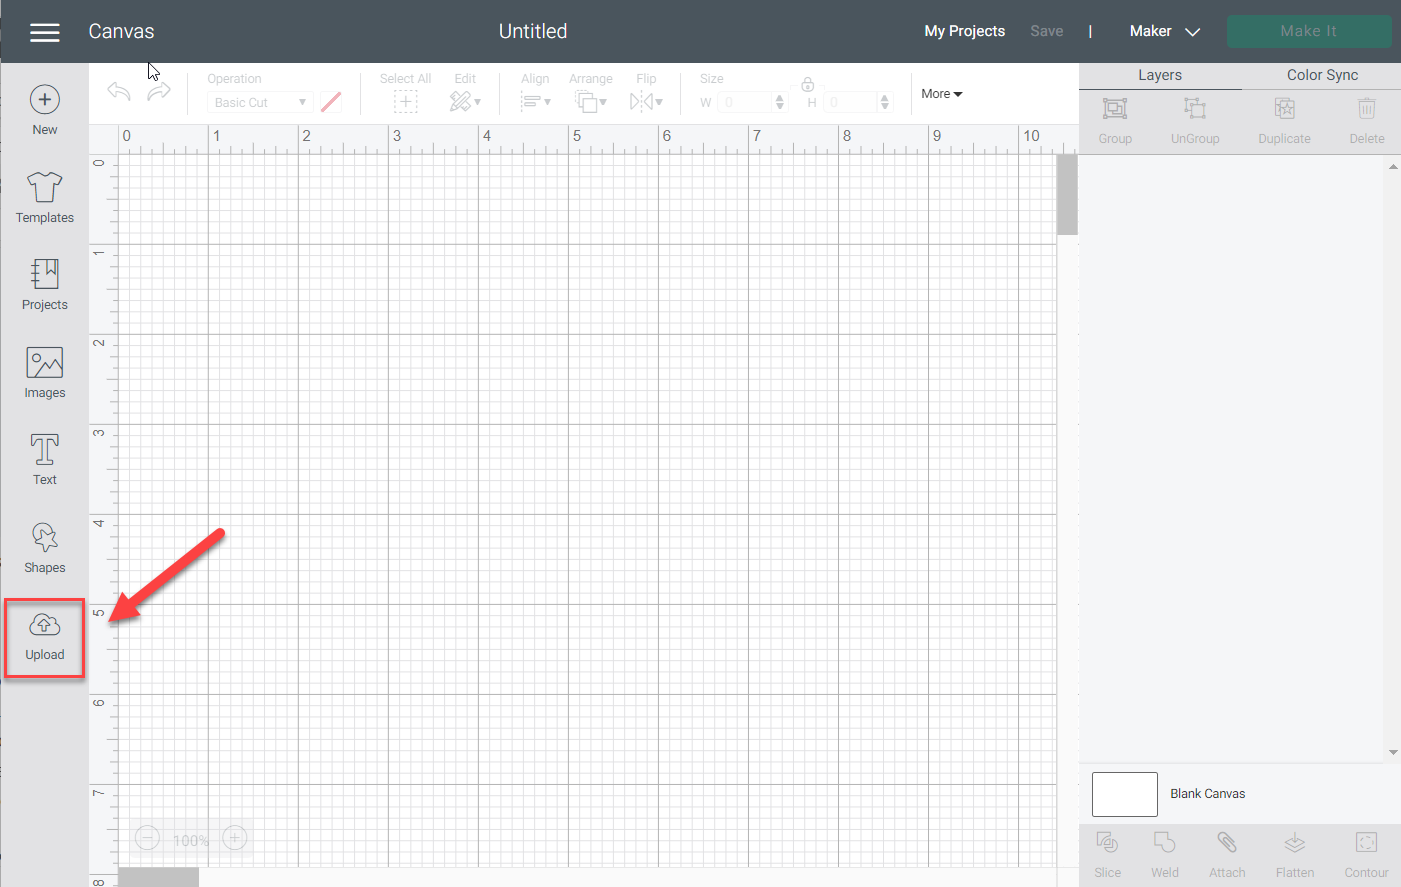
- A blank Canvas Screen will open. Click Upload at the bottom of the toolbar on the left side of the screen.
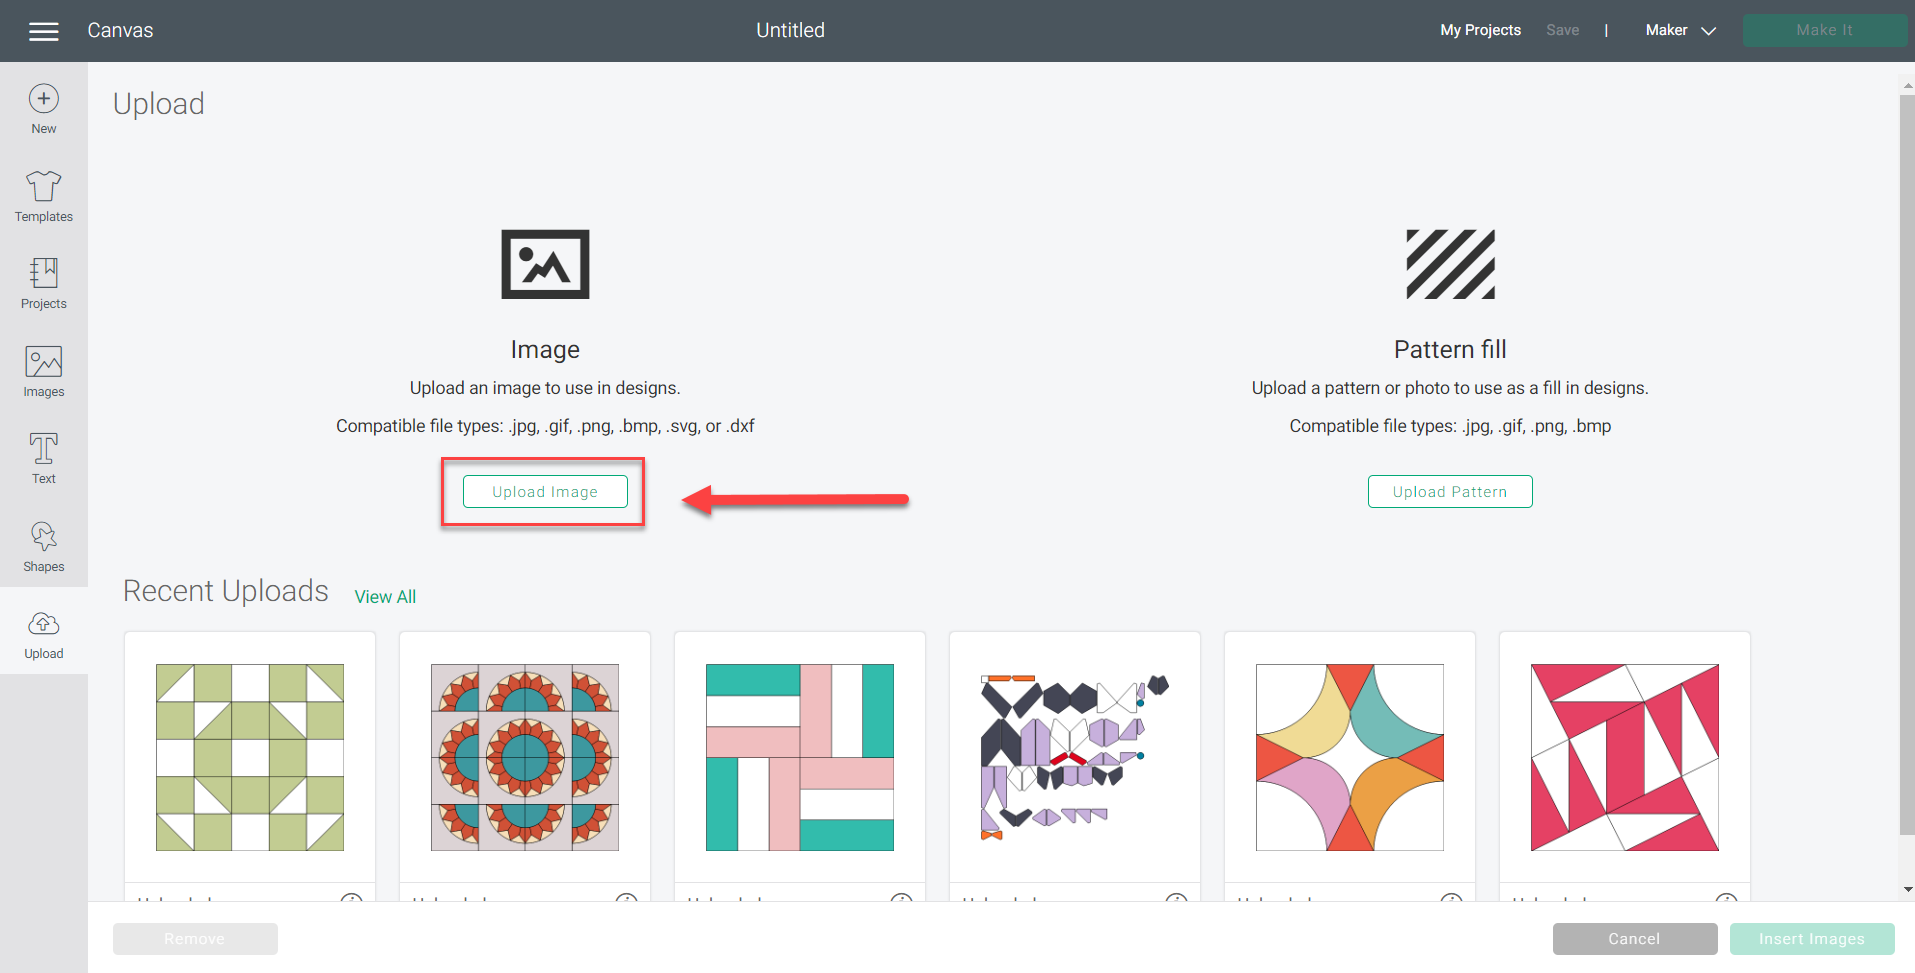
- The Upload Screen will open with options to upload either an Image or a Pattern Fill, as well as showing images of your recent uploads along the bottom. Click the Upload Image button under the list of compatible file types.
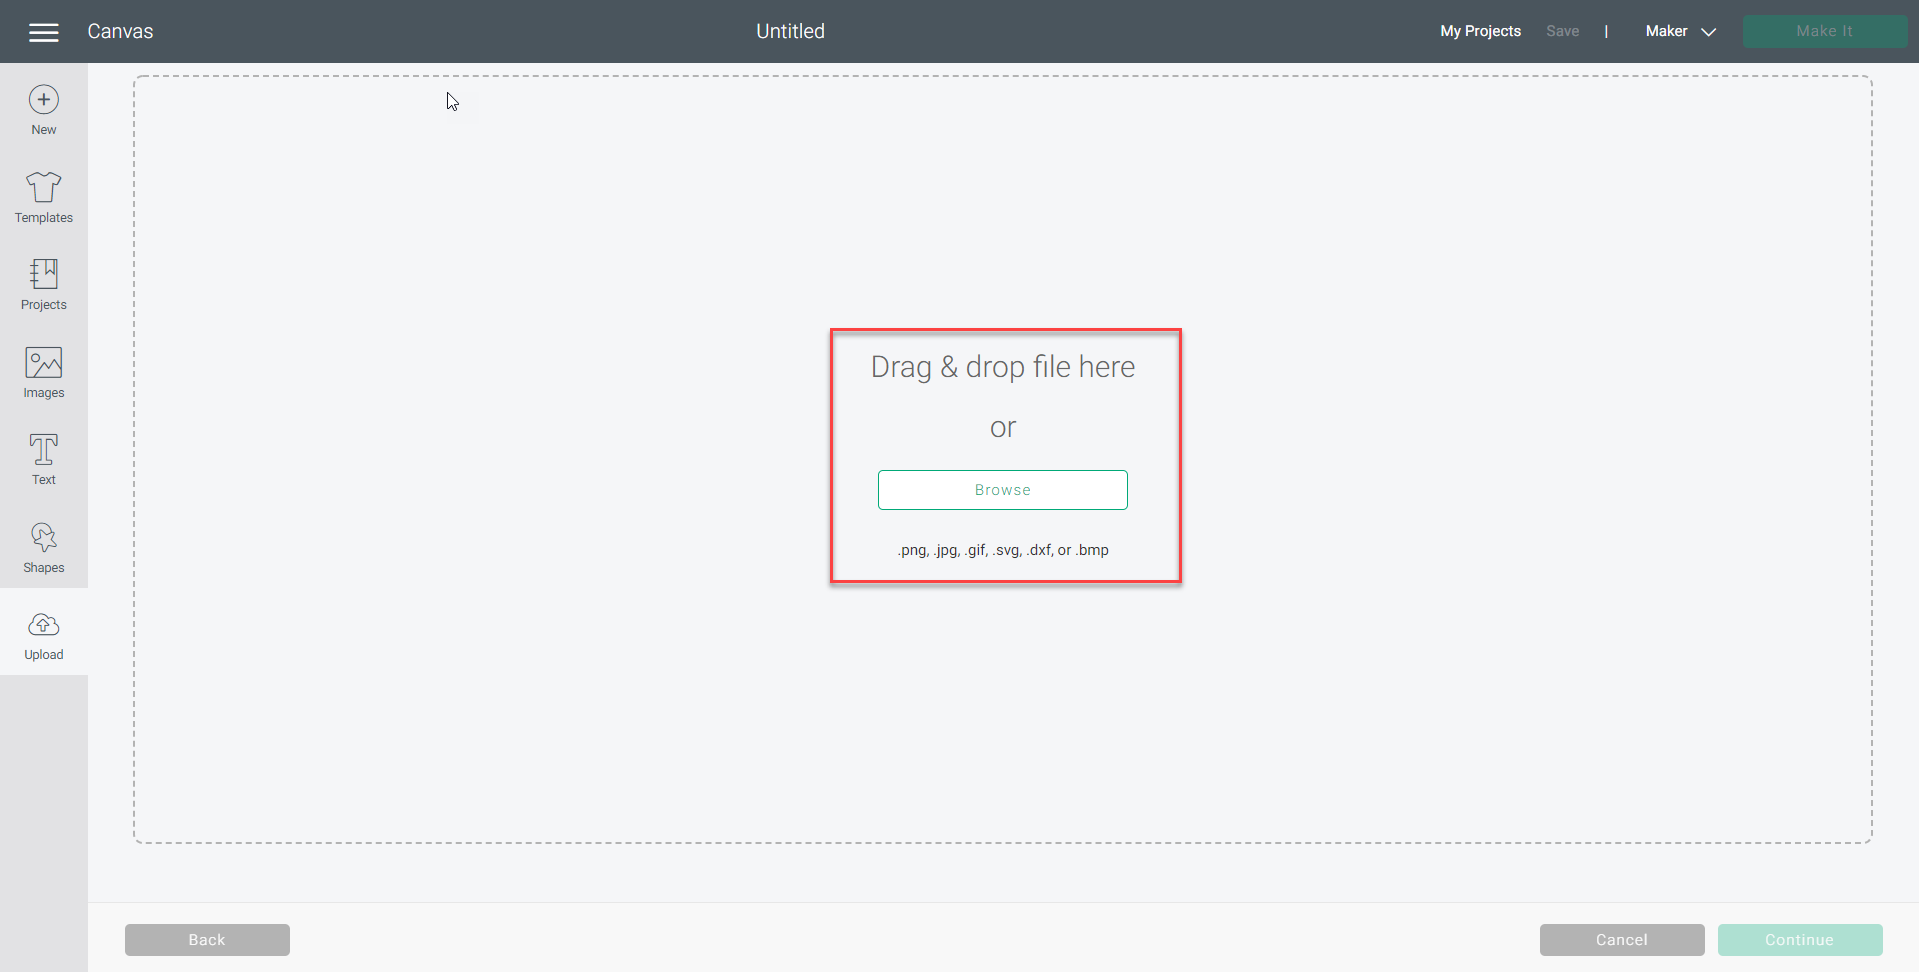
- The Image Upload Screen will open. You can either Drag and drop your file into the window or browse for the file by clicking the Browse button. SVG files from BlockBase+ are saved to your Documents > My BlockBase Plus > Images folder by default. Locate the SVG file that you want to use, select it, and click Open.
- If you are importing an SVG file created by Exporting block templates from BlockBase+ you may see an error message across the top of your screen that reads “The uploaded SVG contained the following items that are not supported: Text elements. – Import anyway?” Click the green Continue button if you get this message. The Scale Square is labeled in the BlockBase+ templates export and Cricut Design Space cannot read text elements. This error message means that the Scale Square will still appear but it will not have a label.

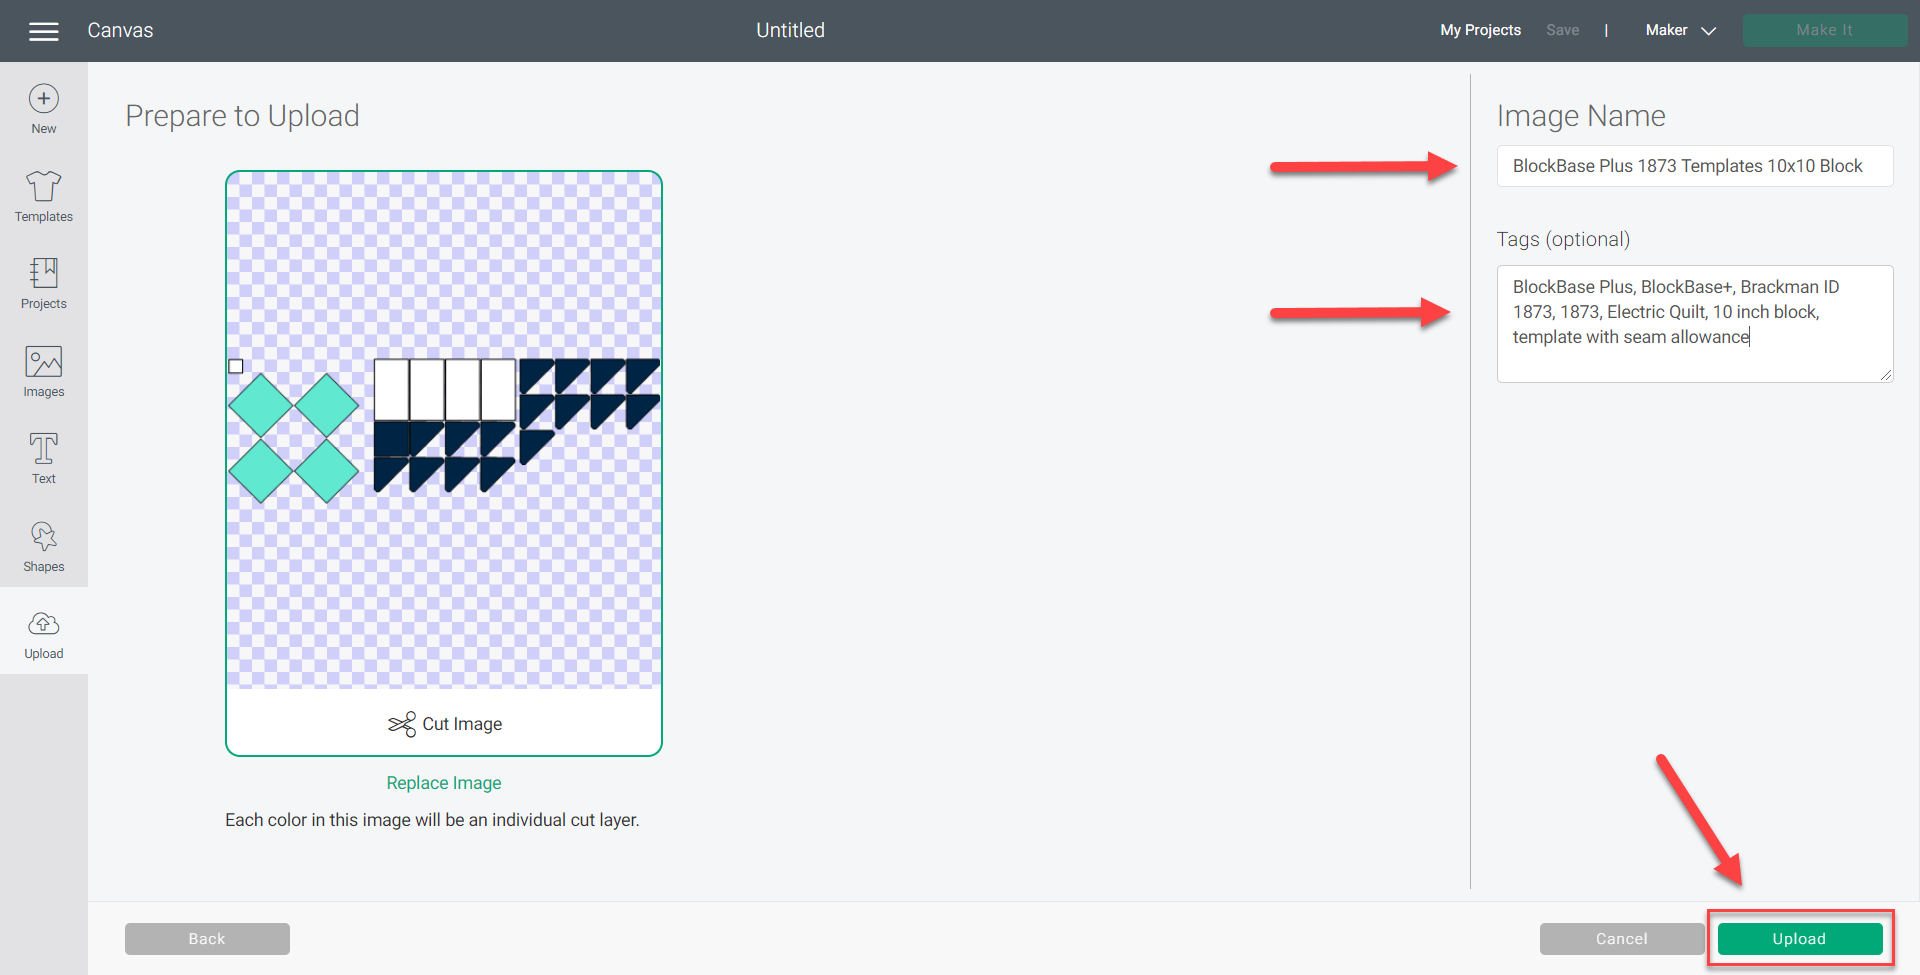
- A Prepare to Upload screen will open with an image of the SVG file. On the right you have the option to rename the file as well as add tags to help you find the file in Cricut Design Space later. This is the only time that you can add this information so we recommend you take a moment to add tags. Tags should be separated by commas. When you are finished naming the upload and adding tags, click the Upload button in the bottom-right corner.
- You will now be back at the main Upload Screen with a blue banner across the top that reads “Image Upload Successful.” You will also see your newly imported file appear as the first file on the left of the Recent Uploads list at the bottom of the screen.
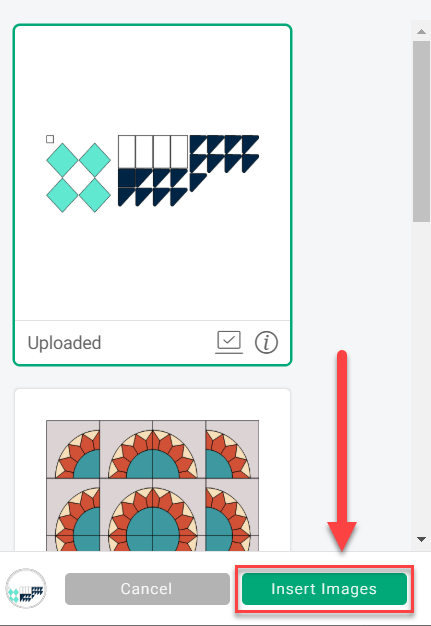
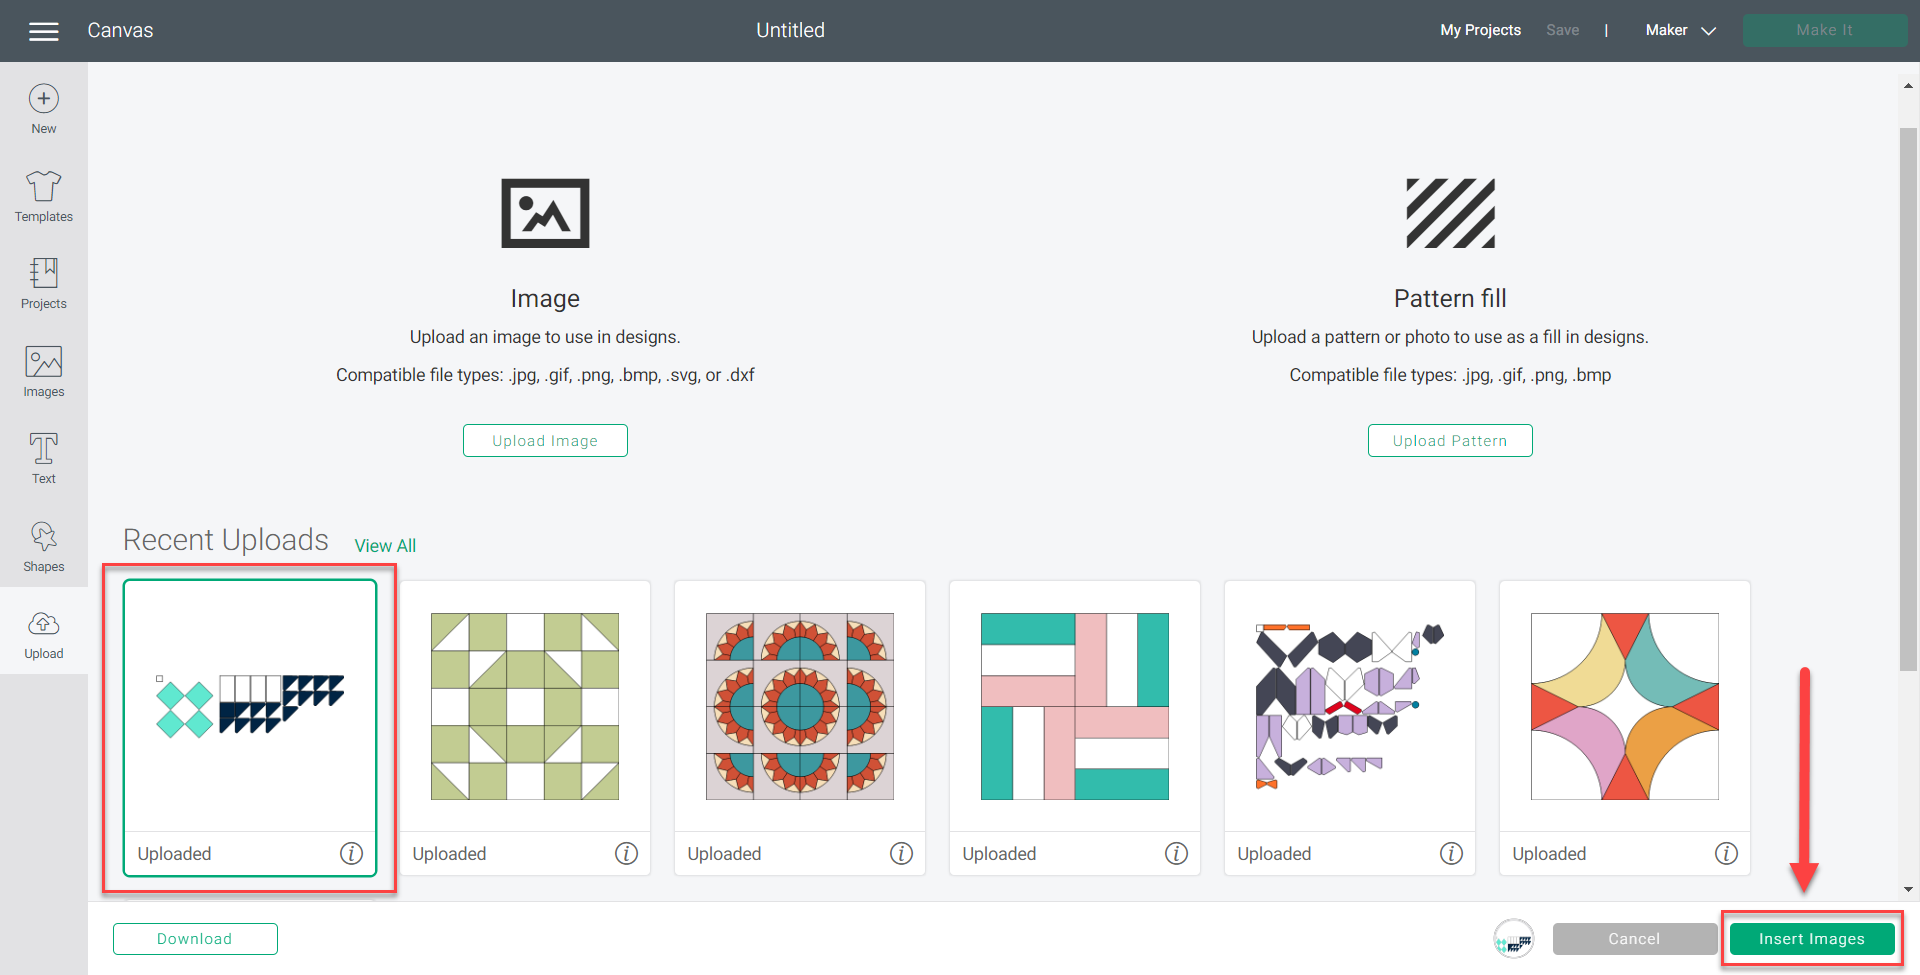 Click on the image you just uploaded to select it. You can click the Information Icon on the bottom-right corner of the block to see the file name and to delete the file. Once you have the block selected, click on the Insert Images button in the bottom right corner.
 - You will return to the Canvas Screen and now the SVG file will be available for you to edit on the Canvas.
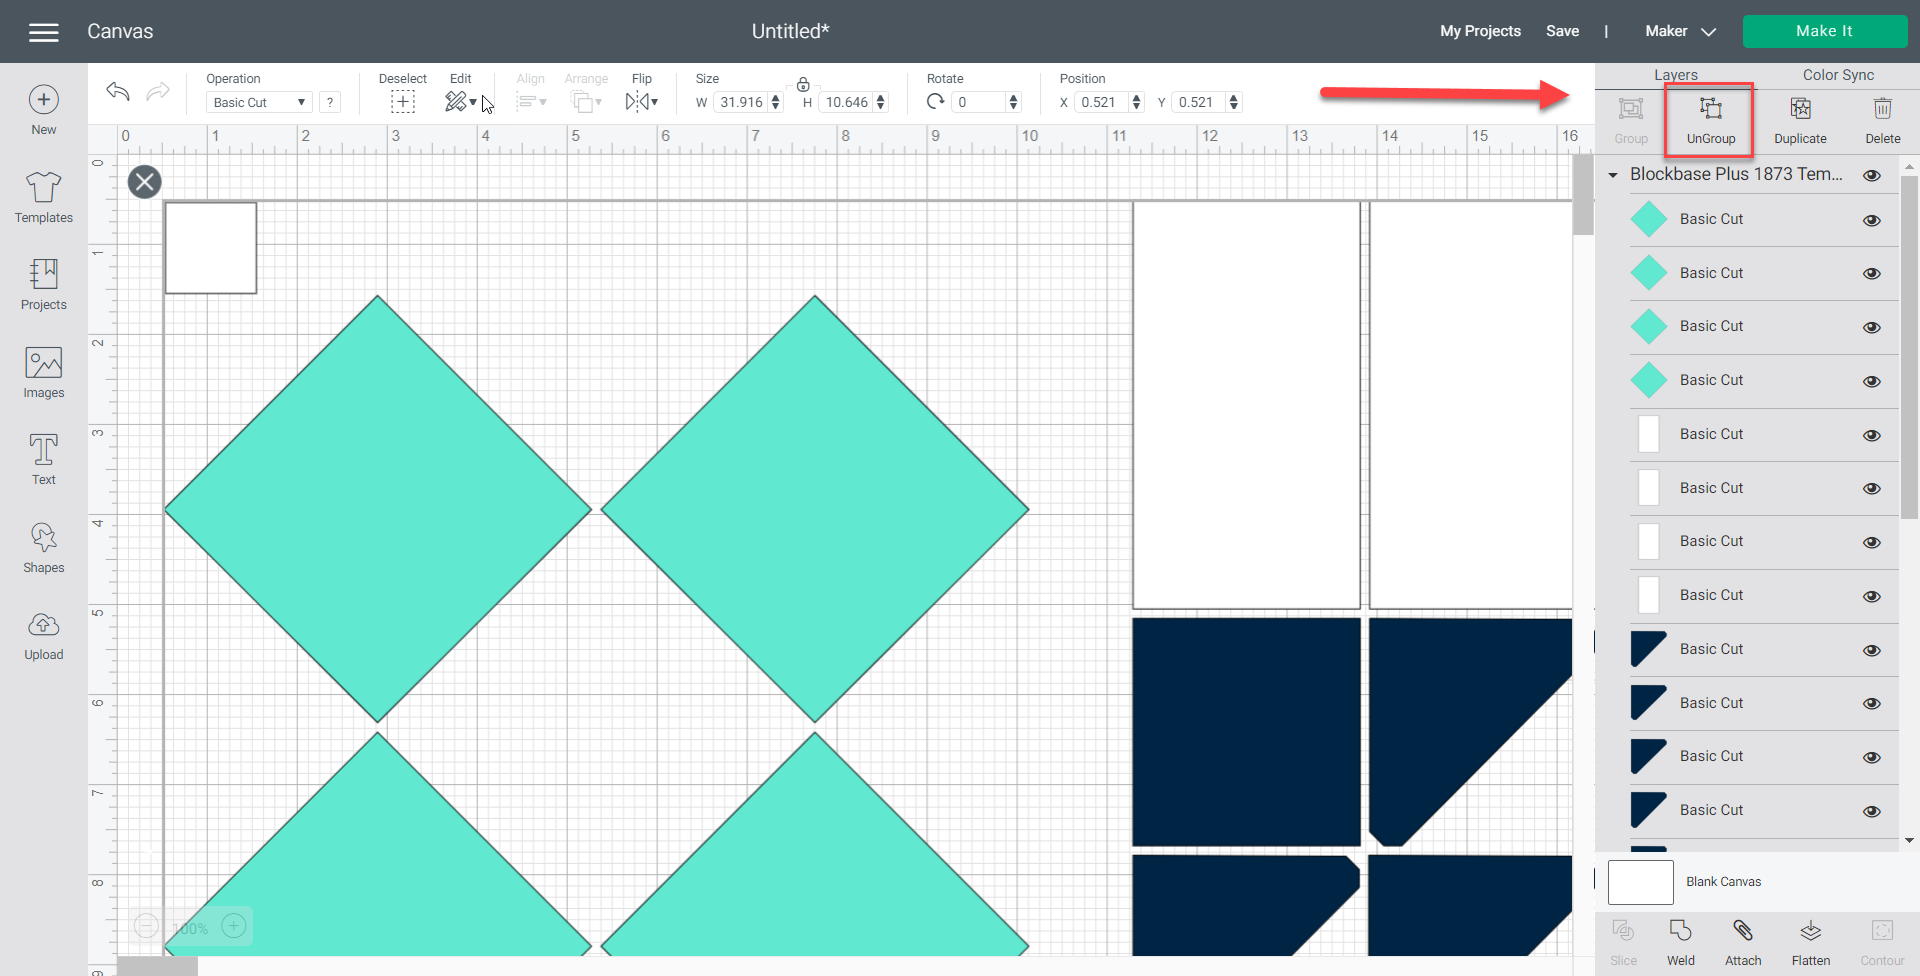
- By default, the BlockBase+ SVG exports will open with all of the templates or block pieces grouped together. To be able to select and manipulate each piece individually, make sure that the image is selected and click the UnGroup button at the top of the right-hand toolbar.
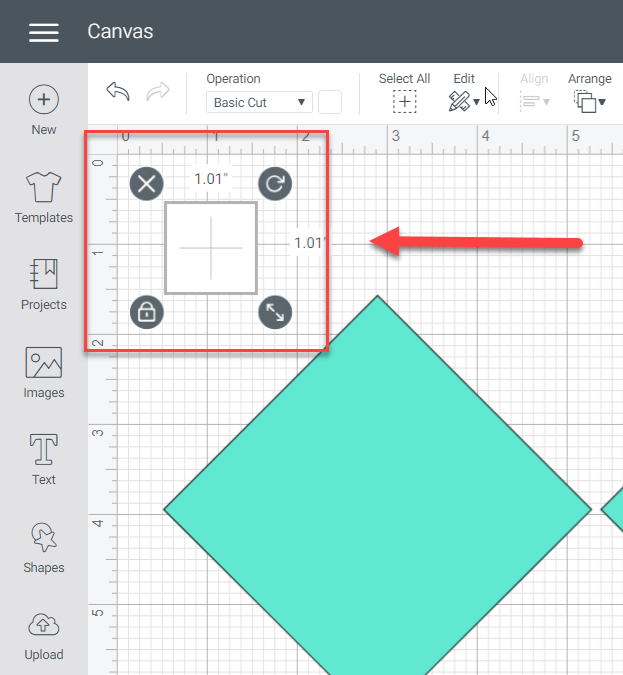
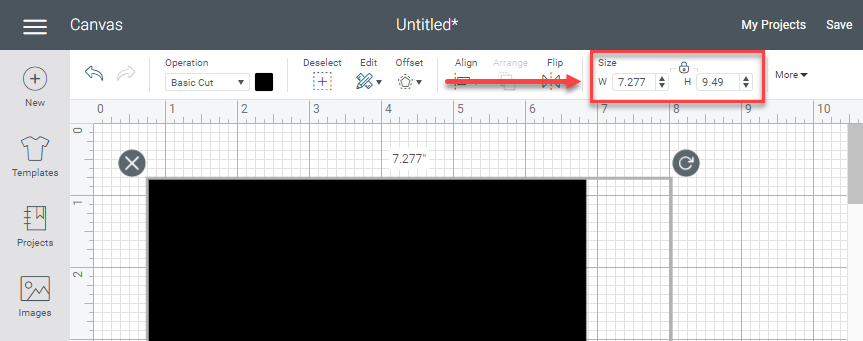
- The blank white square in the upper left corner of the Block Template Exports from BlockBase+ will always be the Scale Square. The Scale Square is not included in Block Image Exports. Once you have UnGrouped the templates, click on the Scale Square and make sure that the square measures 1.000″ x 1.000″. You can delete the scale square once you have confirmed that it is the correct size by selecting it and then hitting the Delete key on your keyboard.
- If the Scale Square is not 1.000 then you need to adjust the size of all of the patches. Use a calculator to divide 1.000″ (the size the scale square should be) by the size the scale square is measuring in Cricut Design Space. The resulting scale number will be more than 1 if the patch is too small and less than 1 if the patch is too large.
- Select all of the patches and click the Group button. Note one of the dimensions, either the width or the height, for the selected group. Multiply the dimension selected by the scale number we calculated in step 12 above. Make sure that the aspect ratio lock is on. Then enter the new calculated dimension into the field where you can resize your elements. Click the Ungroup button and double check that the Scale Square is now 1.000″. If it is correct then you can delete the Scale Square.

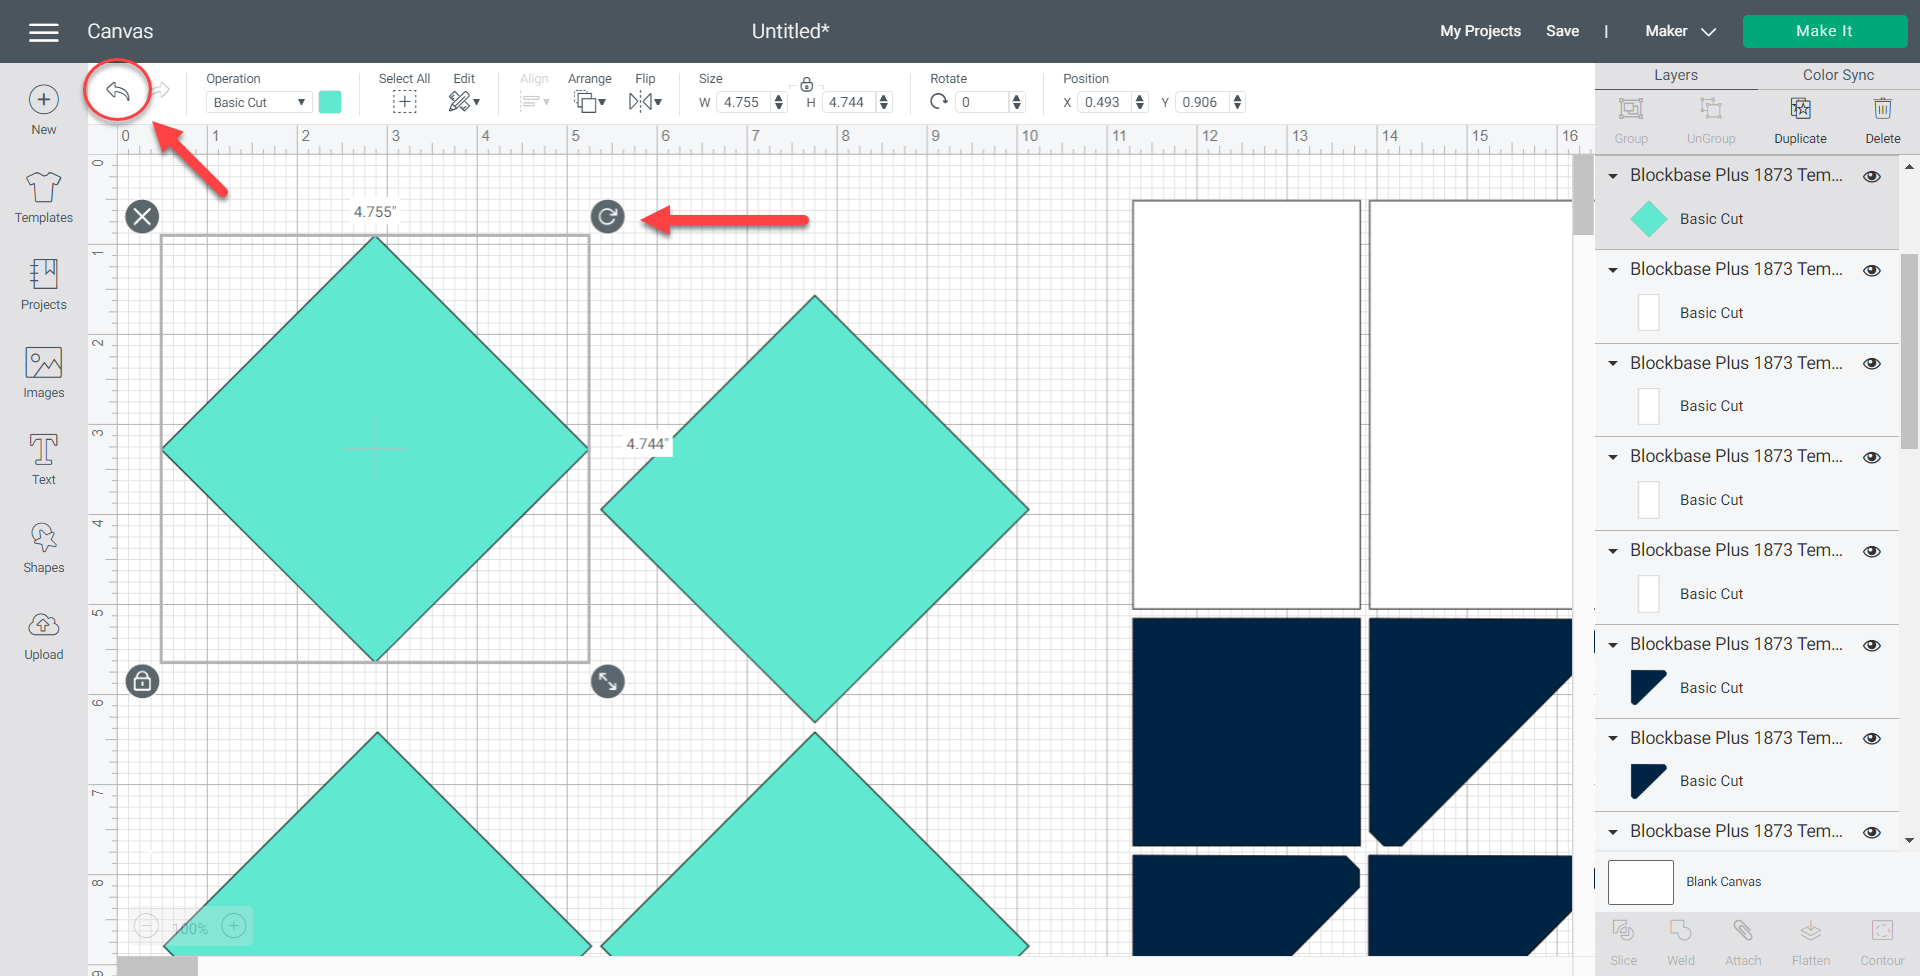
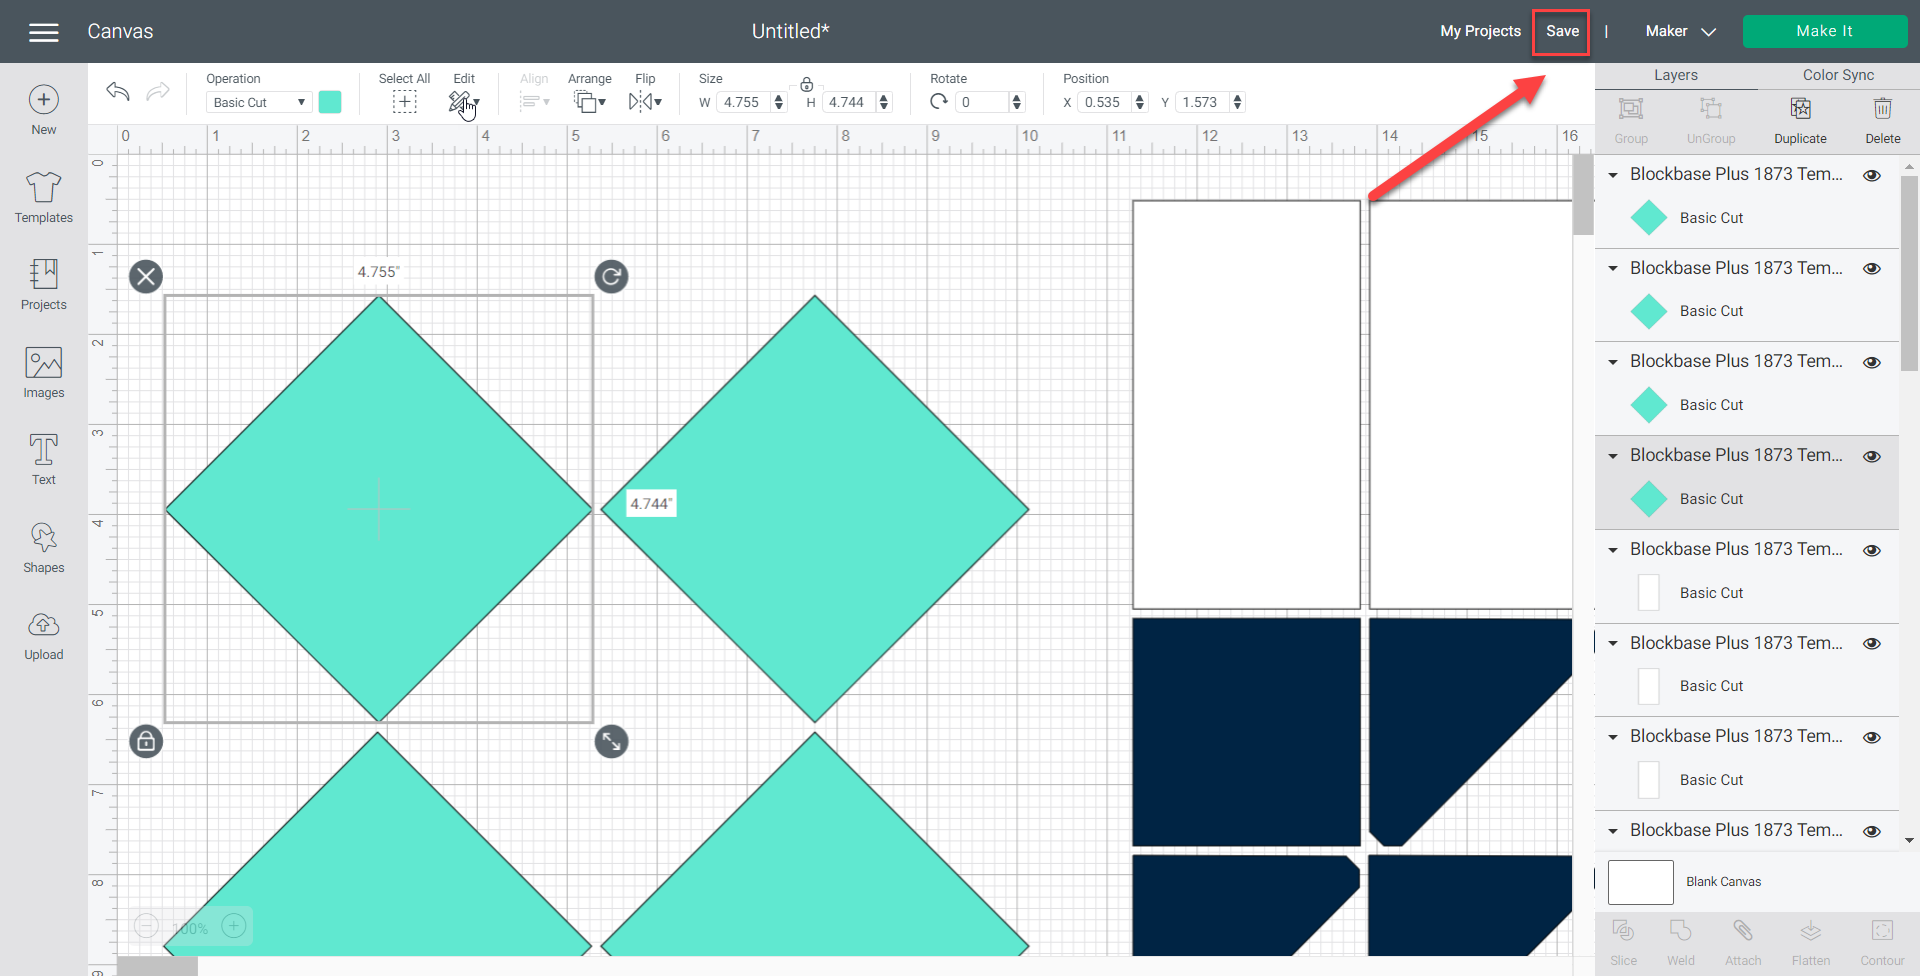
- You can duplicate, delete, move, and rotate the patches individually from this screen. Click on the patch that you want to modify and a box will appear around the shape showing the shape’s measurements. You can click the Circular Arrow Icon in the upper-right corner to rotate or click anywhere on the block to move it. If you make a mistake click the Undo Button in the top-left corner of the Canvas Screen.
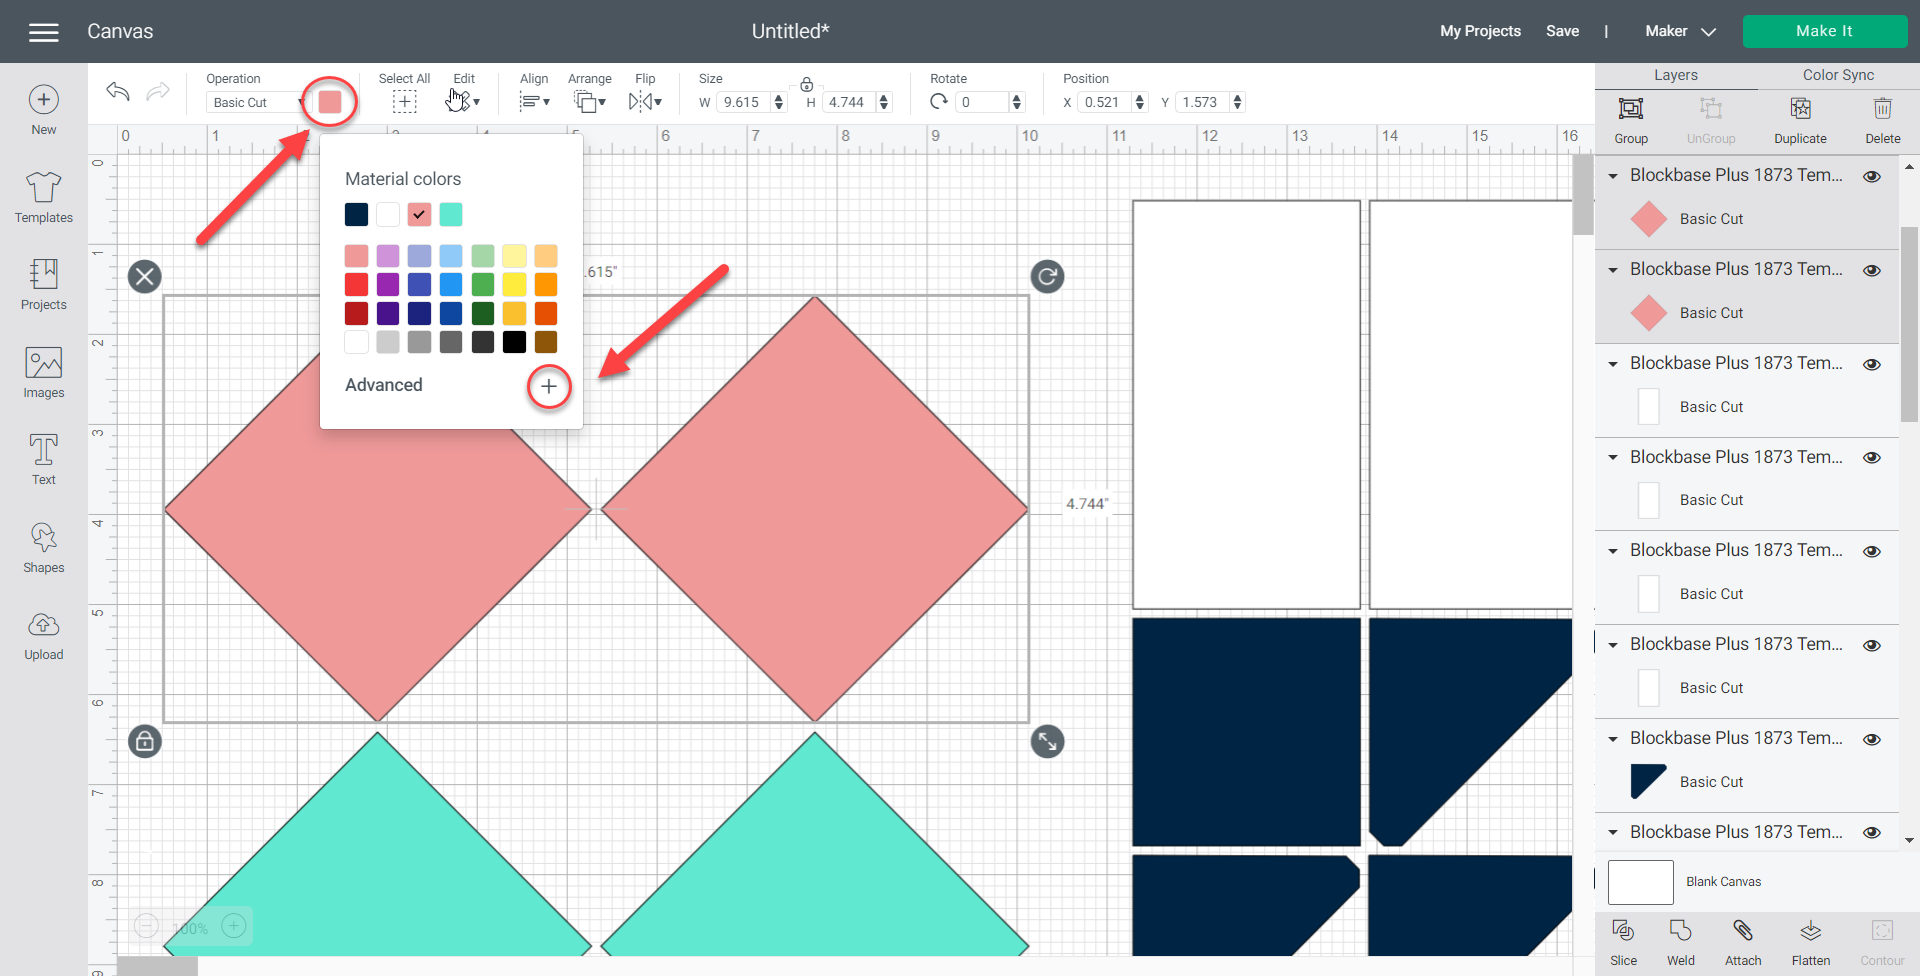
- Because color is included in BlockBase+’s SVG export, Cricut will auto sort the patches onto mats based on their color. You can recolor patches if you want to cut with a different layout or design than the options provide in BlockBase+. To do this, click on the patch or patches that you want to recolor to select them. Click the Color Fill Box at the top of the screen. A pop-up box will let you select from a preset sample of swatches, or click the Plus (+) Icon next to Advanced to be able to enter an HTML color code or select from more colors.
- To save your project click the Save button in the tool bar across the top of the screen. A pop-up box will ask what you want to name the project. Enter the name and click Save. You will get a message telling you that the project has been saved successfully and you will see the top of the screen change from Untitled to your new project name.
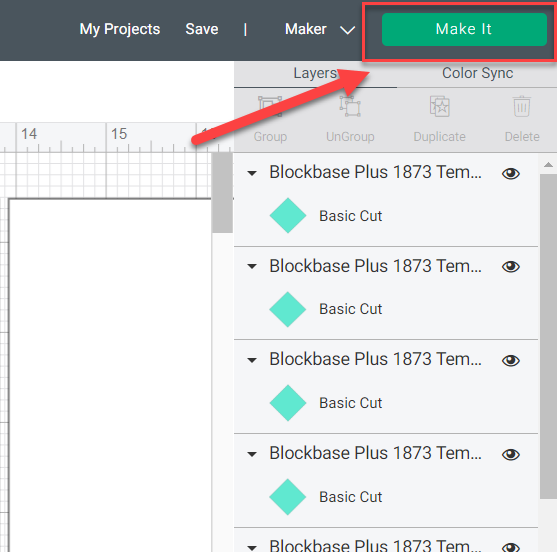
- When you are done manipulating the patches, click the green Make It button in the upper-right corner of the screen. This will auto sort your patches onto cutting mats based on their color.
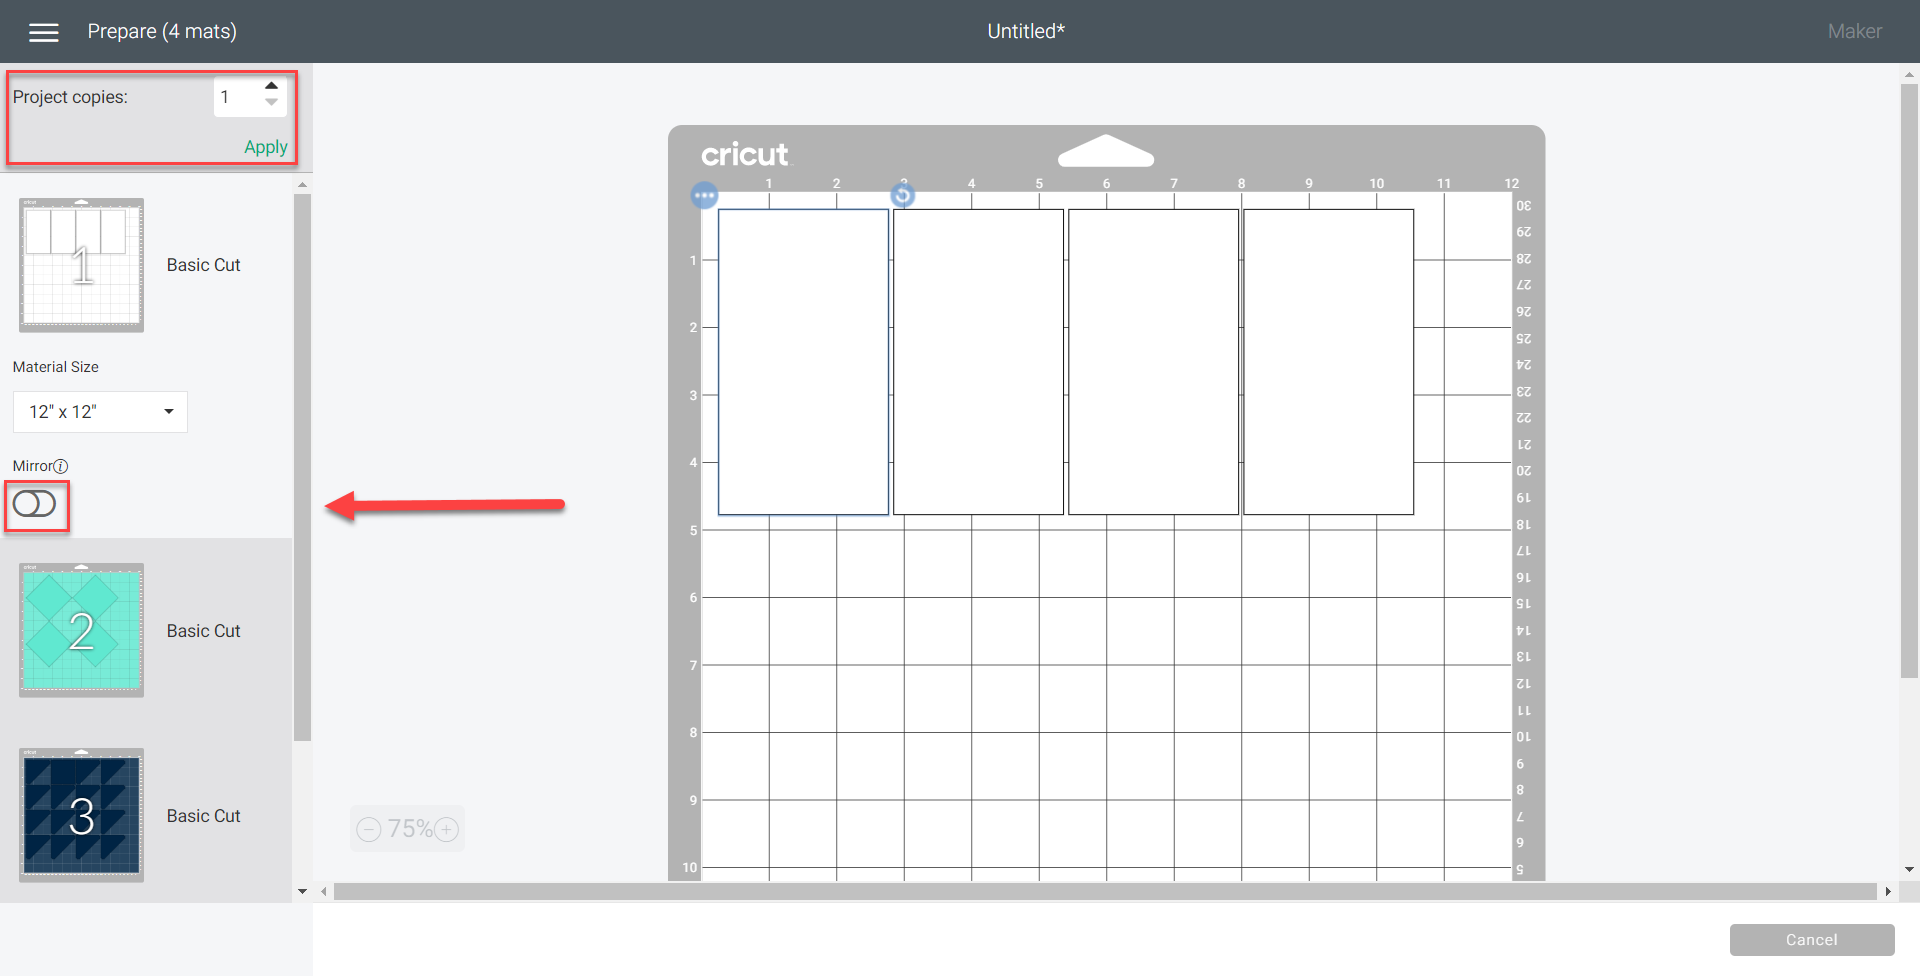
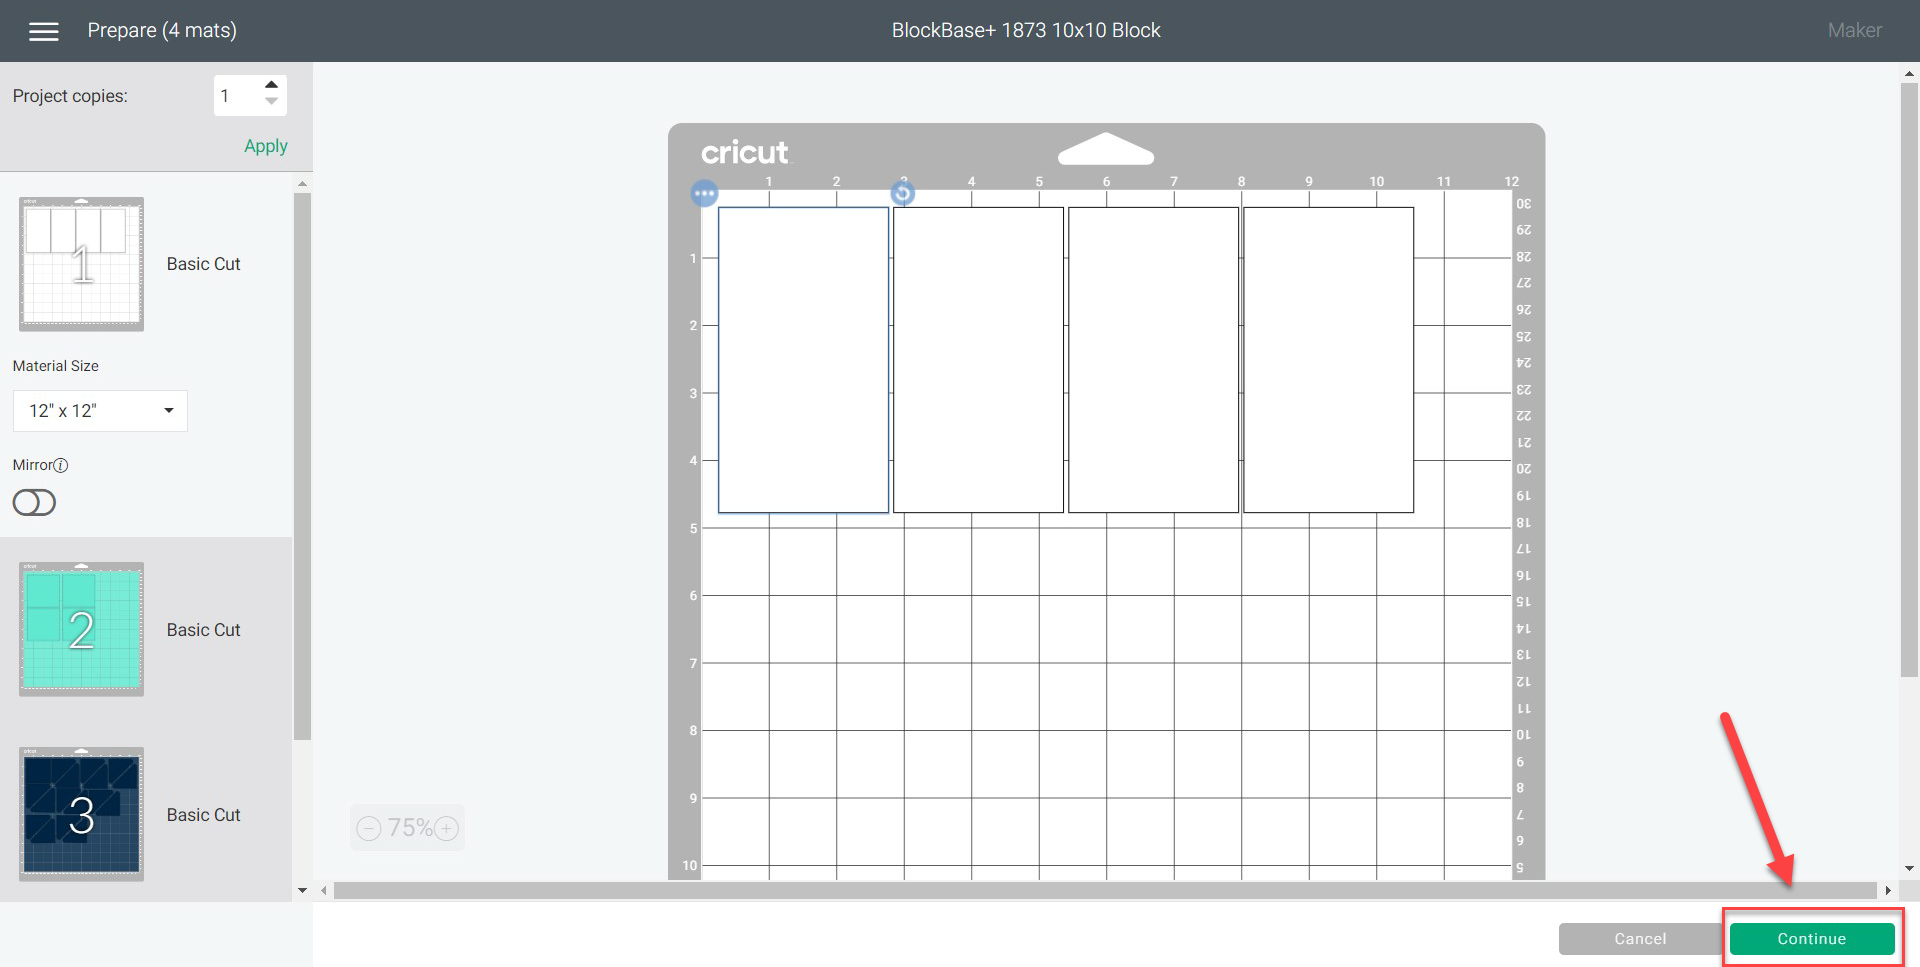
- The Mats Screen will open and show your project sorted onto mats by color. On this screen you can mirror templates (helpful for applique), select the number of project copies that you want to make, and also rearrange the templates so that they make the most efficient use of your fabric or fit within an oddly shaped scrap of fabric. The marks on the mats shown on the screen correspond to the marks on your Cricut cutting mats.
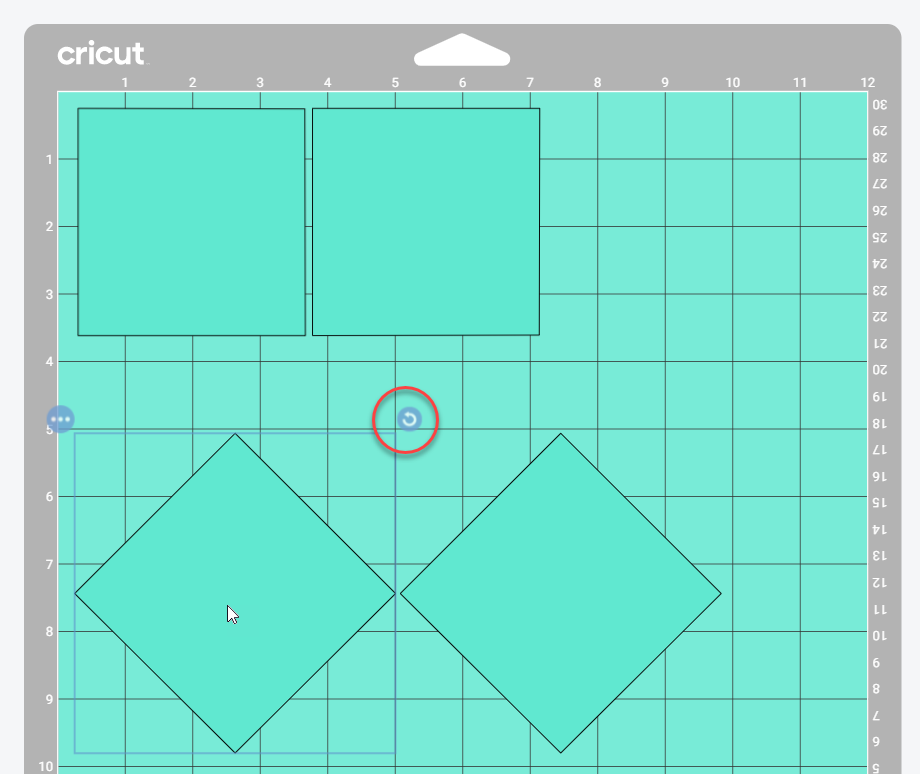
- For this project we can do some rearrangement of patches on mats 2, 3, and 4 to make better use of the space. Click on the mat you want to edit in the list on the left-hand side of the screen.
- Click on the patch that you want to rotate or move. To rotate click on the Circular Arrow Icon. Hold the Shift key on your keyboard down while rotating to rotate the patch at specific increments. To move the patch, click and drag the patch to its new location on the mat.
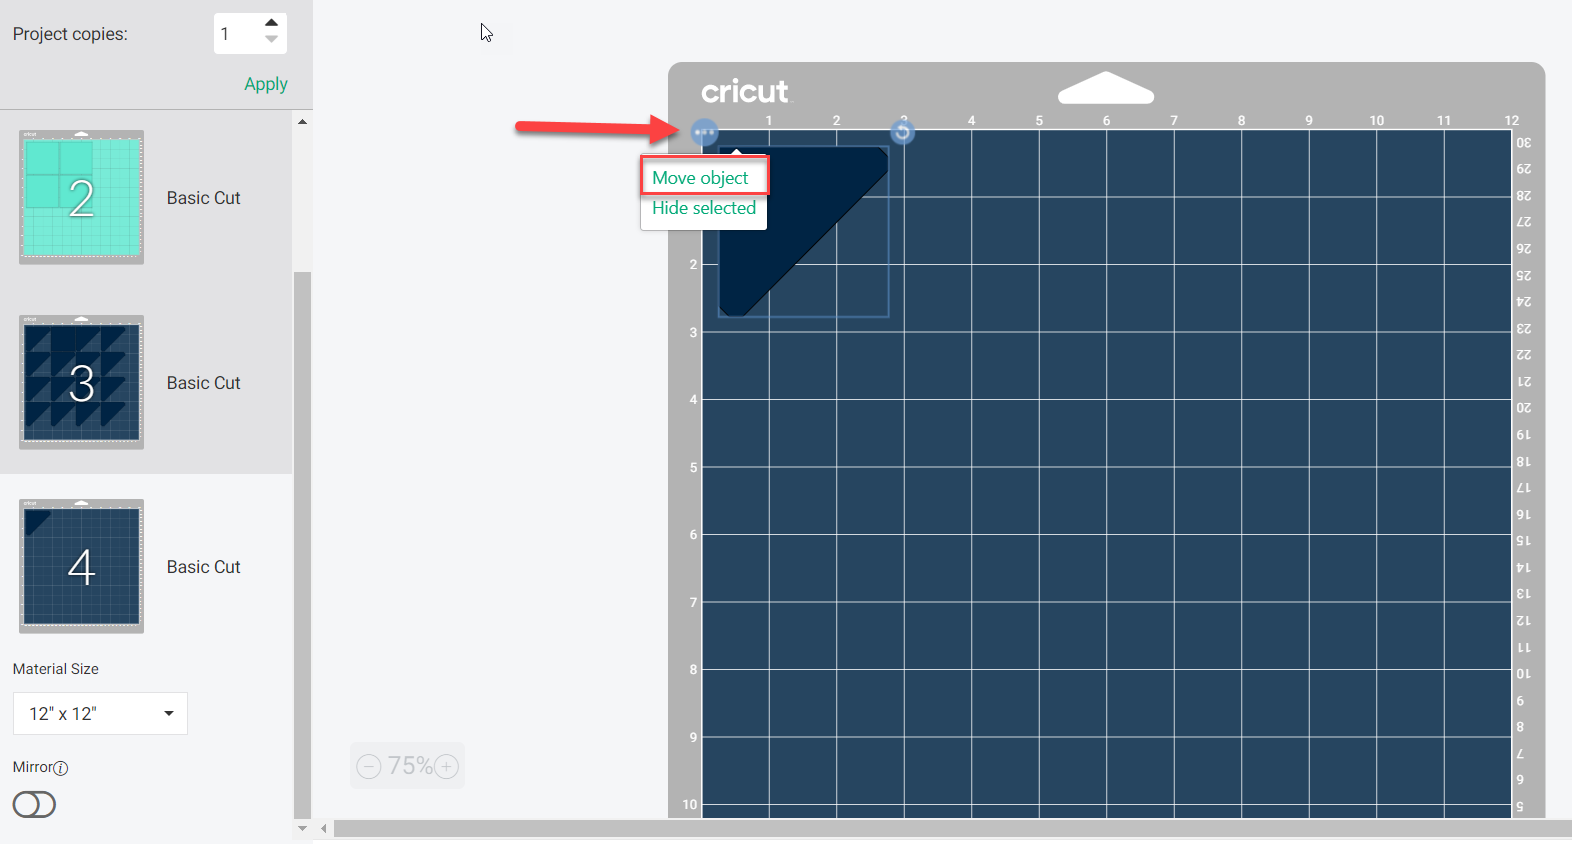
- If you want to move patches between mats, click on the … Icon in the upper-left corner of a selected patch and then click the Move option.
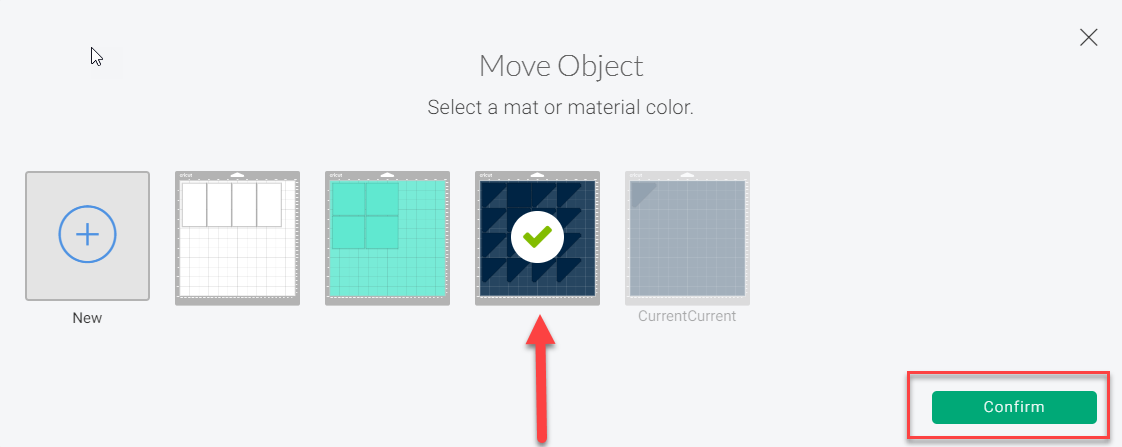
 Select the mat to which you would like to move the patch and click Confirm. In this example, we are moving the single patch on mat 4 to mat 3 so that it can be cut from the same fabric as the rest of the patches of that color. The patch will move to the new mat and appear in the same placement as it was on its previous mat. You may have to look for it overlapping other patches and then move it to the correct location.
- Once you are satisfied with the arrangement of your patches on the mats select the first mat, connect your computer to your Cricut machine, and turn on your Cricut machine. Then click the Continue button in the bottom right corner of the screen.

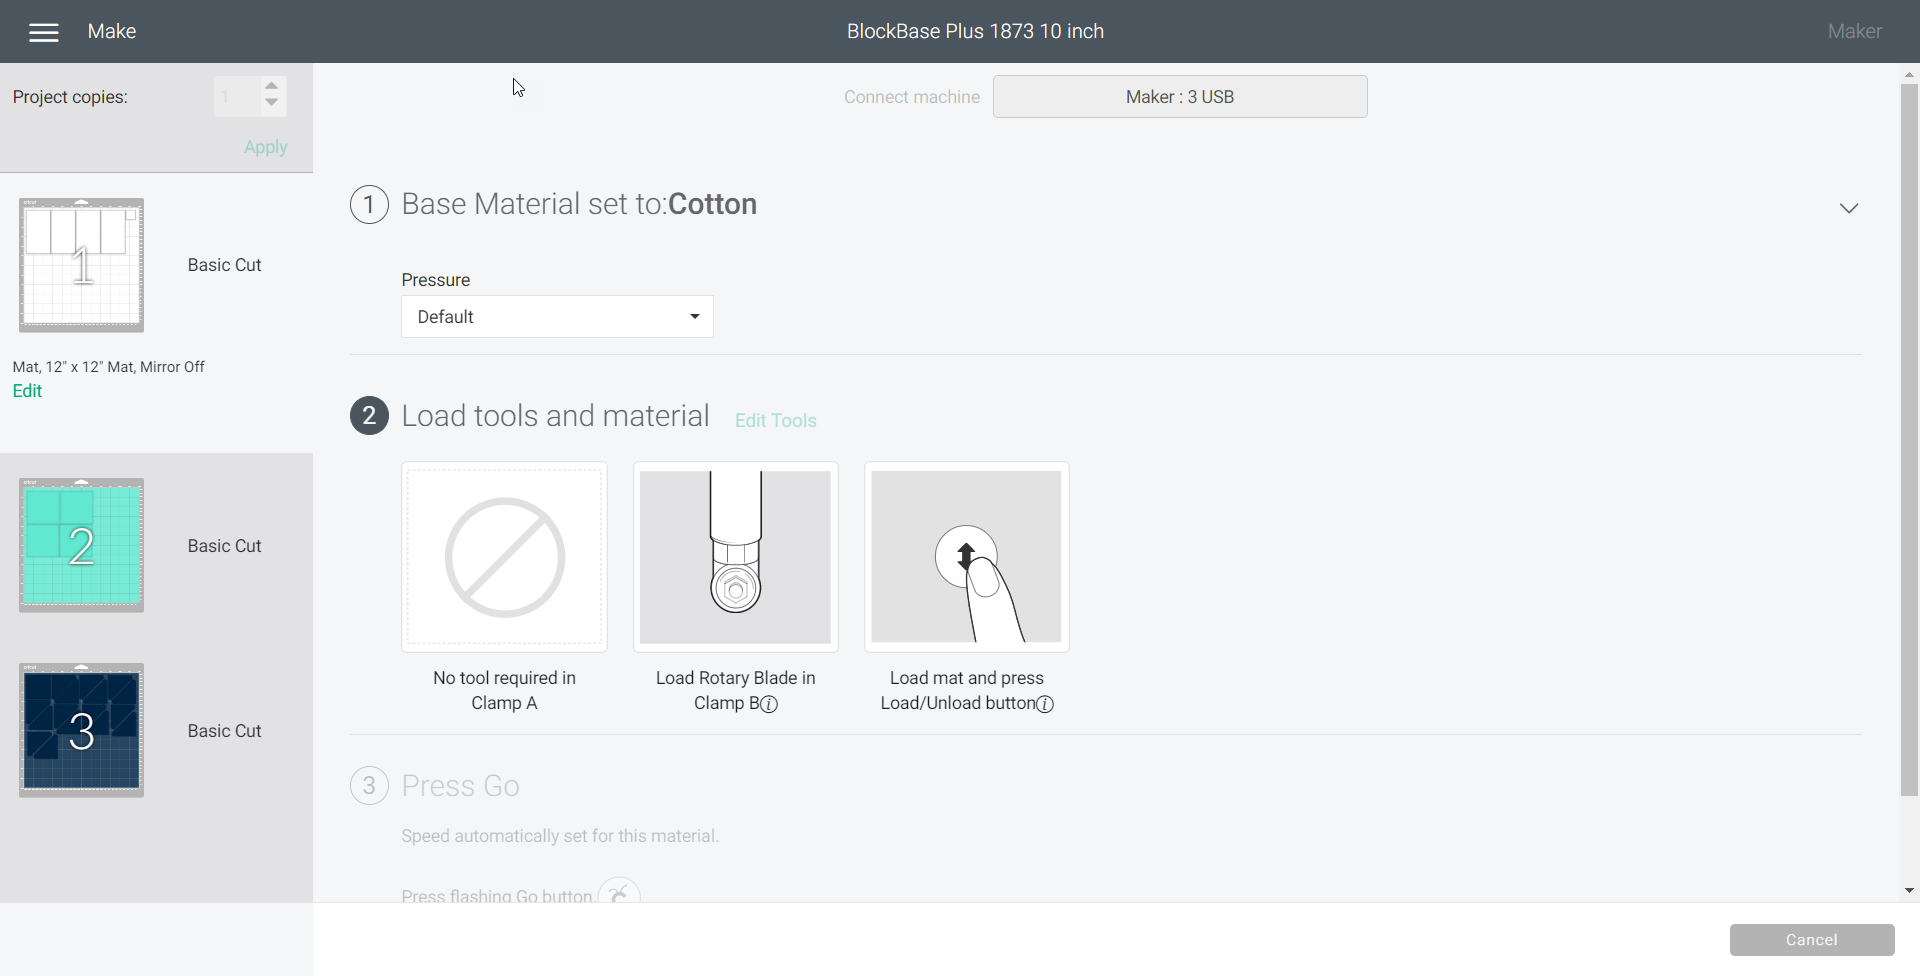
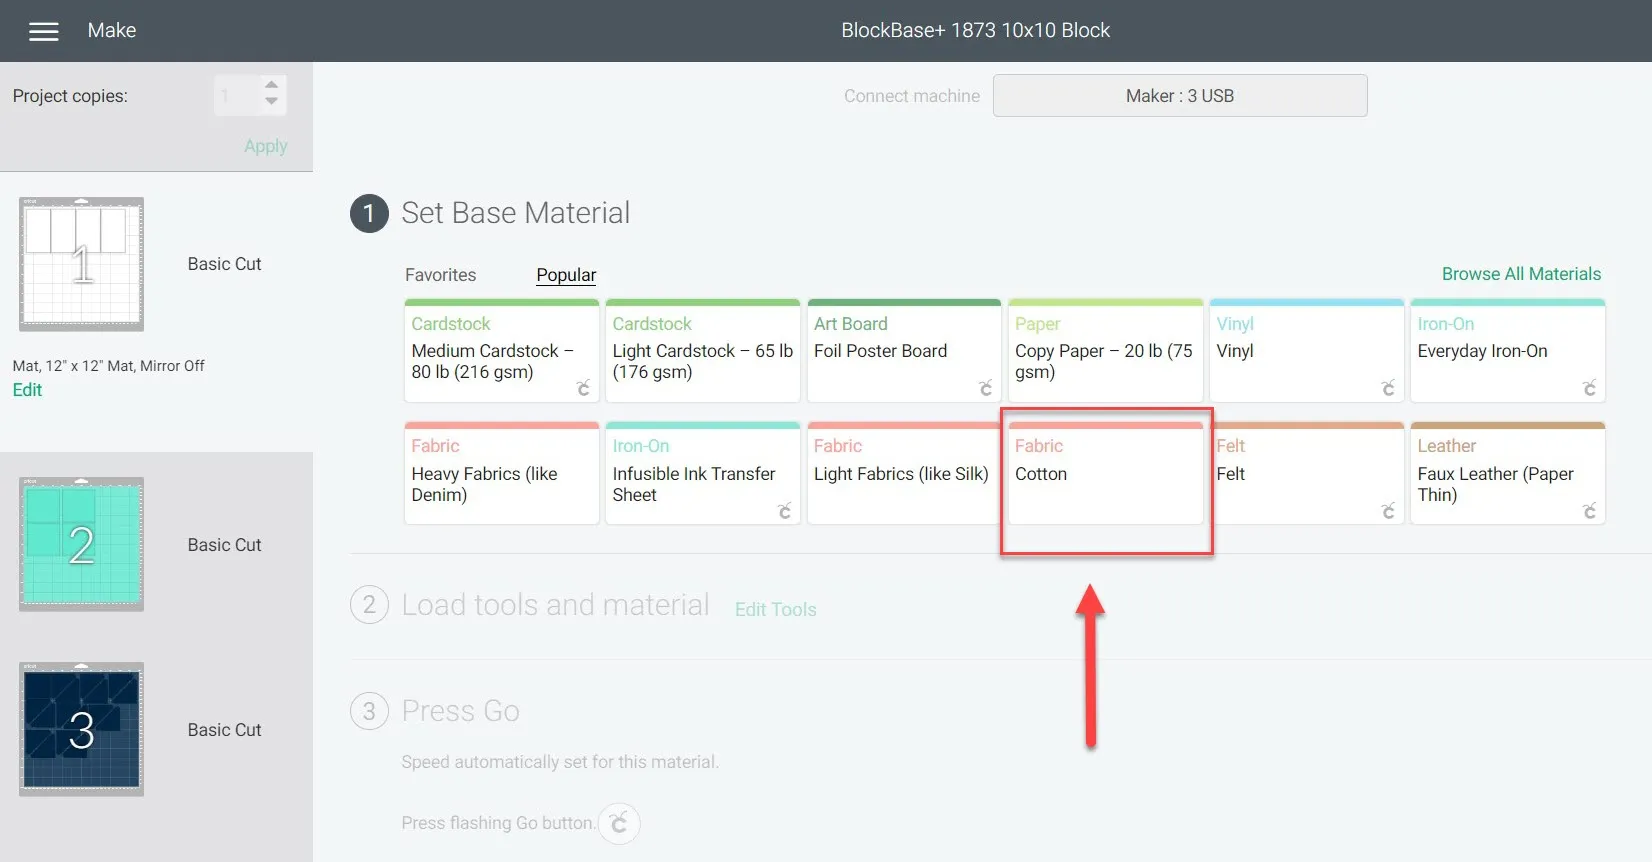
- Select the Material that you are cutting with your machine. Here we selected Cotton since we are making a quilt block.

- Select the Pressure of the blade and follow Cricut’s instructions on what tool to insert into your machine. We are using the rotary blade that works with the Cricut Maker machine.
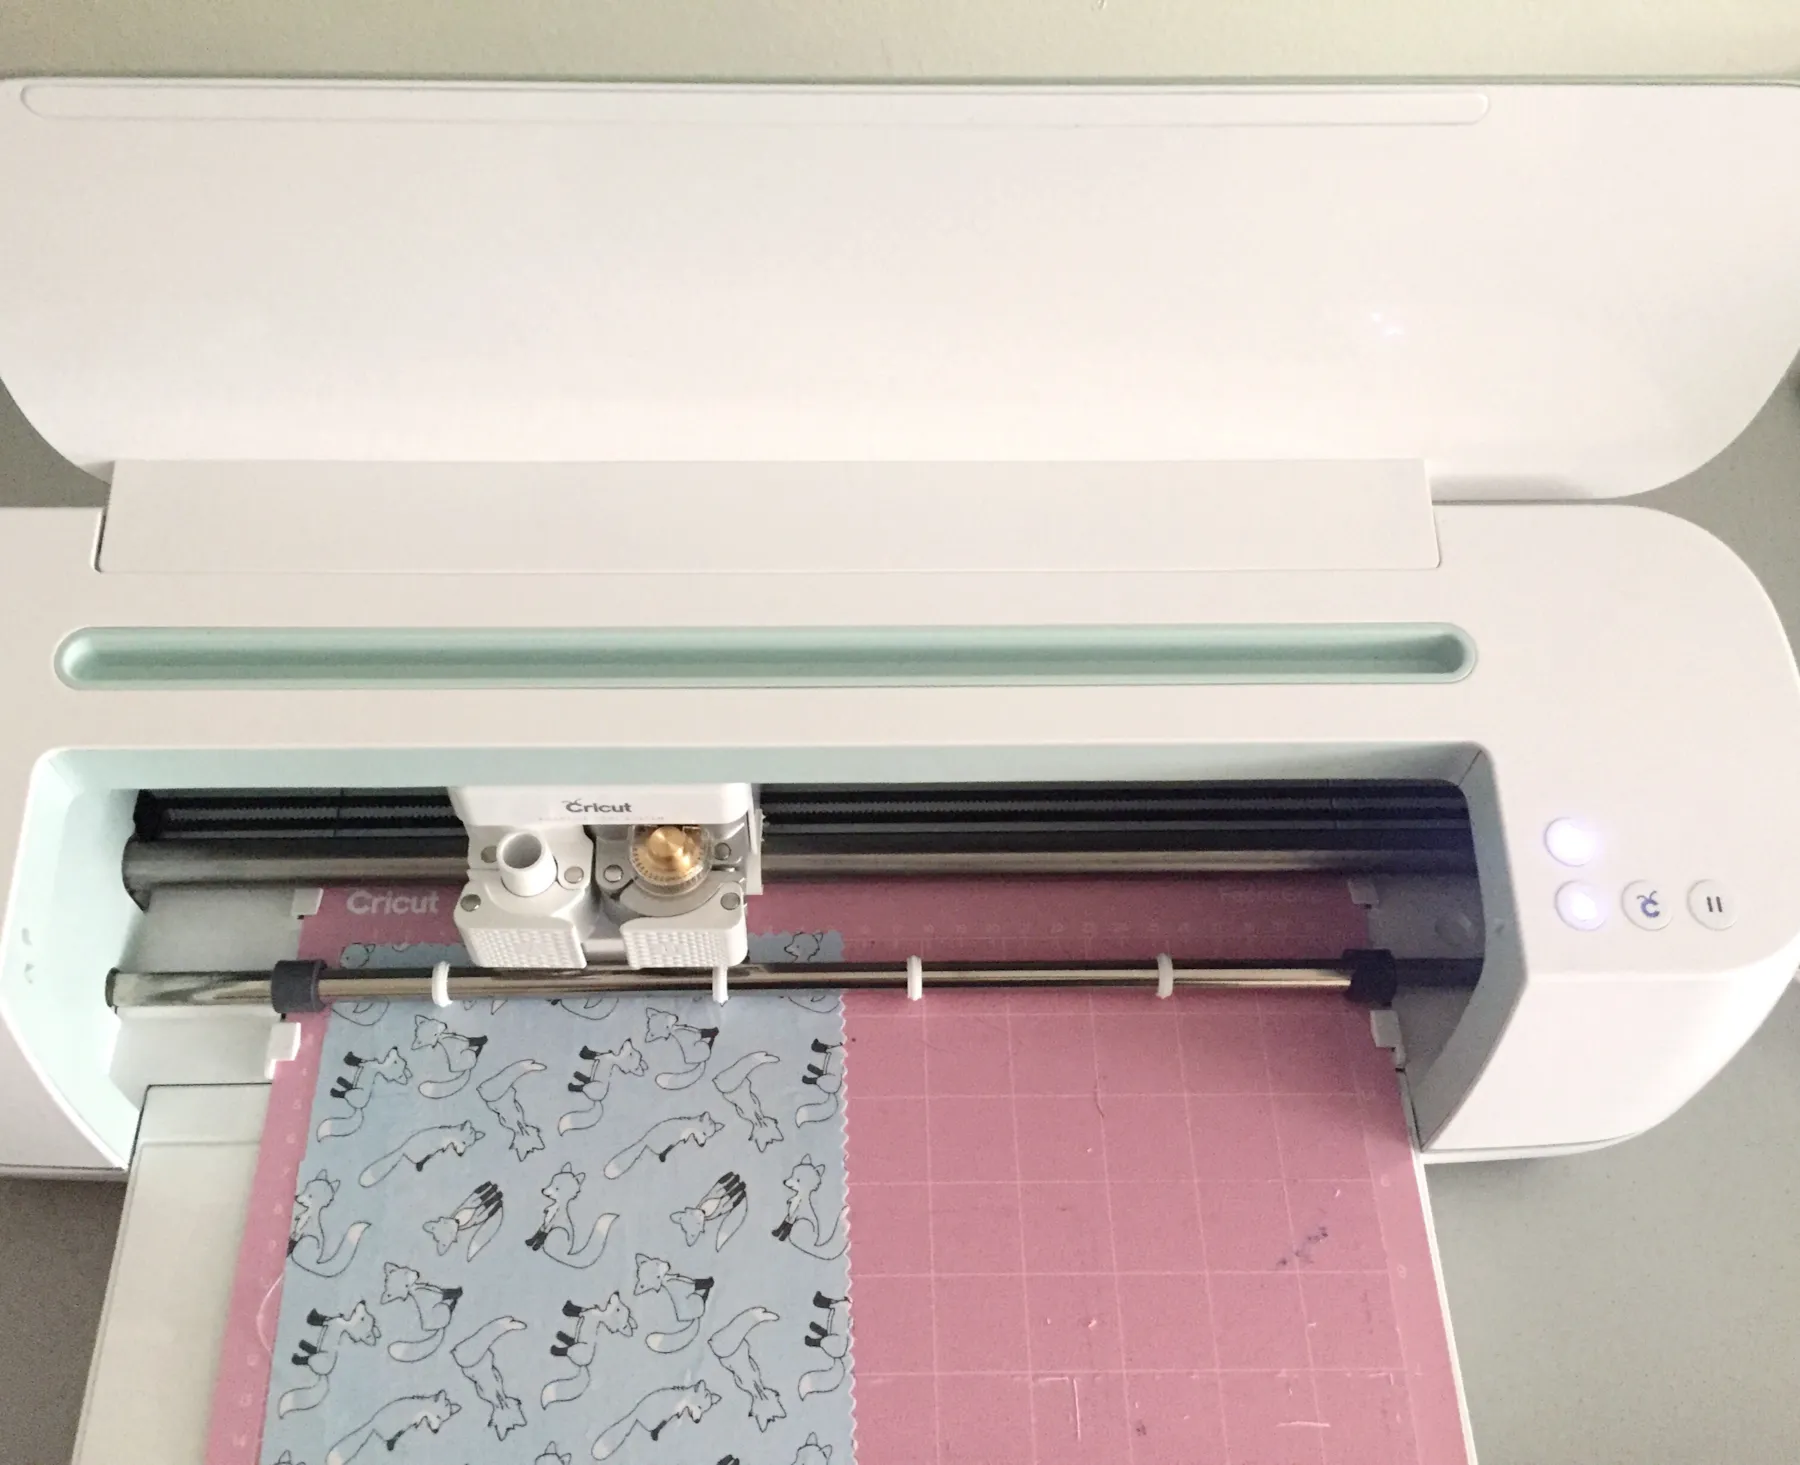
- Put your fabric on your Cricut fabric cutting mat. Use a brayer or a seam roller to ensure that the fabric is firmly attached and that there are no wrinkles. Double check that your fabric placement matches with where you placed the templates on the digital cutting mats. For this project we are placing the fabric right side up but there may be instances where you want to put the right side down. Per Cricut’s instructions, you do not need to add stabilizer to your fabric or use starch or a starch alternative, but please do what works best for you and your machine in preparing your fabric.
- Load the cutting mat with the fabric on it into the machine by clicking the blinking double-arrow button on the top of the machine.

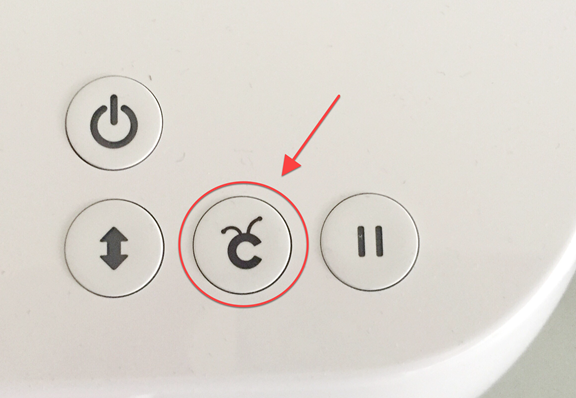
- Once the mat is loaded, click the Cricut Logo button on the top of your machine and let it do the cutting work for you!

- Once the cutting is complete, remove the patches and extra fabric from the mat.
- Repeat steps 23-26 with the remaining mats to cut your other fabric colors and to cut more blocks if you want.
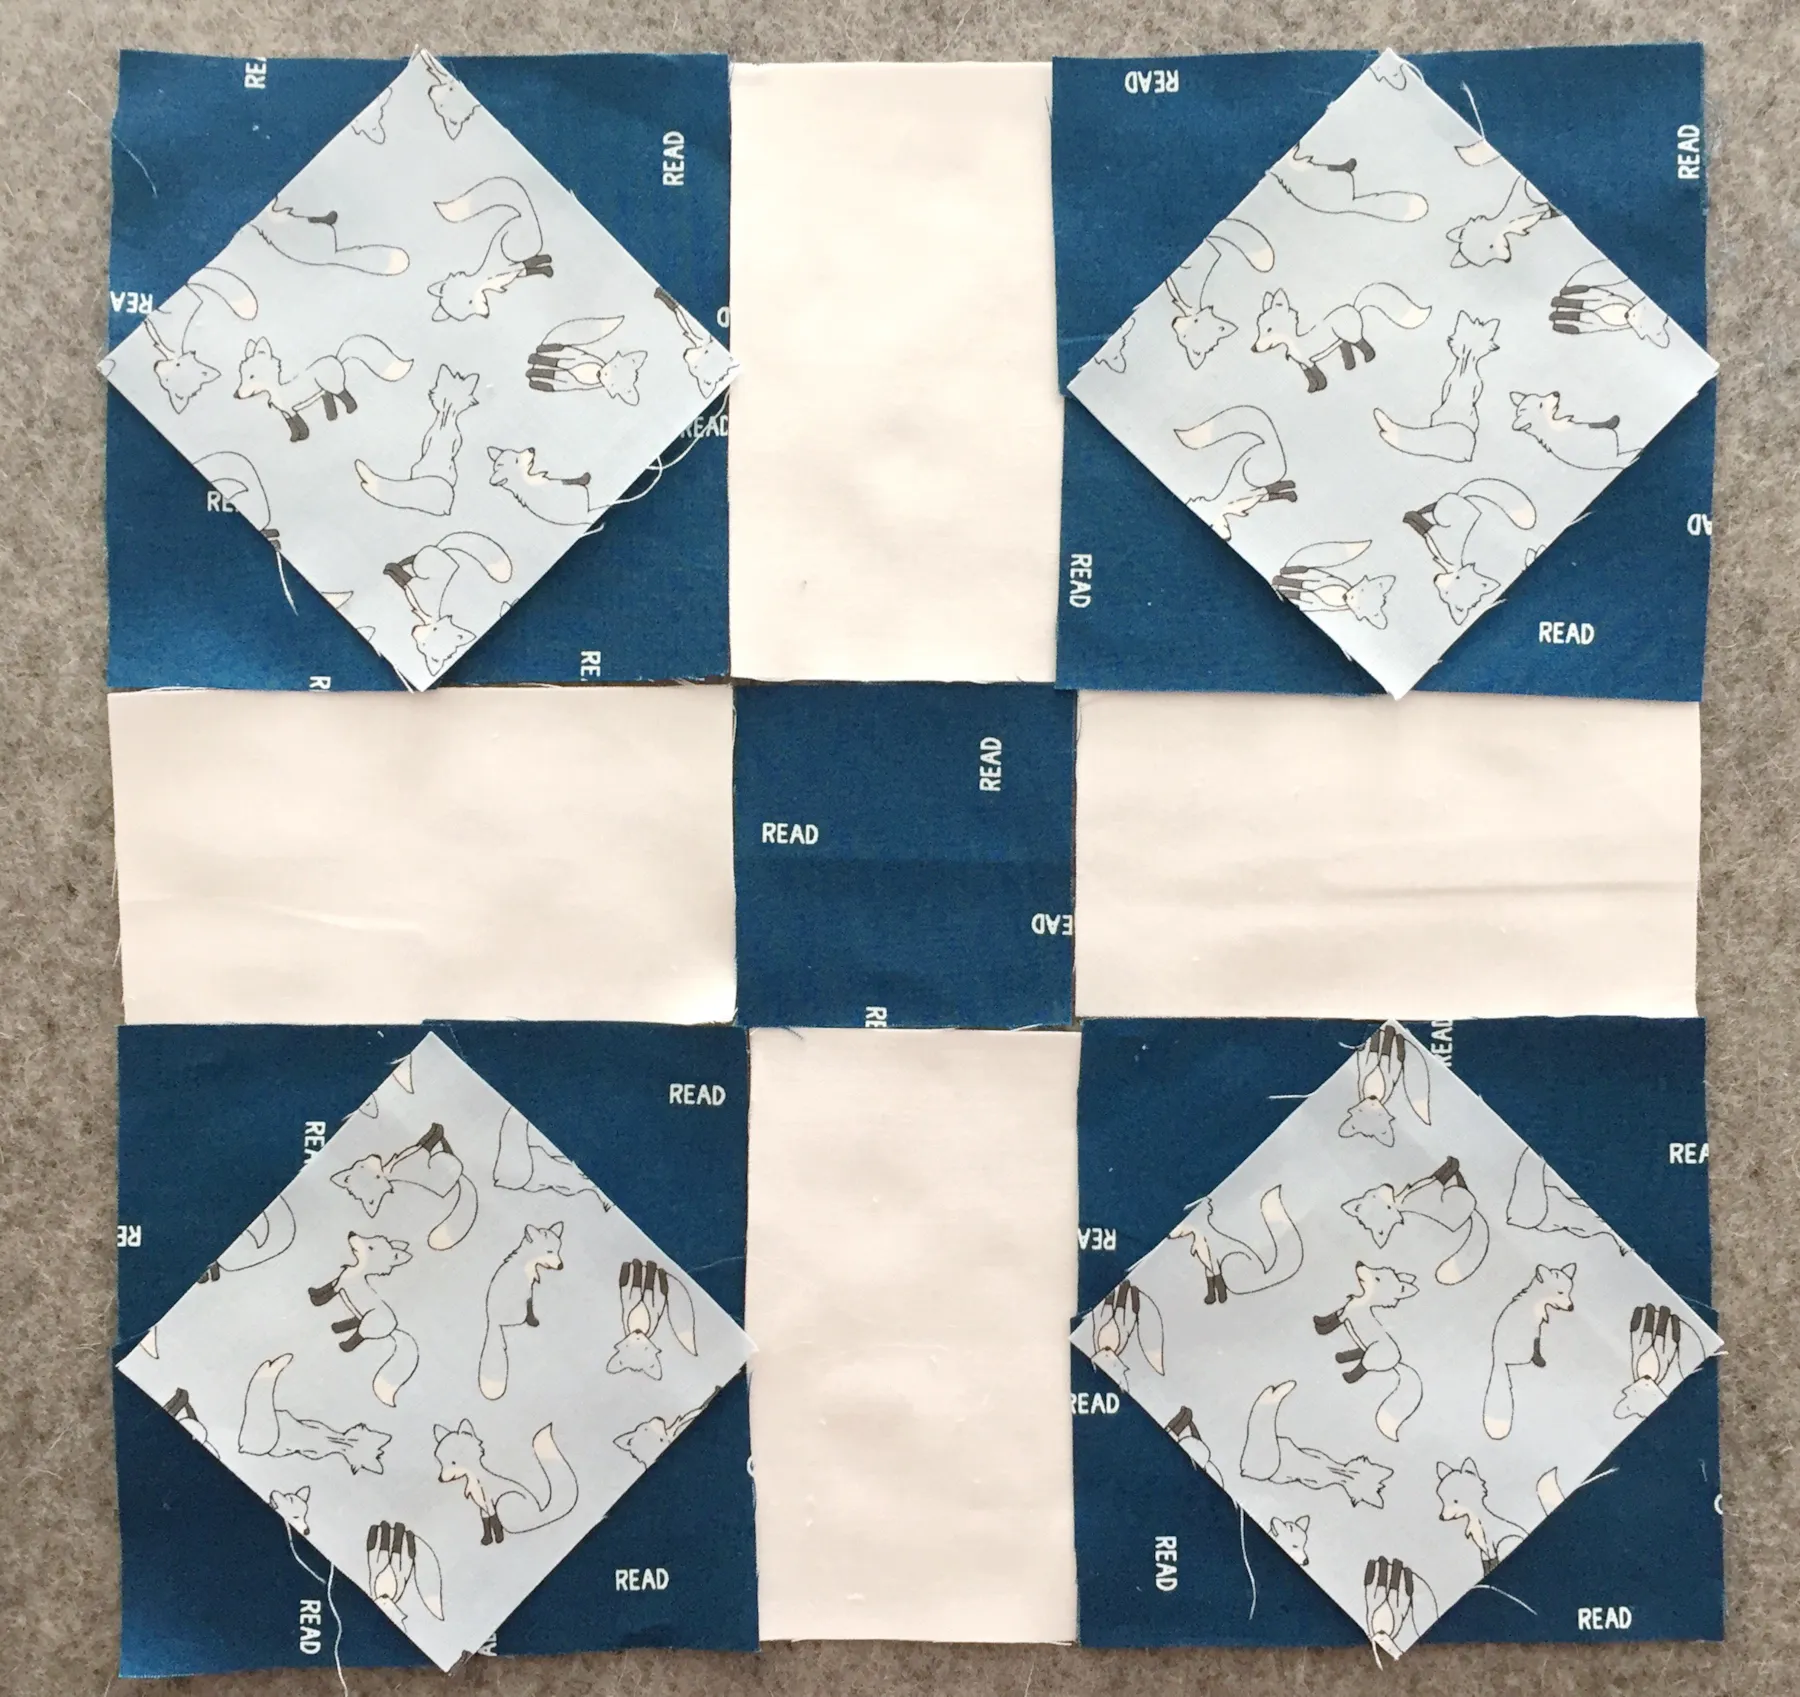
- Sit down with a Reference Block image printed from BlockBase+ and enjoy sewing everything together!


Reopening a Saved Project
- Click the My Projects button on the right of the toolbar across the top of the screen and you will see a list of all of your past saved projects.

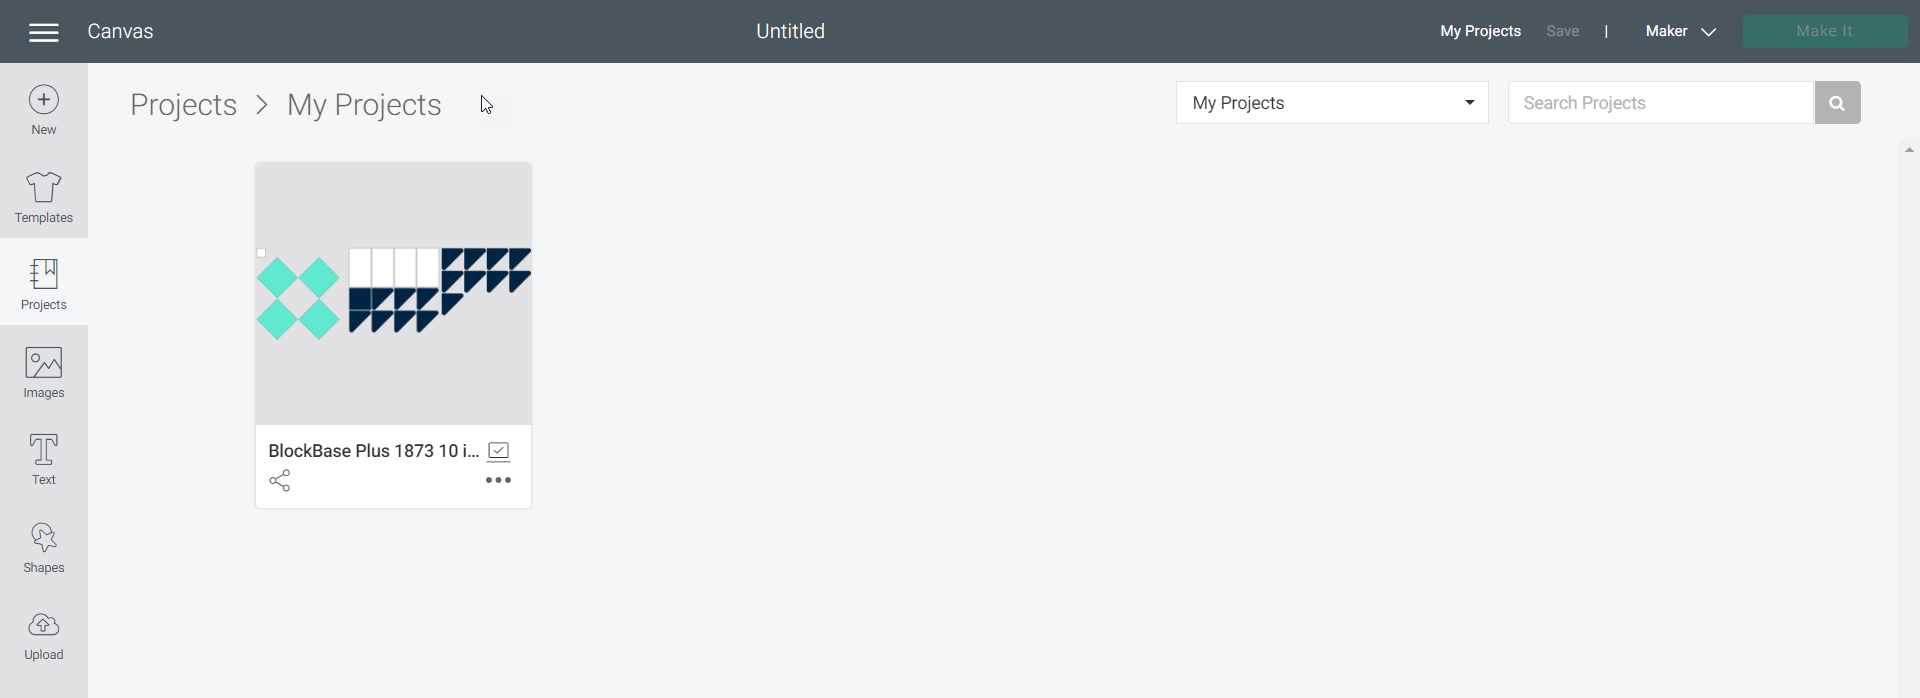
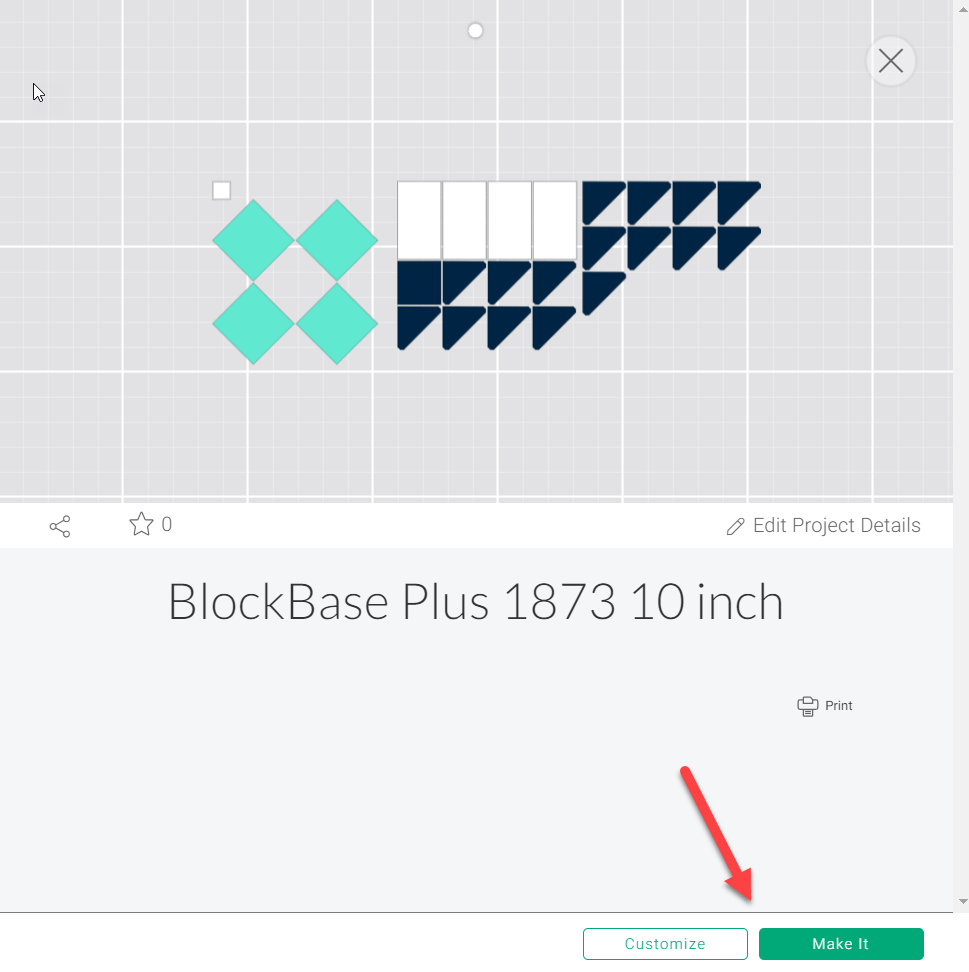
- Click on the project you want to make and a dialog will pop up.

- Click the Make It button to go directly to the mat sorting screen (step 16 above).

- Click the Customize button to go to the Canvas Screen where you can further edit the project before making it (step 9 above).


Creating a New Project from a Previously Uploaded SVG File
- Open Cricut Design Space and click the New Project button on the right of the toolbar across the top of the screen.

- Click the Images Icon in the middle of the toolbar on the left side of the screen.
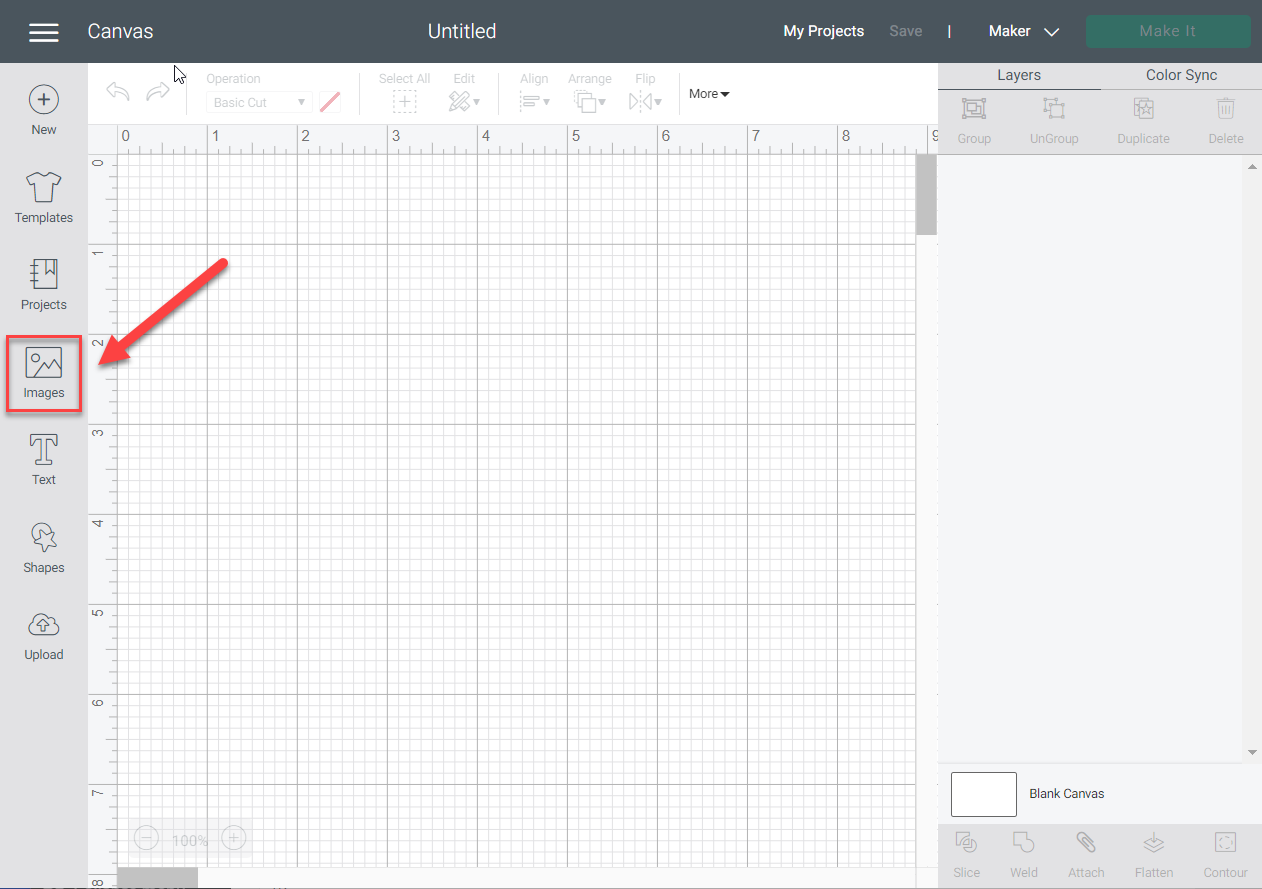
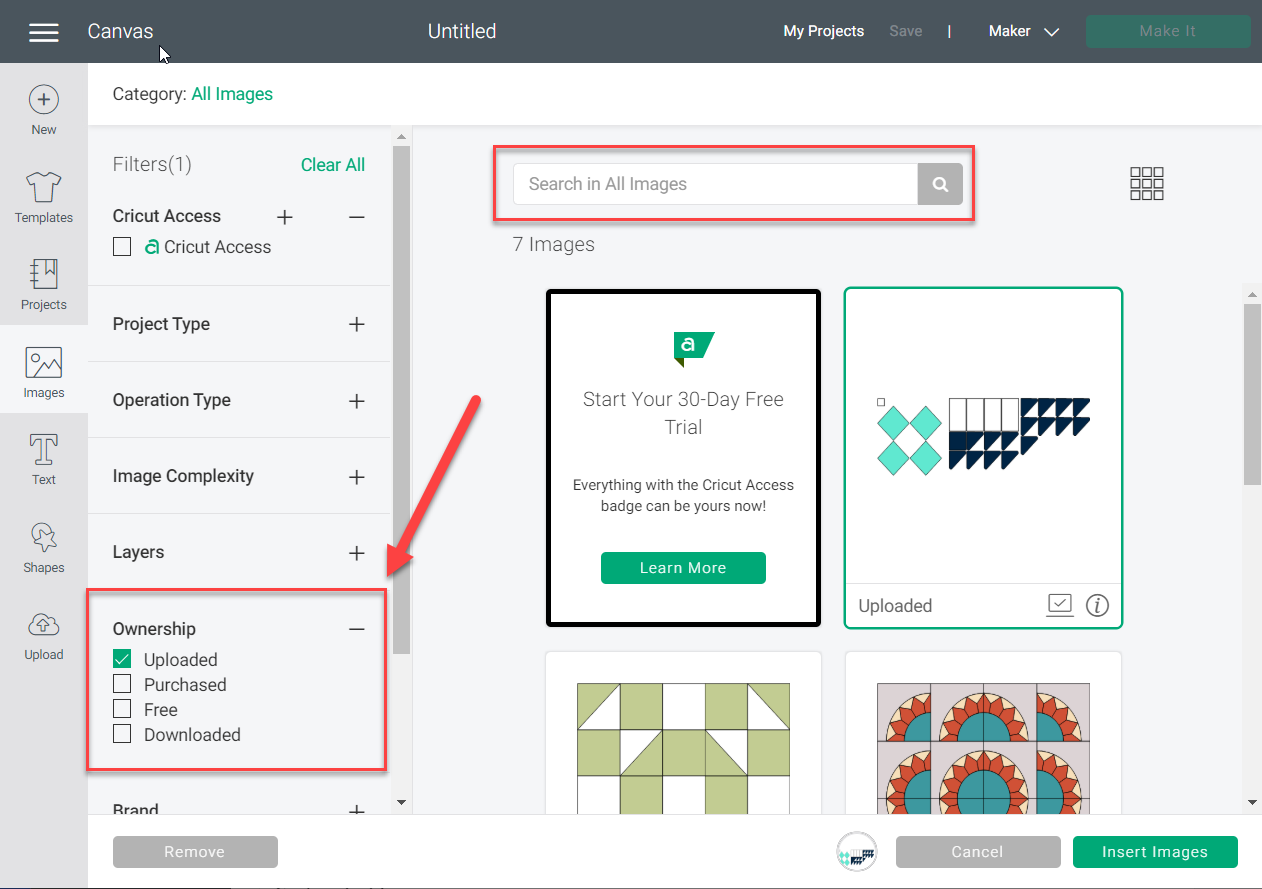
- Click the Plus (+) Icon next to the Ownership category and select Uploaded.

- A list of all images you have uploaded into your Cricut Design Space account will appear. You can search within these using the tags that you assigned to the SVG file (see step 7 above).
- Select the project that you want to work with, click Insert Images, and continue from step 9 above.