 BlockBase+
Let’s get to know the basics of using BlockBase+ SVG files in Silhouette Studio.
SVG (scalable vector graphic) is a unique type of image format. This popular vector file can be imported into many different software applications on the market, including digital cutting machines, embroidery machines, longarm software, and more.
- Follow these instructions for exporting SVG files from BlockBase+ >>
SVG files for use in Silhouette Studio should be exported from BlockBase+ with the Resolution option set to 72 dots per inch (dpi).
Note that Silhouette Studio must be upgraded to the paid Designer Edition in order to be able to import SVG files. - Open Silhouette Studio and you will see an empty workspace.
- Go to the File Menu and select Open or click the Open File Icon in the upper-left of the toolbar along the top of the screen. Locate the SVG file that you want to use, select it, and click Open.
SVG files from BlockBase+ are saved to your Documents > My BlockBase Plus > Images folder by default.


- The file will open and you will see it appear overtop of an image of the Silhouette cutting mat.

- The labeled white square in the upper left corner of the Block Template Exports from BlockBase+ will always be the Scale Square. The Scale Square is not included in Block Image Exports. You may have to scroll to the left to see the Scale Square depending on the size of the SVG file. In the image above, the Scale Square is off the screen in the upper-left.
Click on the Scale Square and make sure that the square measures 1.000″ x 1.000″. In Silhouette Studio you will see this square listed as 1.000″ x 1.297″ because Silhouette is including the label text which extends beyond the square in the size.

Right-click on the Scale Square and select Ungroup to separate the text lines from the Scale Square.

Next, click on just the Scale Square and drag it to a different location. Click on the Scale Square again and you will see that it measures 1.000″ x 1.000″ as it should.

- If the Scale Square does not measure 1.000 x 1.000 once you have separated it from the text, then we will need to do some resizing. Use a calculator to divide 1.000 (the size the Scale Square should be) by the size of the Scale Square as it appears in Silhouette Studio. The resulting scale number will be more than 1 if the patch is too small and less than 1 if the patch is too large.
- Select all the patches simultaneously, group them together by right clicking and selecting group, and note one of the dimensions for the selected group.
- Multiply this dimension by the scale number that we calculated in step 6 above. Round to three decimal places. Make sure that the lock button is closed to maintain the aspect ratio, and then enter this newly calculated dimension into the appropriate width or height field in the sizing panel. Make sure that you see the dimension you are changing change on the worktable as well.

- Right click on a patch and select Ungroup. Then check the measurements of the Scale Square to ensure that it is now 1.000 x 1.000.
- Once you have confirmed that the Scale Square is the correct size, you can delete it and the separate text by selecting each piece and then hitting the Delete key on your keyboard. You can also Click and Drag around all the pieces to select them all in order to delete them at the same time.

- You can duplicate, delete, move, and rotate the patches individually from this screen. Click on the patch that you want to modify and a box will appear around the shape showing the shape’s measurements. To rotate a patch, Click on it to select it and then click and hold the Handle at the top of the patch to free rotate. When your mouse hovers over the green Handle it will turn into a circular arrow.

To rotate at specific angles, open the Transform Panel from the toolbar on the right side of the screen. Select the Rotate Icon, which is the circular arrow, at the top of the Transform Panel. Then choose from the preset rotation angles or enter a custom angle in the boxes. You can use either the Rotate To or Rotate By; both will work for our purposes.

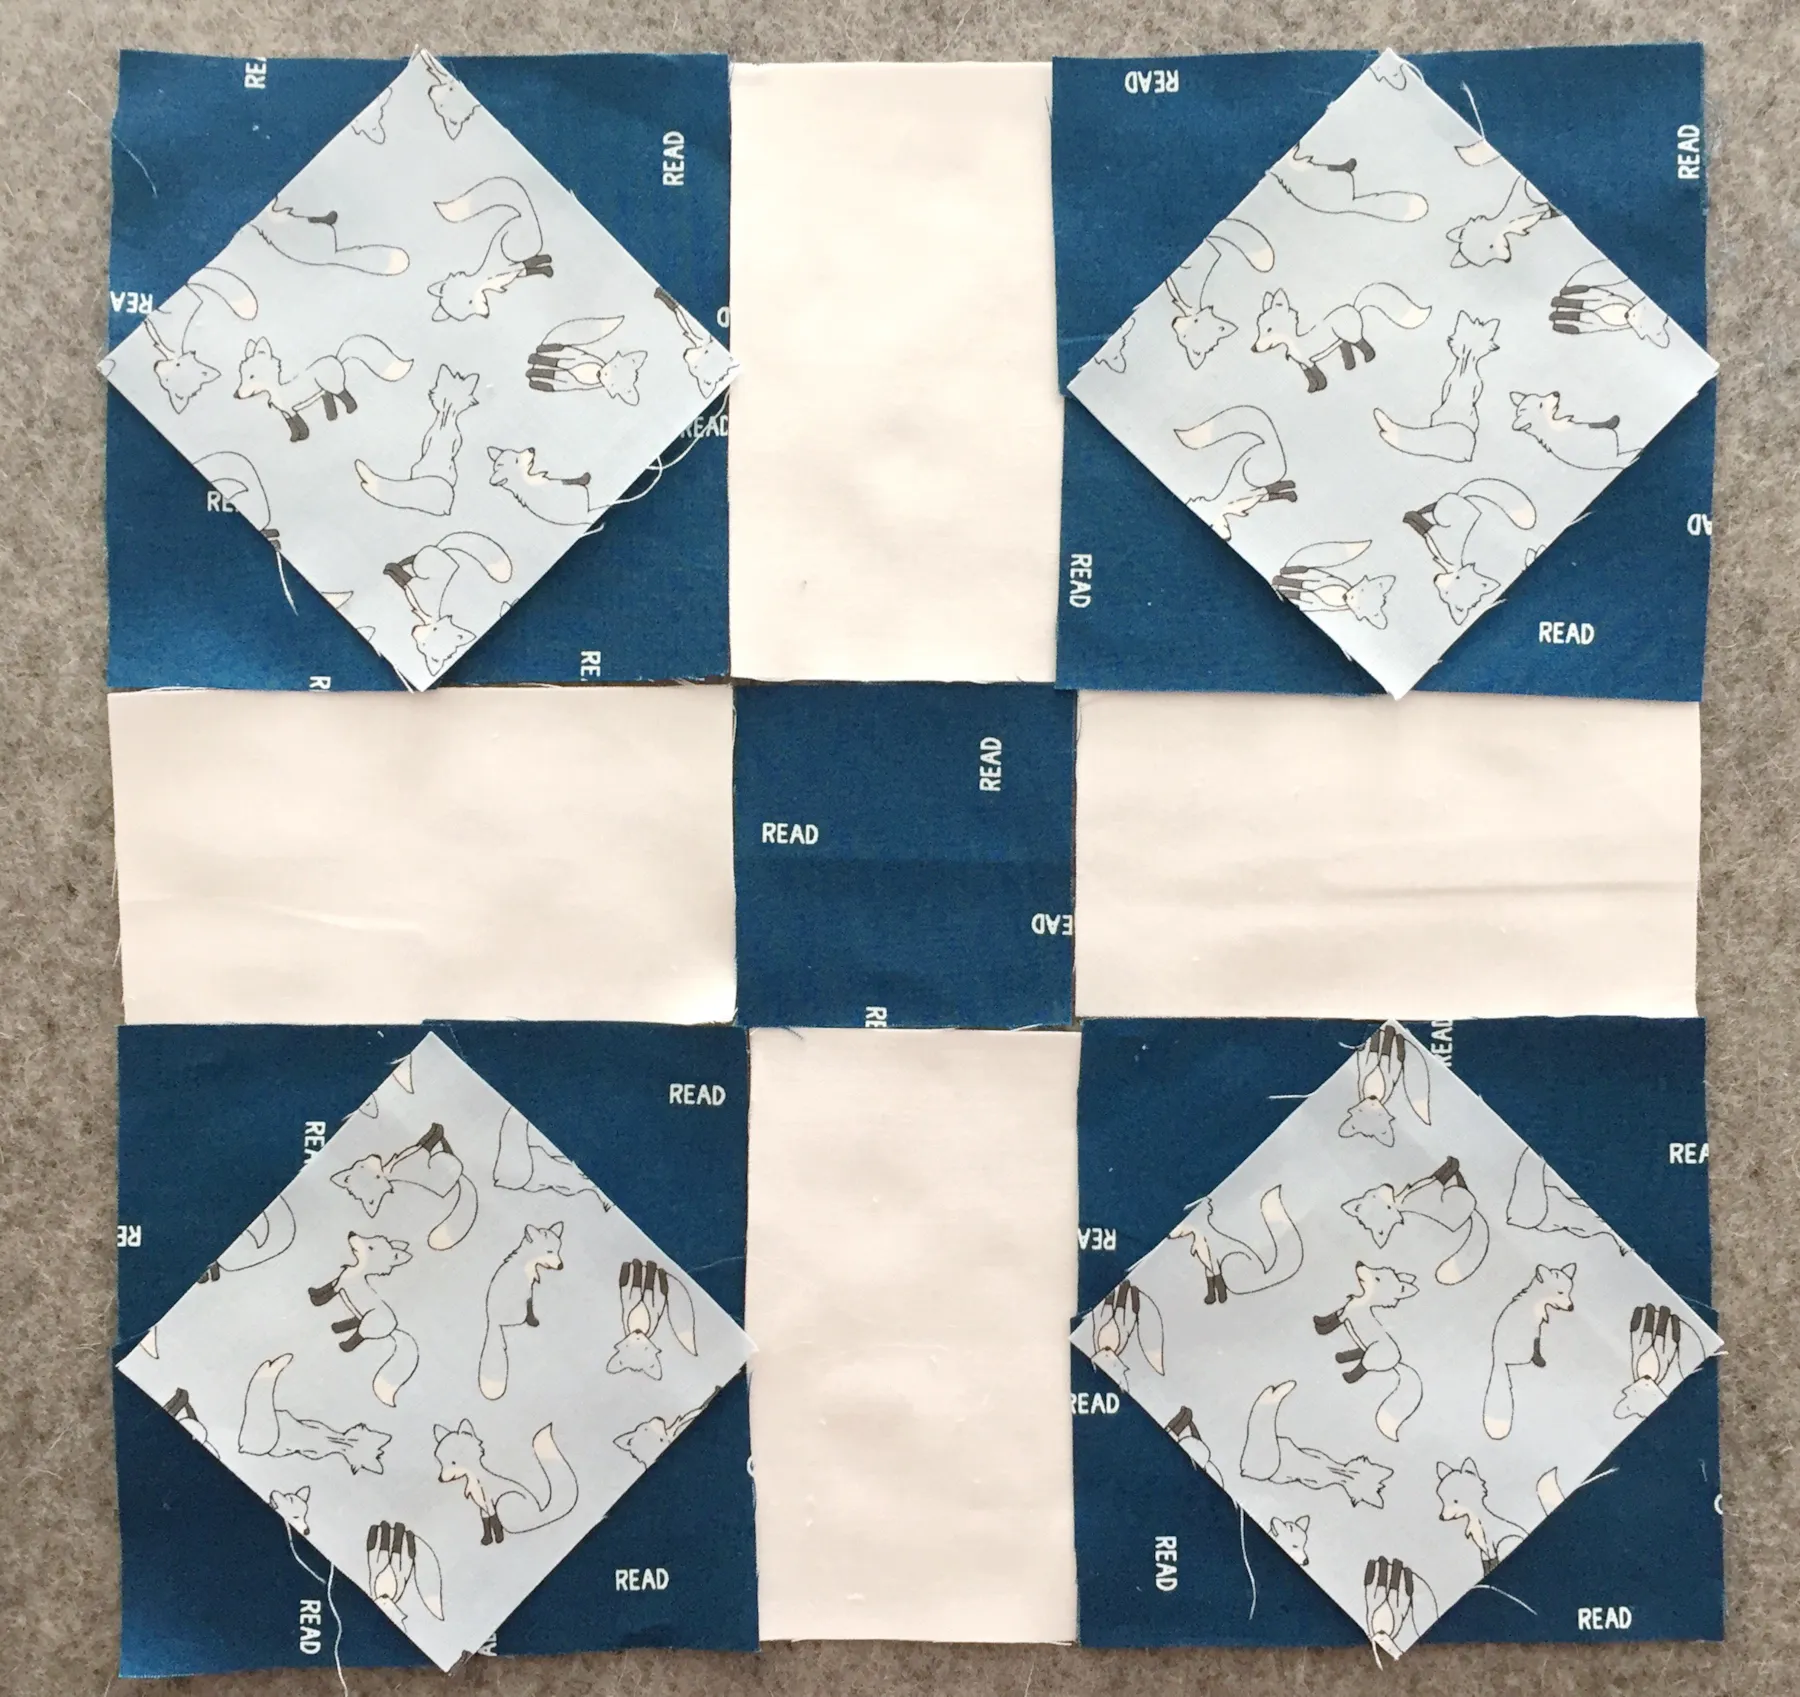
- We need to create a separate cutting file for each fabric we will be cutting. To do this we will cut and paste the patches of different colors into new project files. In this example, we will leave the white rectangles, as they are already arranged where we need them to be on the cutting mat, and will move the teal squares and the navy square and triangles to new project files.
- First, select all of the patches of the color that you want to move. Hold down the Shift Key on your keyboard as you Click on the patches one-by-one to select multiple patches at once or Click and Drag around all the pieces to select them all together.

You may need to zoom in and zoom out or use the Scroll Bars to see all of the patches of one color. You can zoom using the different controls in this section of the toolbar across the top of the screen.

- Right-click on one of the selected patches and choose Cut from the pop-up menu that appears. The patches will disappear from your screen.

- Go to the File Menu and select New Project Wizard from the dropdown menu.

- Click on the icon that says Blank Document and then click the Start button in the lower-right of the dialog window.

- You will now see a new empty screen with just a digital image of the Silhouette cutting mat.

- Right-click anywhere on the screen and select Paste from the pop-up menu that appears. The patches that we cut from the other screen will paste onto the new screen. They will appear in the same position on the the new screen as they were on the original screen.

- Click on a patch to select it and move it onto the digital cutting mat, placing it where you want it to be when the file is sent to the Silhouette cutting machine. Do the same for all patches.


- Click on the File Menu and select Save to create a Silhouette Studio file for this specific color that you can reopen and edit later. Name the file and select where you would like it to save on your computer. I like to save with the same project name and the color of the fabric from which I will be cutting the patches.

- You will see the name of the file appear at the top of the window and in a white tab just above the workspace screen on the left.

- You will also see a gray tab next to the white tab. This is the original file that we still have open. We can easily switch back and forth between tabs while keeping all of the files open. Click on the gray tab to move back to the original project. You will see the original screen and the tab you clicked on becomes white. The new file we were just working on will now appear gray. The name of the file at the top of the window will also have changed to the name of your original SVG export.


- Repeat steps 9-17 to make new files for each fabric color that you want to cut. In this example we will end up with three open tabs.

- Switch back to your first tab by clicking on it in the tab list. This screen should now only have one color remaining on it. Adjust the templates on this screen so that they are where you want them to be for cutting.

- We also want to rename and save this original screen. Click on the File Menu and select Save As and then Save to Hard Drive to be able to create a new Silhouette Studio file for this specific color.

You will see a pop-up dialog that will let you change the name of the file. Enter a new name and click the Save button. You’ll see the name change at the top of the screen and in the tab.

- We are now ready to cut the templates. Connect to your Silhouette machine and turn the machine on.
- Select the tab that you want to cut first. Here we are using the middle tab with the teal square patches. Click the Send button in the upper-right corner of the screen.

- The Cutting Screen will now appear. On the left you will see your templates with the cut lines highlighted in red. On the right are the options for cutting. Click on the top option in the highlighted box in the image below to change the material that you are cutting. We have selected Fabric, Thin (Cotton Print) from the dropdown list that appears. Make sure that the second option says Cut. The third item only has the Ratchet blade as an option.

- Based on the selections that we have made, Silhouette Studio tells us what setting we should adjust the Ratchet Blade. Here it is telling us to set it to 3. Start with this setting, but you may want to experiment to find the setting that works best for you and your machine.

- Prepare your fabric for use with your Silhouette.
Different models may require different setups for cutting fabric.
Please follow the recommended setup for cutting fabric on your model.
You will need to stabilize the fabric in some way, such as backing the fabric with interfacing or another material or using starch or starch alternative, in order to get a clean cut. Please experiment to find a setup that works for you.
Silhouette does not have a dedicated fabric mat. They do have a Fabric Blade, which is the same as the Ratchet Blade but in a different color so that you can distinguish it. Like your fabric scissors, Silhouette recommends that you have a blade that is only used to cut fabric.
Put your fabric on your Silhouette cutting mat. Use a brayer or seam roller to ensure that the fabric is firmly attached and that there are no wrinkles. Doublecheck that your fabric placement matches with where you placed the templates on the digital cutting mats. For this project we are placing the fabric right side up, but there may be instances where you want to put the right side down. - Load the cutting mat with the fabric into the machine by pressing the Load on the digital screen of your machine. Note this step may vary depending on which model of machine you have. We have a Cameo 2.

- Click the Send button on the bottom right of the screen and let your Silhouette do the cutting work for you!

- Once the cutting is complete, press the Unload button on the digital screen of your machine to unload the mat. Then remove the patches and extra fabric from the mat.
- Click the Design button in the toolbar at the top of the screen to switch back to your open tabs. Switch to the next fabric color tab and repeat steps 22-30 to cut your other fabric colors and to cut more blocks if you want.

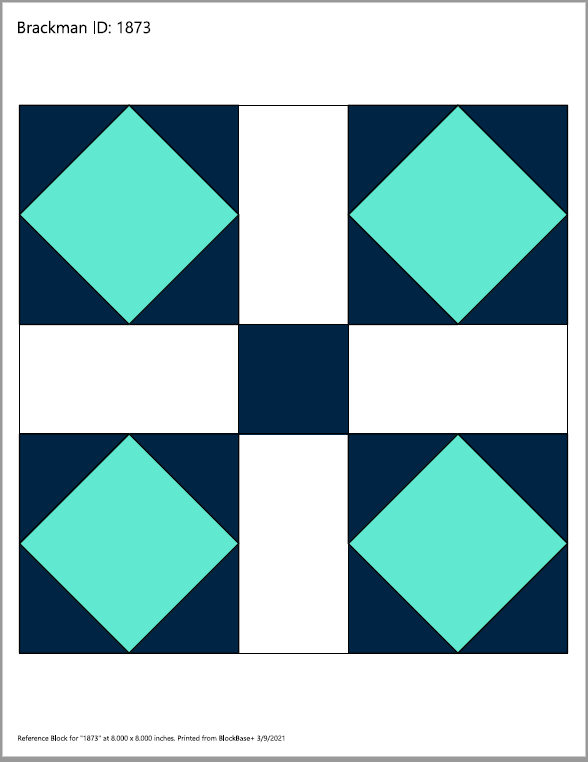
- Sit down with a Reference Block image printed from BlockBase+ and enjoy sewing everything together!