
Designing custom quilts just became easier! Using the Grid allows blocks to snap for the best accuracy when laying out a Custom Set quilt.
Learning about the Grid
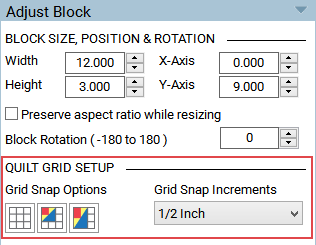
The buttons for using the grid are in the Adjust Blocks palette of the Quilt Worktable. You must have the Adjust tool selected. The grid is useful on Layer 1 of Custom Set layouts and Layers 2 and 3 of standard layouts. Keep in mind that the grid, whether the button is pressed or not, will only be visible on a custom set quilt. Although it’s not visible, it still works for snapping on Layers 2 and 3 of standard layouts.
The Buttons
![]() Show grid
Show grid
Displays the grid on the quilt based on the setting for Grid Snap Increments. Only visible on Custom Set quilts.
![]() Snap block position to grid
Snap block position to grid
While moving with the Adjust tool, the upper-left corner of the block snaps to the grid.
![]() Snap block size to grid
Snap block size to grid
While resizing with the Adjust tool, the block size snaps to a multiple of the number of the setting for Grid Snap Increments.
The Grid
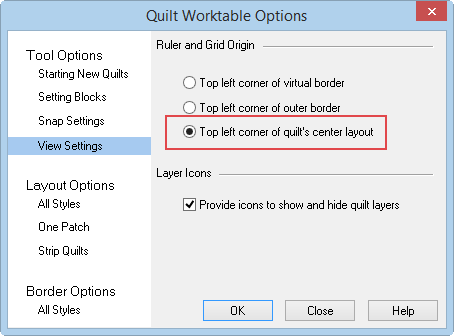
First, be sure the Show grid button is pressed in the palette. The settings for the grid shown below are for Grid Snap Increments of a 1/2 inch and the Grid Origin to be at the Top-left corner of quilt’s center layout.
PLEASE NOTE!
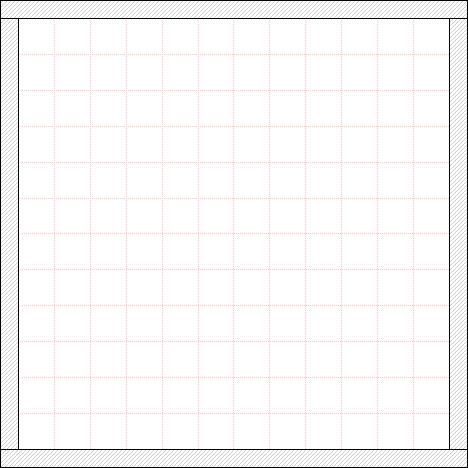
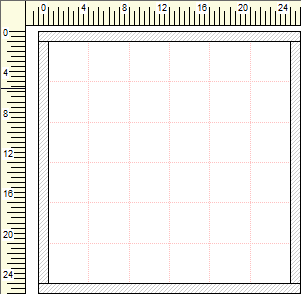
The program can only “draw” so many grid lines on the quilt layout. So even though you don’t see the grid line, it does not mean the grid is not there. For example, this quilt (A) is 24″ x 24″ with Grid snap settings set to 4 inches. You can clearly see the grid lines every 4 inches. However, changing the Grid snap settings to snap every inch (B) might cause more confusion. As you can see, the grid lines are only visible at 2″, 4″, 6″, and so on.
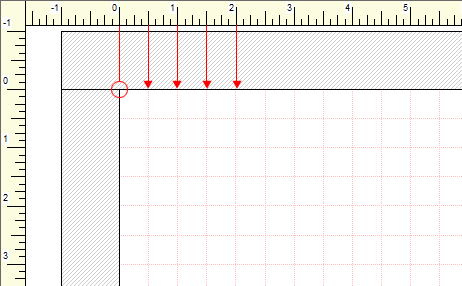
The block will still snap at every inch, whether the red grid line is visible or not. Notice below (B) the block snapped at 10″.
Setting Up the Grid
To view the grid settings, click the Quilt Worktable Options button on the bottom of the main toolbar ![]() , or click Quilt > Quilt Worktable Options.
, or click Quilt > Quilt Worktable Options.
To change the origin of the grid
The easiest setting for the grid origin is to have it start at the top-left corner of the quilt’s center. Click View Settings in the left column, then select the last option under Ruler and Grid Origin: Top left corner of quilt’s center layout.
To change the snap settings
Use the palette options for Adjust Block to change the snap settings.
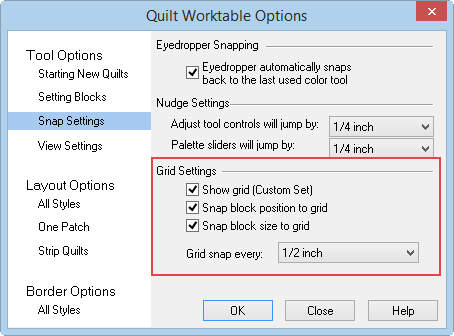
Or, in Quilt Worktable Options, click Snap Settings in the left column, then click the drop-down list next to Grid snap every.
Snap Block Position to Grid
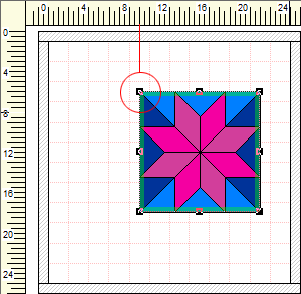
Press this button to set blocks based on the grid. When setting a block or moving a block, the top-left corner of the block will snap to the grid lines. This makes it easy to align blocks of different sizes. In the example below, you can see each block snapped at its top-left corner on the grid.

Snap Block Size to Grid
Press this button to adjust block sizes based on the grid settings. This button does not affect how the block is set on the grid, only its size while adjusting with the Adjust tool.
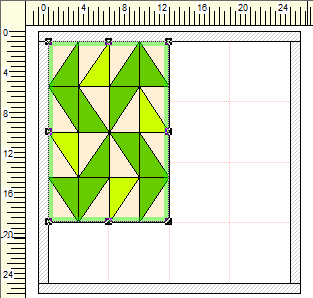
In the example below, the grid is set to snap every 6 inches so the red grid lines are visible at 6″, 12″, and 18″. When pulling the right corner of the block to adjust the size, the block size will snap to the next closest multiple of 6. In this case, the block will snap to 12″ in width and 18″ in height.

Note:
You do not need to have the Snap block position to grid button pressed when using the Snap block size to grid feature.


