


 BlockBase+
Click Print on the Block toolbar and choose Foundation from the menu.
You can also click File > Print > Foundation Pattern.
The Print Foundation dialog will display.
Note: The Windows Print Foundation dialog looks different than the Mac Print Foundation dialog. All settings are the same for both platforms.
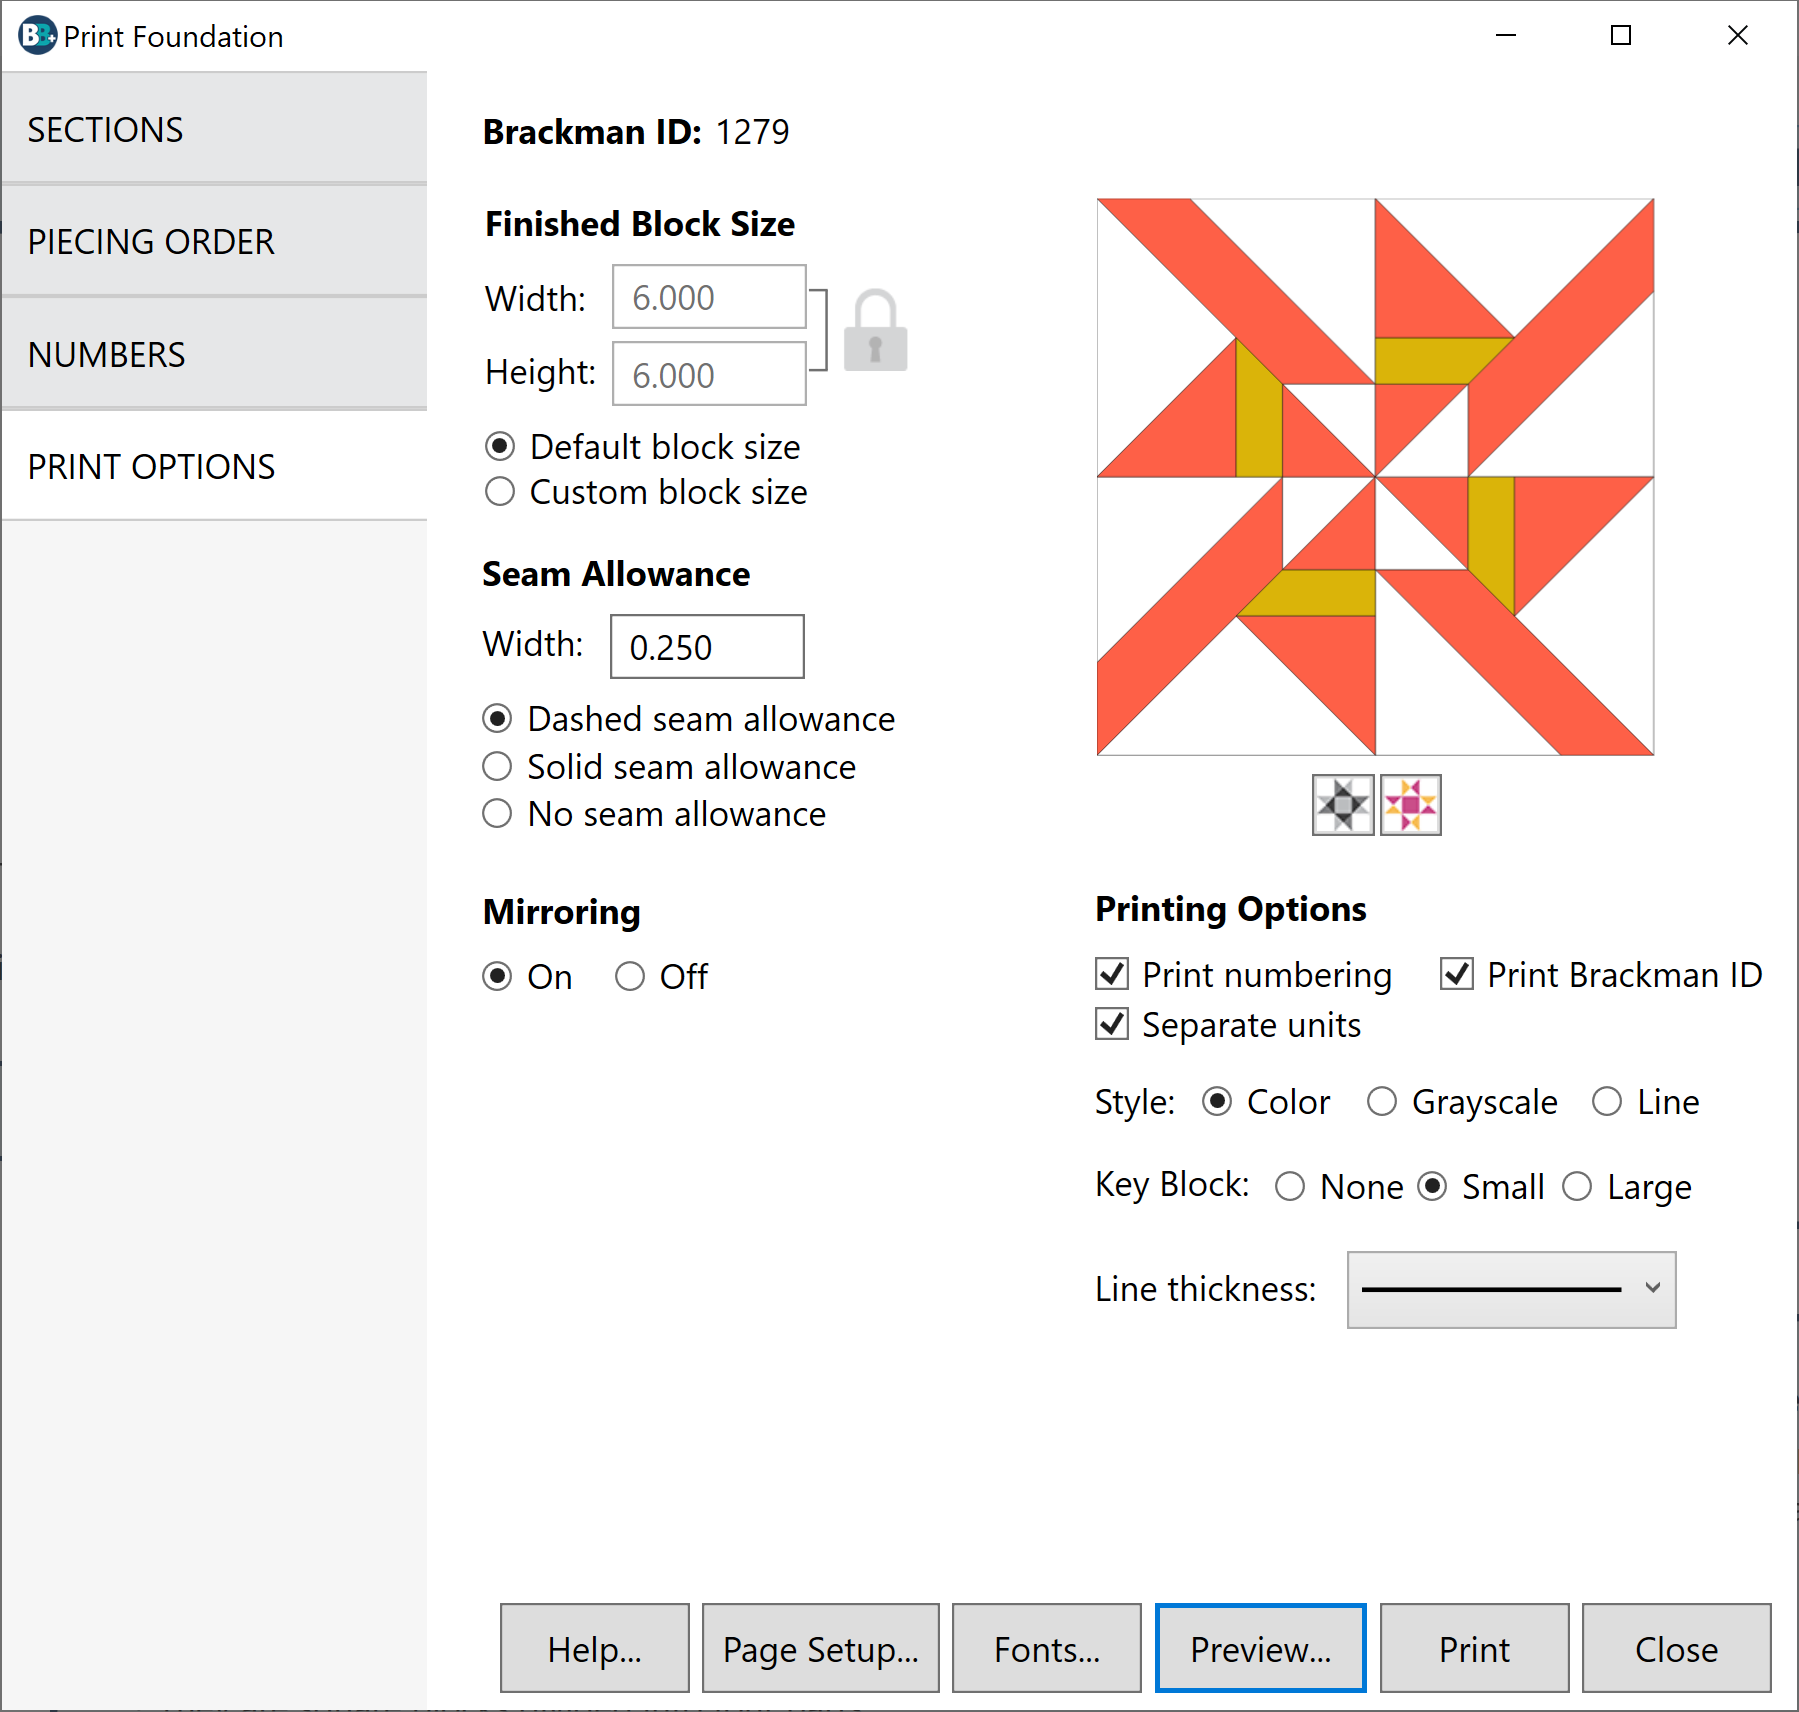

Print Options
The Print Foundation dialog has four tabs. The tabs appear along the left on Windows and along the top on Mac. The dialog will always open initially to the Print Options tab.
Finished Block Size
The Finished Block Size is the size of the block after all the seams have been sewn. The Default block size is automatically selected for you. This is the size of the block as it was originally drawn. To change the block size, click Custom block size and then type a new size in the Width or Height box. If you want to change the proportions of the block, click the Lock icon next to the Width and Height boxes to unlock the entries. Then you can change each dimension independently.
Allowable Width and Height values: 1 to 150.
Seam Allowance
Seam allowance is set to 0.25 inches or 0.635 centimeters by default. If you would like to change the seam allowance, type a new number in the Width box. You can change the style of the seam allowance by selecting Dashed seam allowance or Solid seam allowance. To turn off the seam allowance, choose No seam allowance.
Allowable values: 0.1 to 1.50.
Mirroring
Mirroring flips the pattern horizontally and is on by default. If you are printing a directional block, mirroring ensures that your finished block is oriented the way you expect because you stitch on the opposite of the paper.
Printing Options
Print numbering will include the numbers on each section that indicate sewing order. These numbers can be changed on the Numbers tab of this dialog.
Print block name prints the Brackman ID number at the top of the printout.
Separate units prints multi-unit patterns as separate units with a label.
Style allows you to choose between Color, Grayscale, or Line drawing for the foundations.
The Key Block appears on the first page of the printout and shows both the section key and the finished block key. You can choose a Small or Large key block. To turn the Key Block off, choose None.
The sections key is mirrored to help you see how the sections go together. This shows the printed side of the foundation as you’ll see it when piecing. The finished block key shows the finished block after it is sewn.
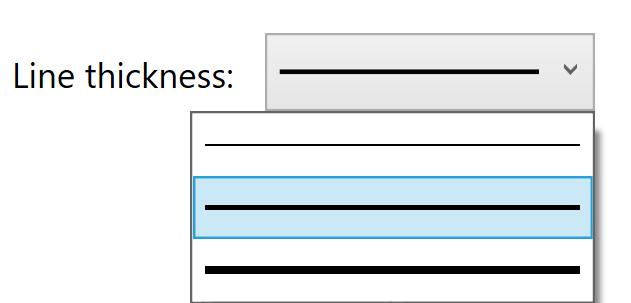
Line Thickness
Choose the line thickness you prefer for your printouts by clicking the down arrow to display the examples. Then click directly on the line thickness you want in order to select it.
Sections
Most foundation pieced blocks must be pieced in sections. Each section gets pieced separately. Then all the sections are sewn together to create the final block. Click the Sections tab to view the sections for the currently selected block.
Note: If the Sections tab is empty, it is because the block cannot be foundation pieced. For example, all the blocks found in 01 One Patch > 09 Curves. These blocks are made up of curves and cannot be foundation pieced. If you click Preview or Print on a block that has not been sectioned, you’ll receive a message reminding you to section the block before printing.
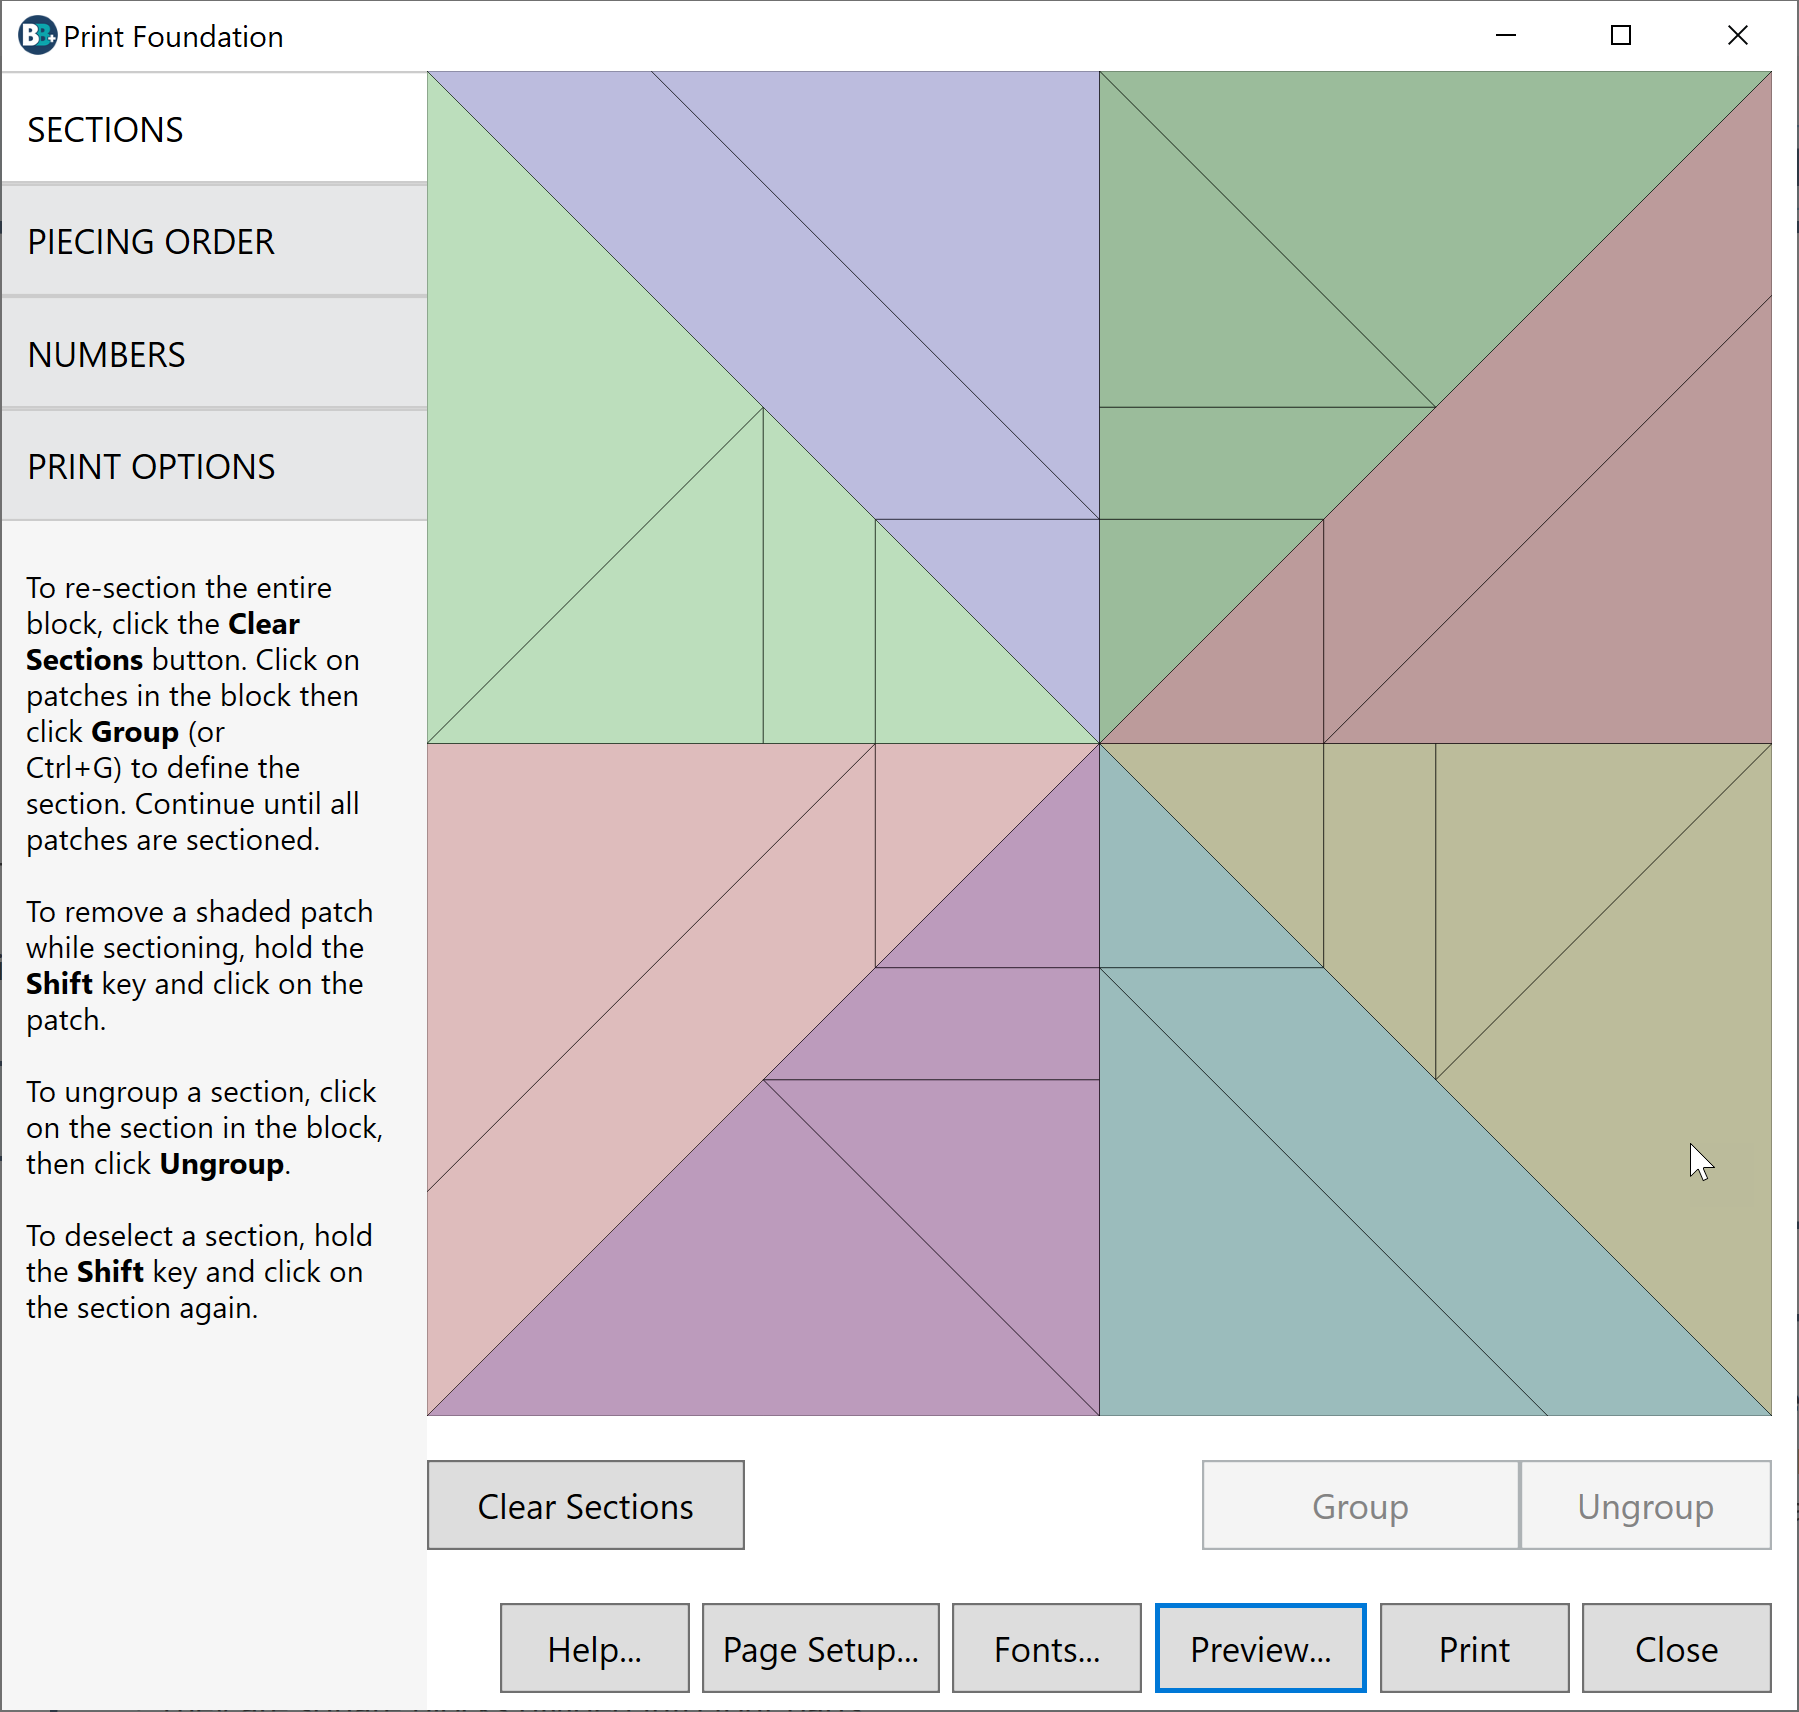
Each section is defined by a different color. You will find that some BlockBase+ blocks will be better suited to foundation piecing than others.
Changing the Sections
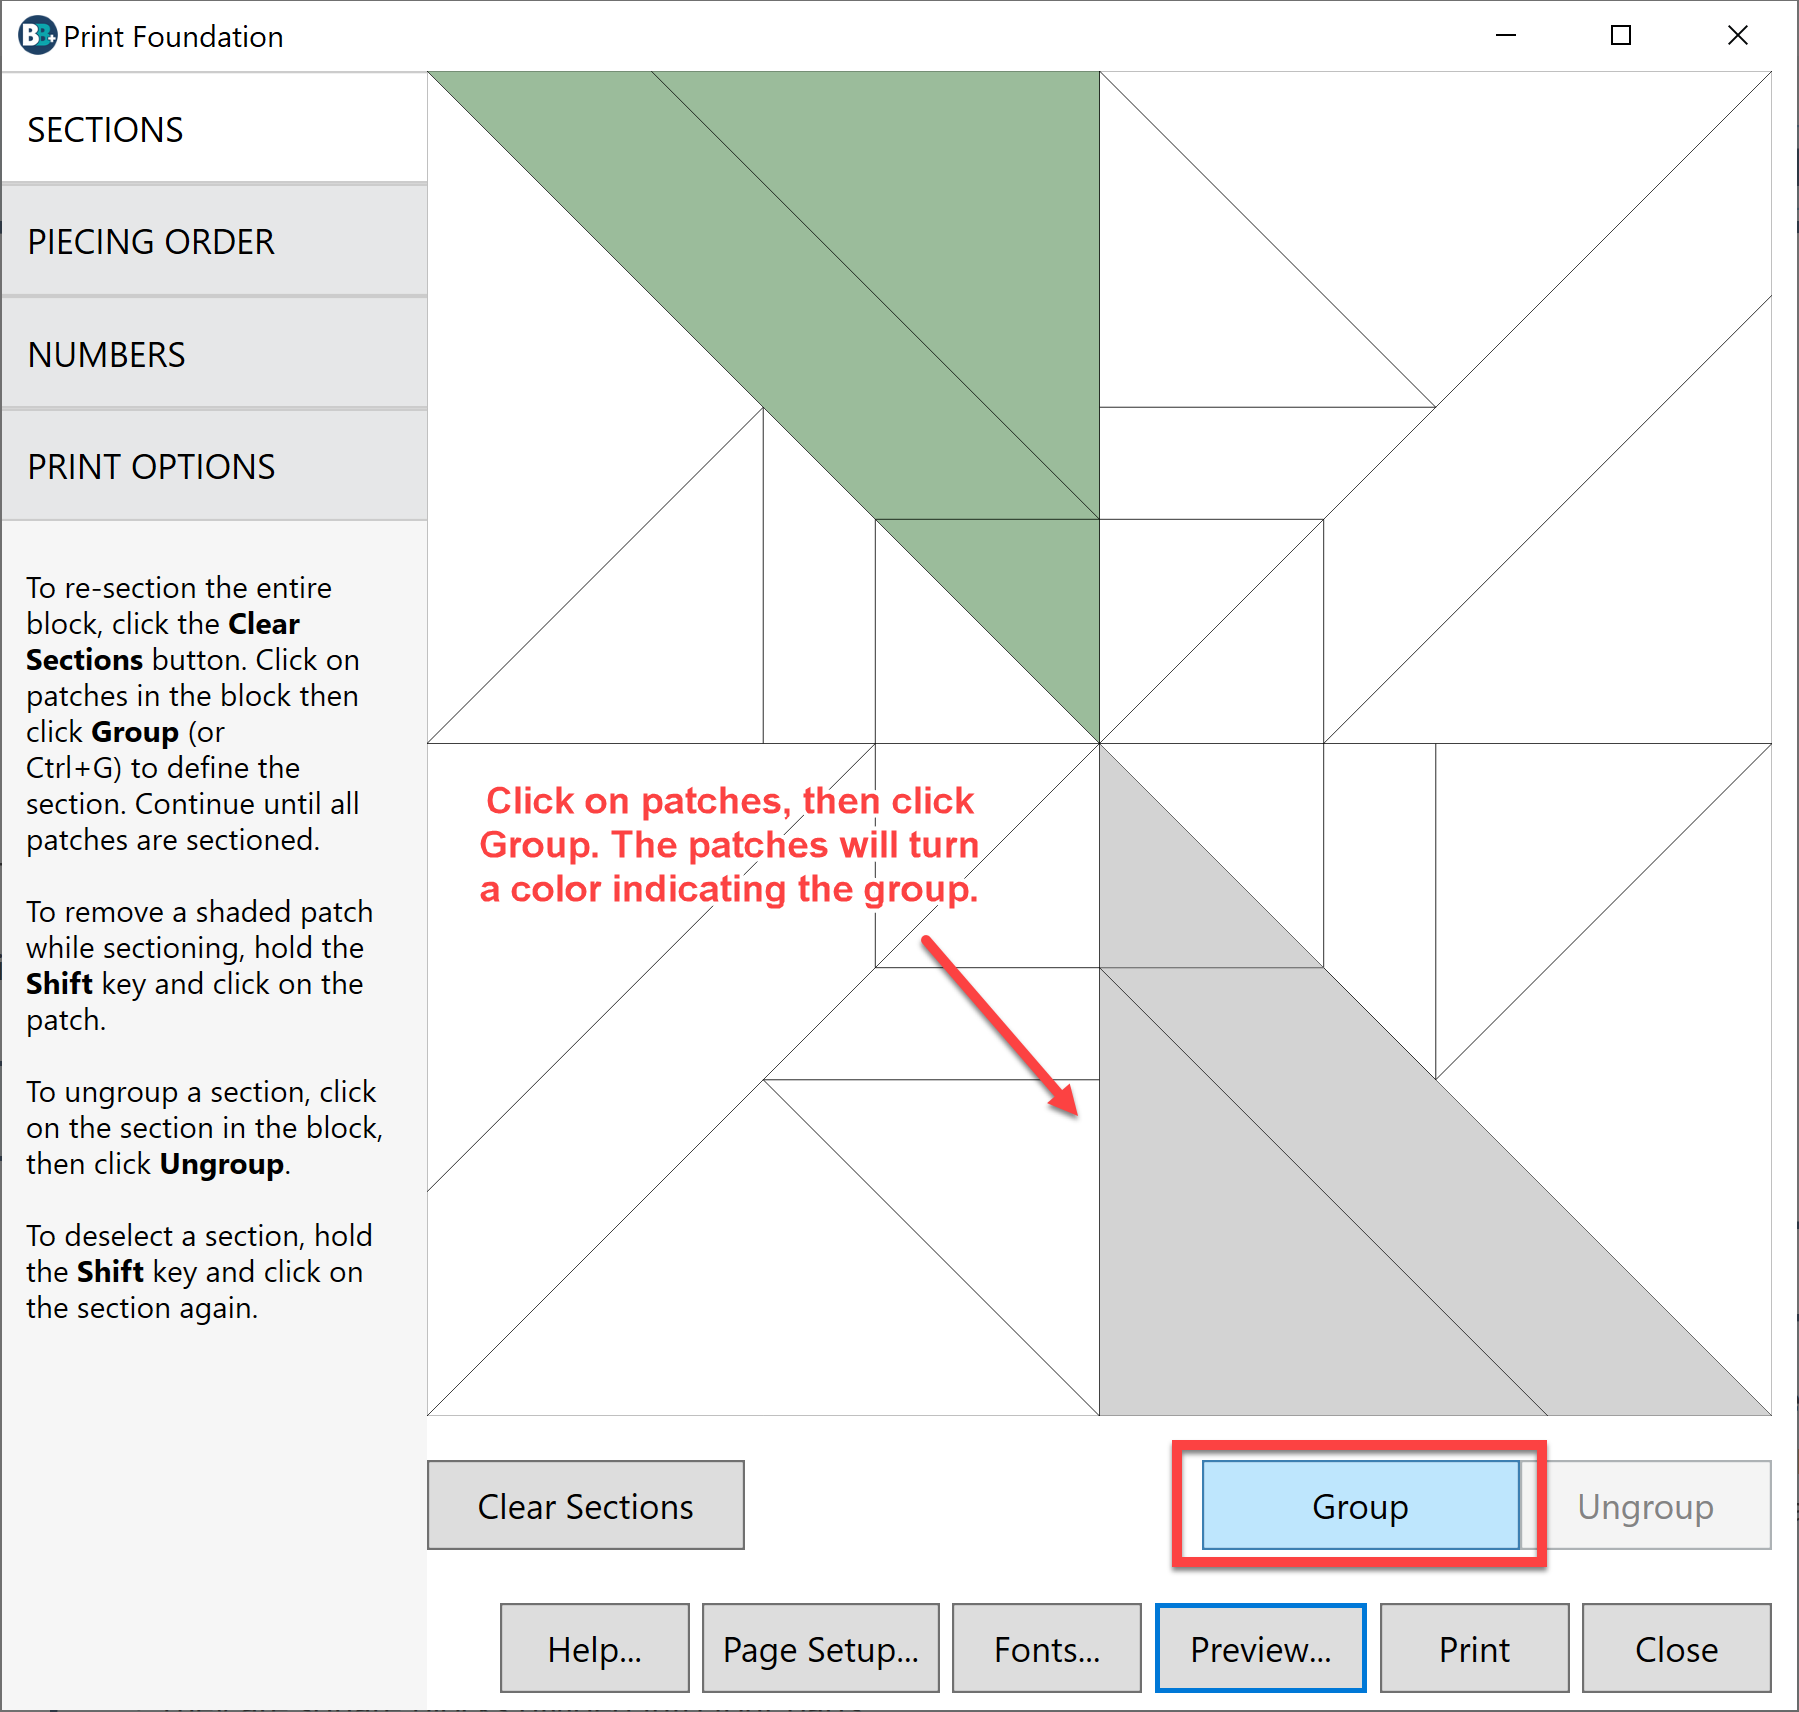
To clear all sections, click the Clear Sections button. All of the patches will turn white.
To create new sections, click on patches and group them. Click on the first patch you’d like in a section. It will turn gray. Continue clicking on patches then click the Group button. (Ctrl +G Windows, Cmd + G Mac). The section will turn to a color. Continue clicking on patches and grouping them until the entire block has been sectioned.
Tips
If you click the wrong patch, hold down the Shift key on your keyboard and click the patch a second time. This will remove the patch from the section, turning it from gray back to white.
If you’d like to ungroup one section, click on the section. It will change to a lighter shade of color indicating it is selected. Then click the Ungroup button. The patches will turn white.
Patches that are colored have been sectioned.
Patches that are gray have been selected, but have not been grouped into a section yet.
Patches that are white have not been sectioned and will not appear in the final foundation printout.
Piecing Order
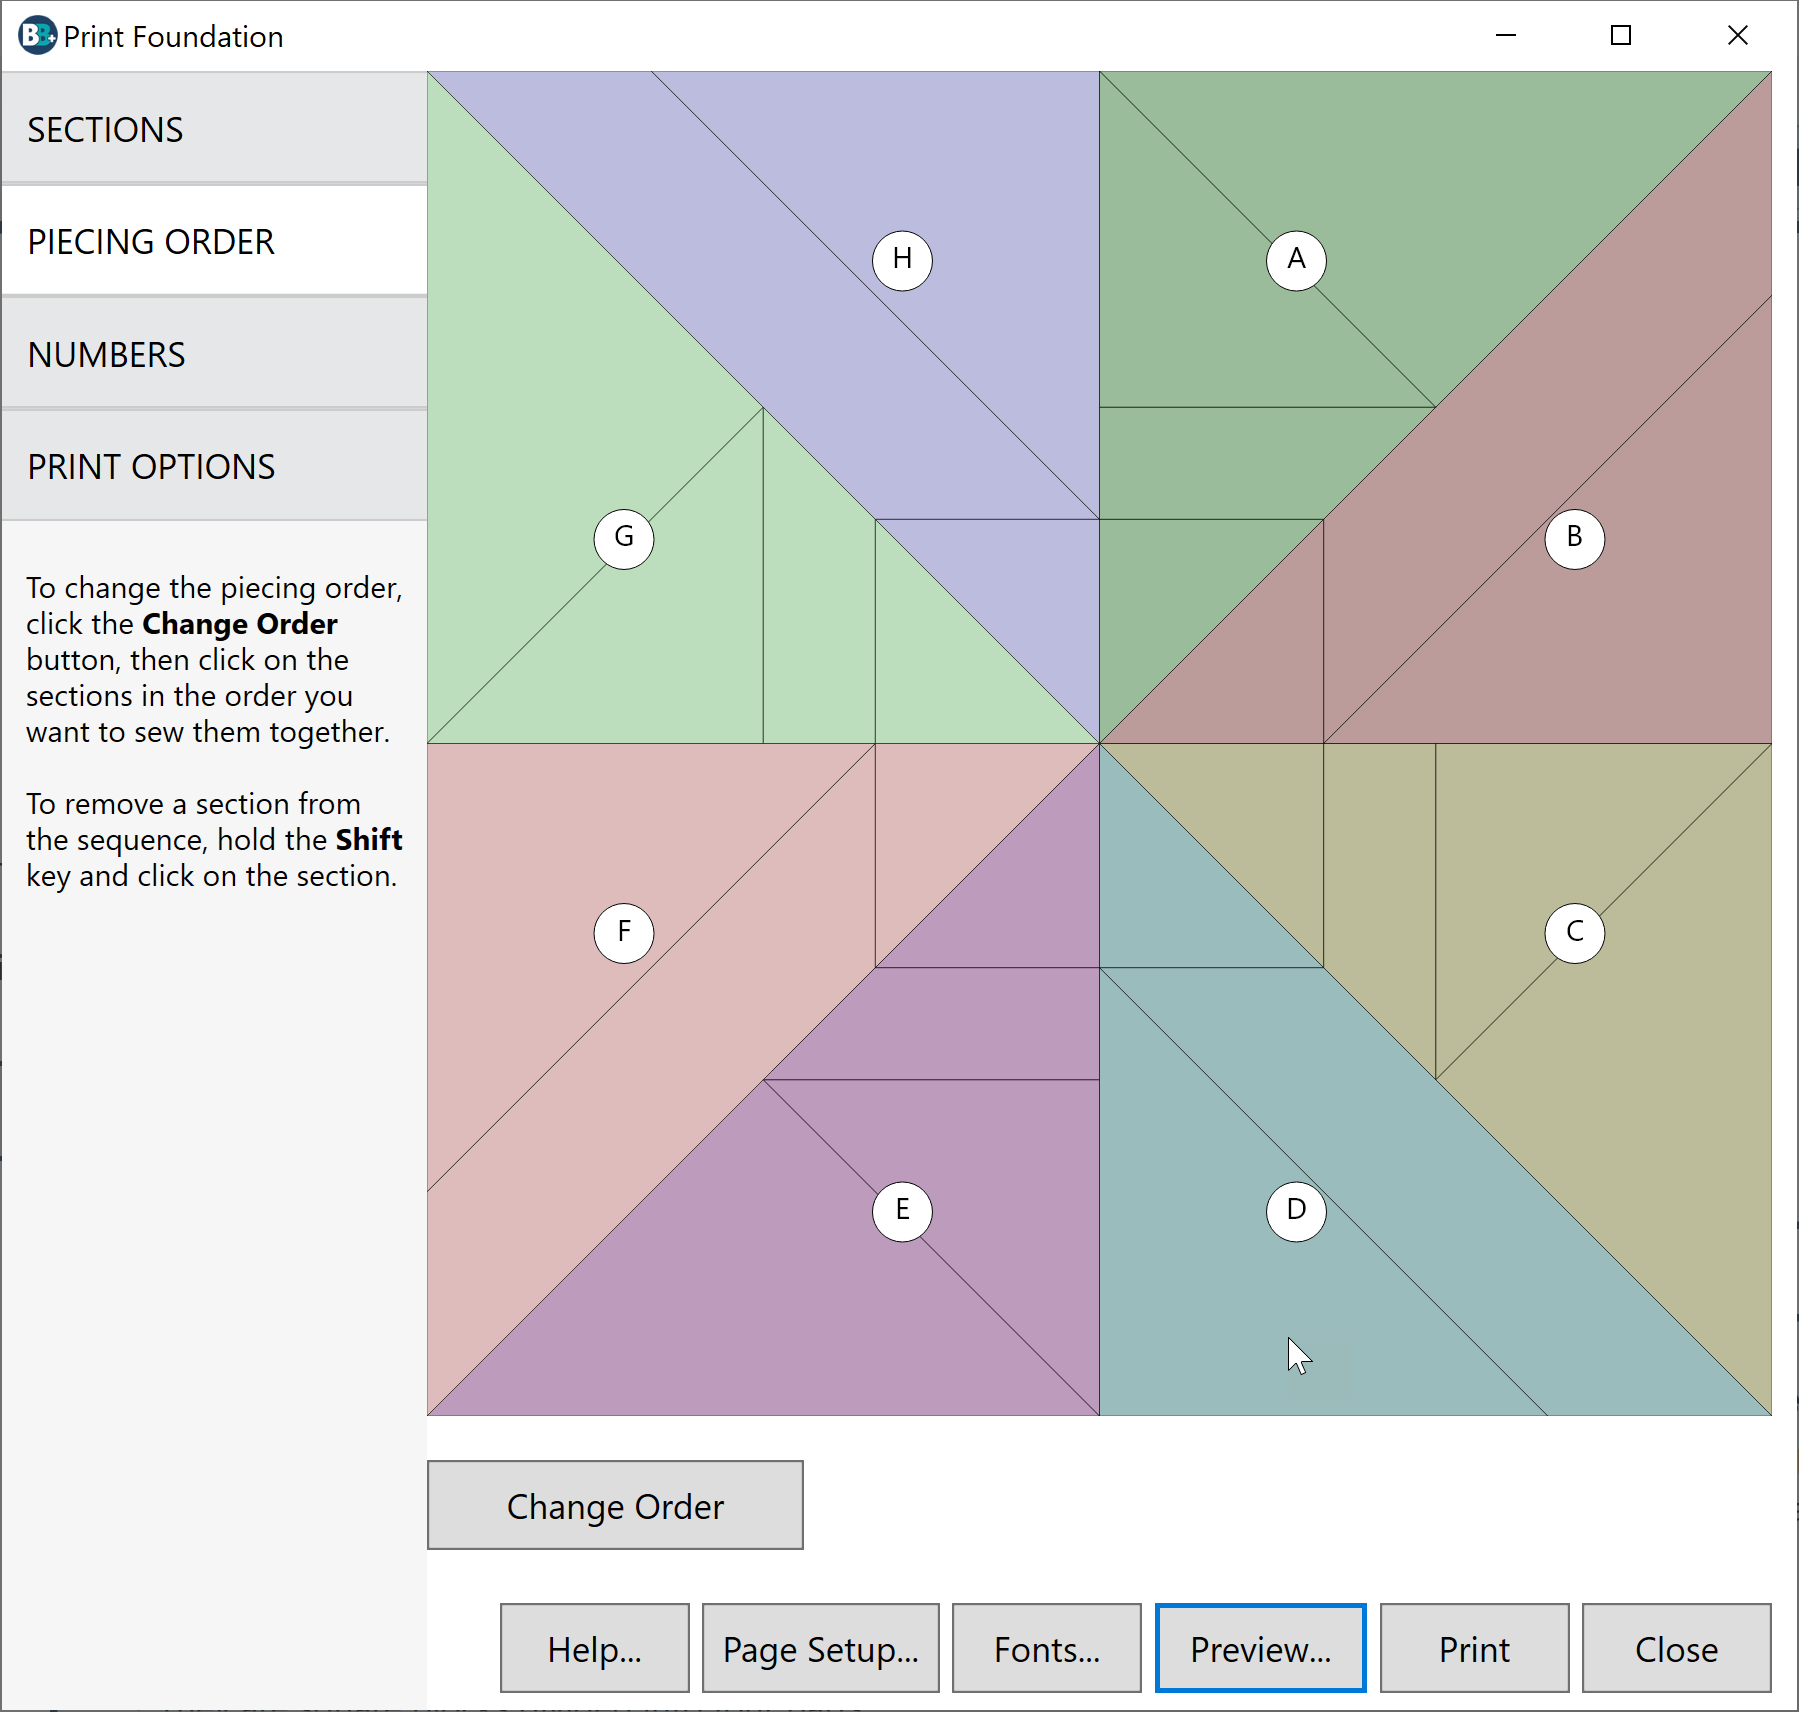
Each section of the block gets labeled with a letter to define the section. You can think of these letters as the order you intend to sew the sections together. Use the Piecing Order tab to define each section with a letter. The section will be labeled A, B, C, and so on.
Changing the Order
To change which letter appears on each section, click the Change Order button. The letters will change to question marks (?). Click on each section in the order you’d like the letters to appear. The question marks will change to the letters.
To remove one section from the piecing order sequence, hold down the Shift key on the keyboard and click on the section. The label of that section will change to a question mark, and the other section labels will adjust to reflect the change. Click on the section again to add a letter.
Numbers
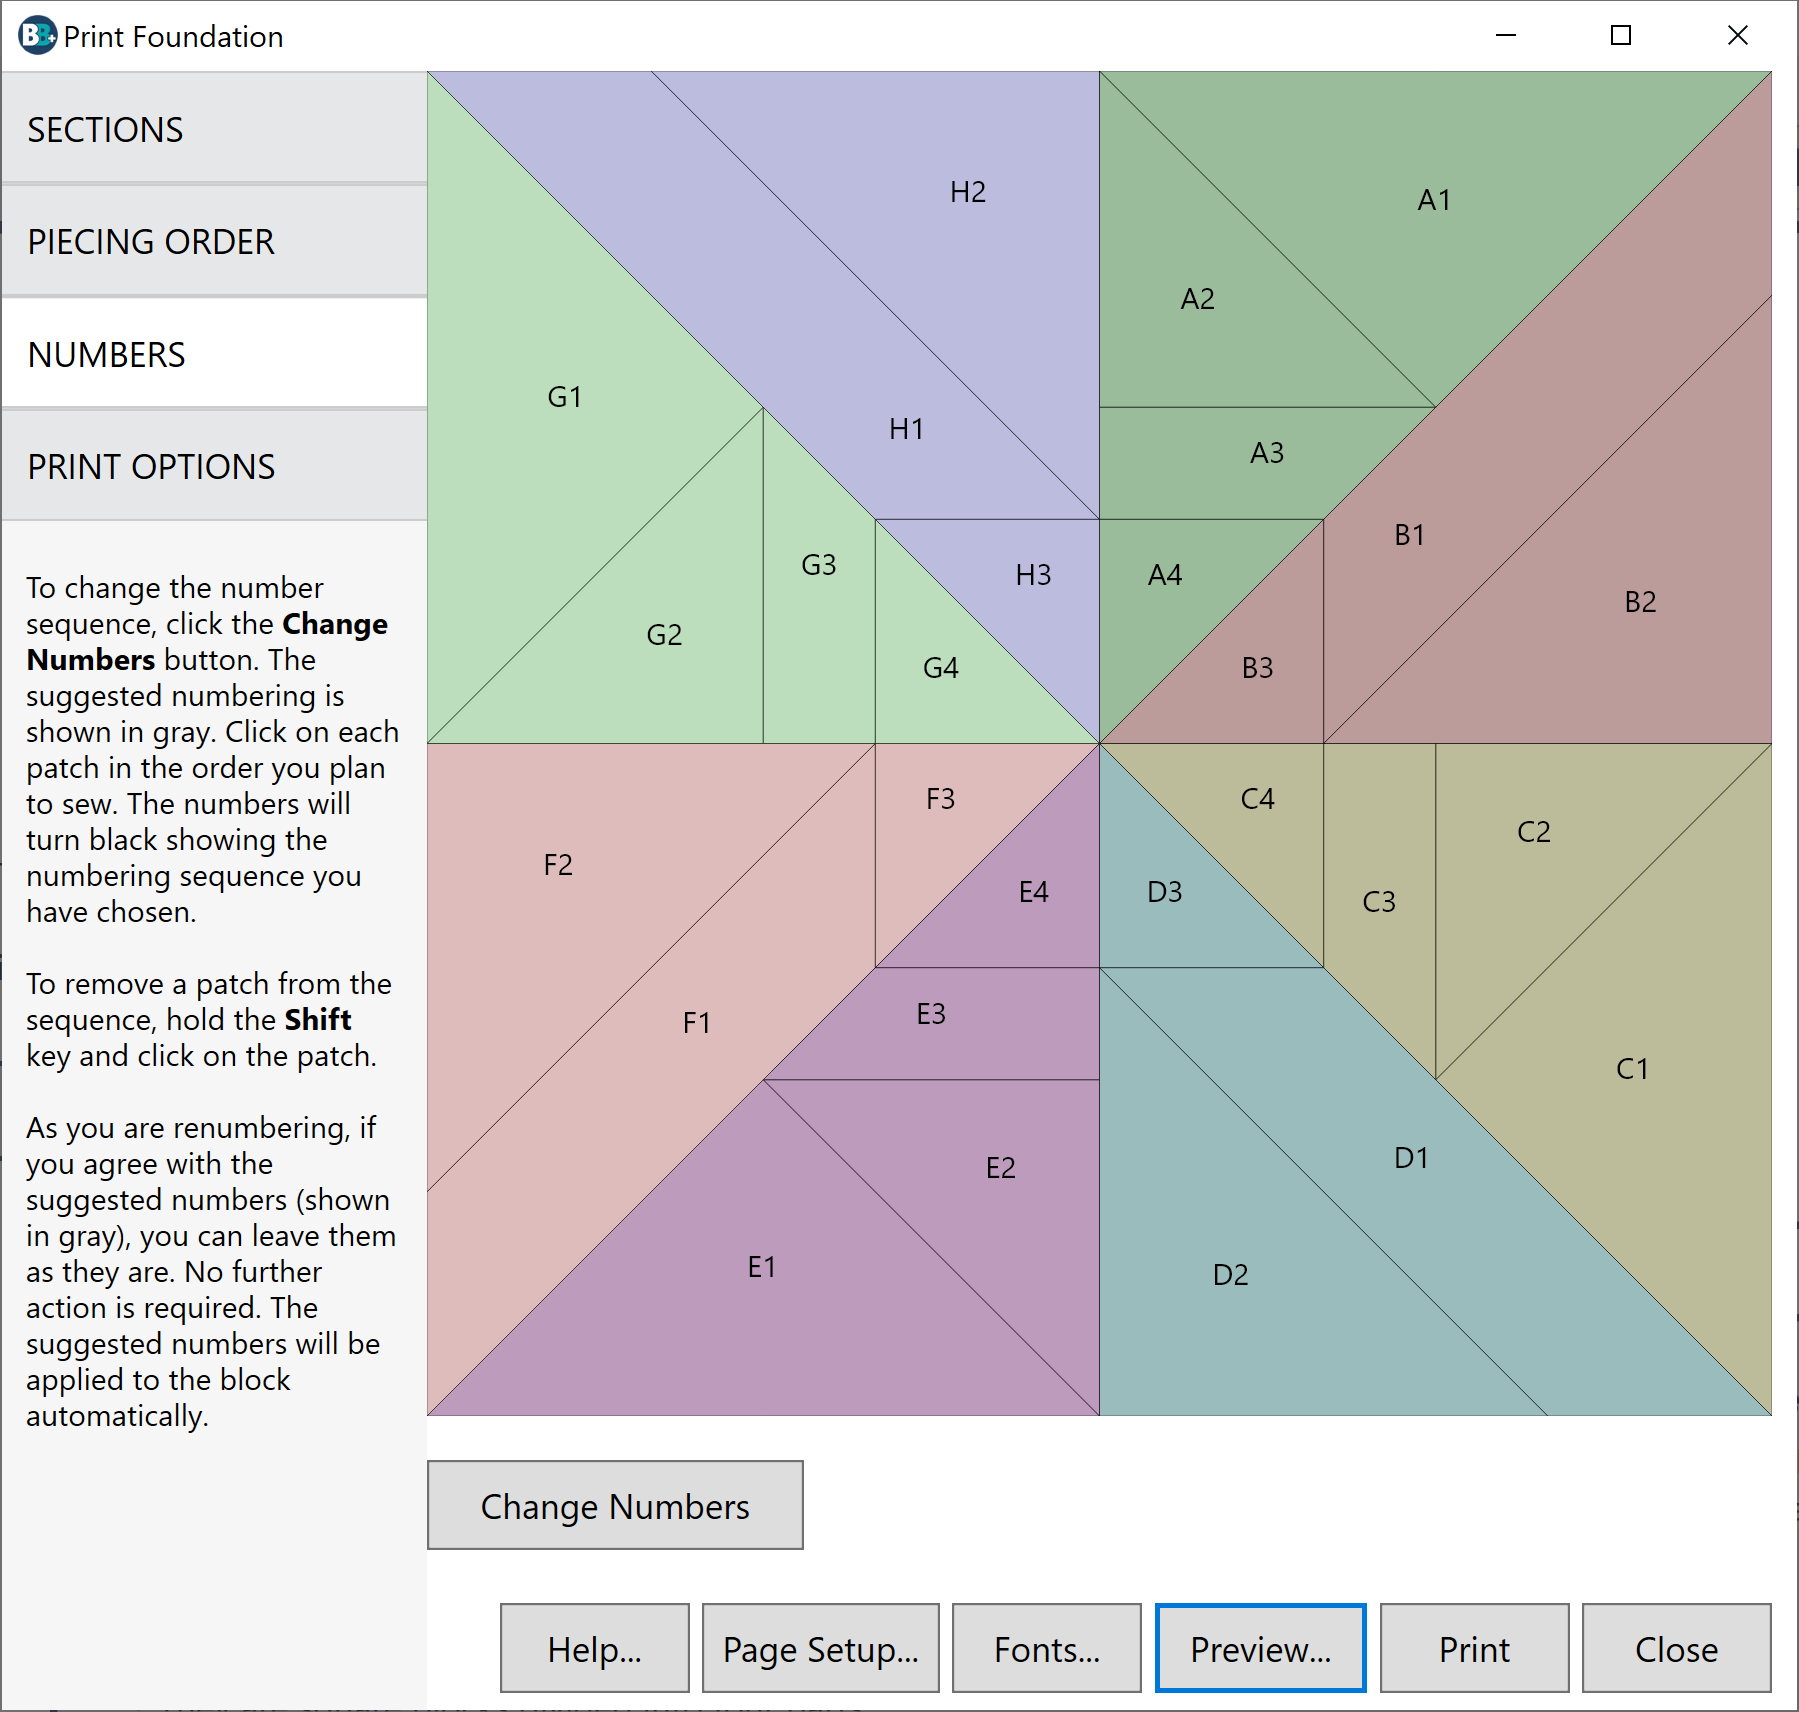
Click the Numbers tab to see how each section is numbered. The numbers on each patch indicate the order in which the section can be pieced.
Changing the Numbers
To change numbers, click the Change Numbers button. All the numbers will turn gray. Click on a patch to start the numbering sequence. The number will turn black and the rest of the patches in that section will renumber to show the suggested numbering.
If you agree with the numbers appearing in gray, no further action is needed. Or, you can continue clicking on all the patches in the order you plan to sew them until all the numbers are black.
If you accidentally click the wrong patch while numbering, hold down the Shift key on your keyboard and click on the patch to remove it from the sequence.
Default Sections and Numbers
If you’d like to revert back to the way a block was originally sectioned or numbered in BlockBase+, click the Close button in the Foundation Pattern dialog. Then, with the block still selected, click Print > Foundation Pattern again.
If you want to keep the sections, piecing order, and numbering that you created, be sure to save a PDF of the pattern.


