
Many of the fabrics on the internet that you can download have a ruler along the edge like this one. This ruler is important because it helps scale the fabric to the appropriate size in EQ. If you want to take a photo of fabric, place a ruler on the fabric before you take the photo. Then you can follow the same instructions below for scaling. Even if you don’t have a ruler in the photo, if have the actual fabric, you can measure the actual fabric to scale it.
- Click on Image Worktable > Image > Edit > Import Image.
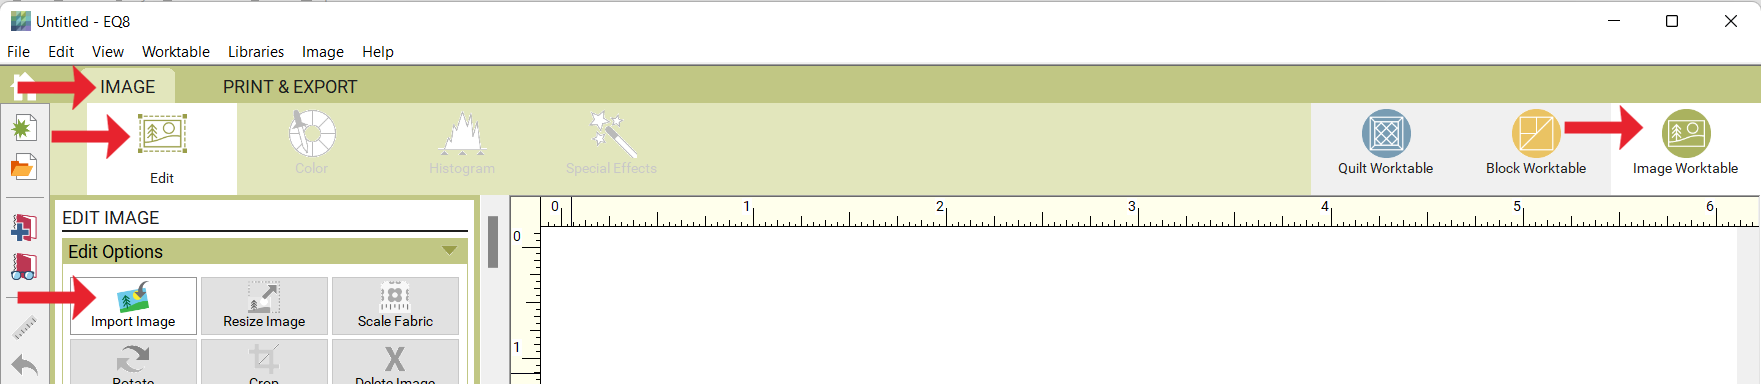
- Navigate to the file and click on it to select it. Click the Open button. The image will appear on the worktable.
Notice that the rulers on the worktable don’t match the ruler in the photo. In this example, the worktable ruler show approximately 10 inches and the actual ruler on the fabric shows approximately 18 inches. To get the appropriate scale, we need to adjust the rulers on the worktable to match the ruler in the photo.
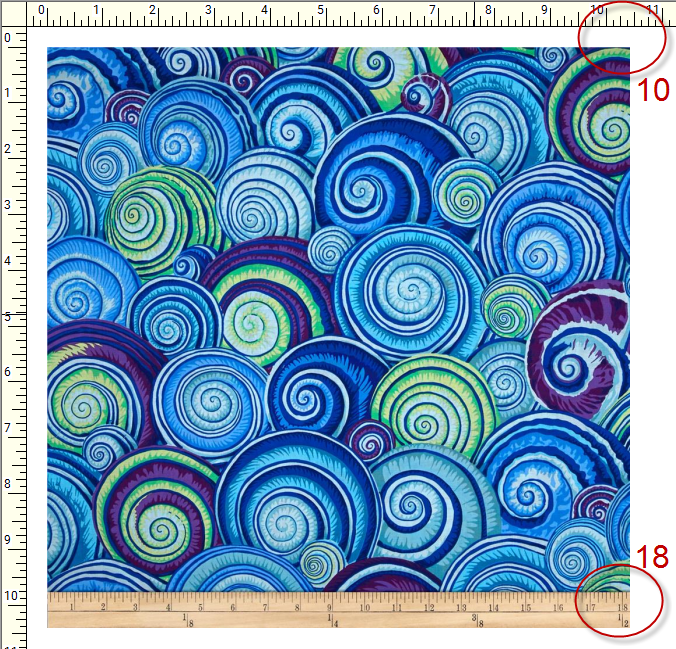
- Use the Crop tool to crop the right side to exactly the 18 inch mark.

- Click the Scale Fabric tool in the palette. Type the size shown on the ruler in the photo into the entry in the palette.

- In this example we would type 18 and click Apply Scale.

Now the rulers on the worktable match the ruler on fabric. You can crop the fabric in any way you choose and it will maintain the proper scale. - Click Add as Fabric to save in your Sketchbook, in the Fabrics section.


Note: If you don’t have a ruler in the photograph, use a ruler to measure the distance on the actual fabric that matches the distance on the screen. Enter the number in the palette and click the Apply Scale button.


