

When you’re ready to import fabric images into EQ8, you have to decide whether or not the fabrics need edited (cropped, straightened, or scaled) first. Use the guide below to help you decide which importing process would be best.
Please note: Regardless of the scenario, make sure the images are saved as RGB, not CMYK.
- Scenario #1 – Scanned fabrics at 72 DPI
Import each fabric one at a time to the Image Worktable. You will need to straighten and crop each image before creating the EQ fabric image. - Scenario #2 – Photos taken with a camera
Import each fabric one at a time to the Image Worktable. You will need to straighten, crop, and scale each image before creating the EQ fabric image. - Scenario #3 – Fabric images downloaded from a website
Import one or multiple fabrics at a time through the Fabric Library. Most likely these images are already straightened and cropped. The scale is unknown, but the only way for you to ensure the scale is accurate is if you actually have the fabric in front of you. - Scenario #4 – Fabric images downloaded from a fabric manufacturer’s website (as a ZIP file)
Unzip the file first, then import multiple fabrics at a time through the Fabric Library. Most likely these images are already straightened and cropped. The scale is unknown, but the only way for you to ensure the scale is accurate is if you actually have the fabric in front of you or if the website offers images with rulers. Get more details >
Importing multiple fabrics at a time through the Library
If your fabric images do not need any editing, you can import one or many at a time through the Fabric Library.
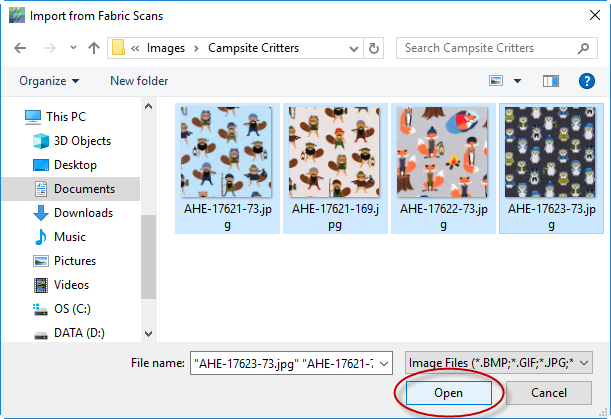
- Open the Fabric Library.
- Click Import > From Image Files.

- In the Import from Fabric Scans box, navigate to the folder that holds your fabric images, select as many as you want, then click Open.
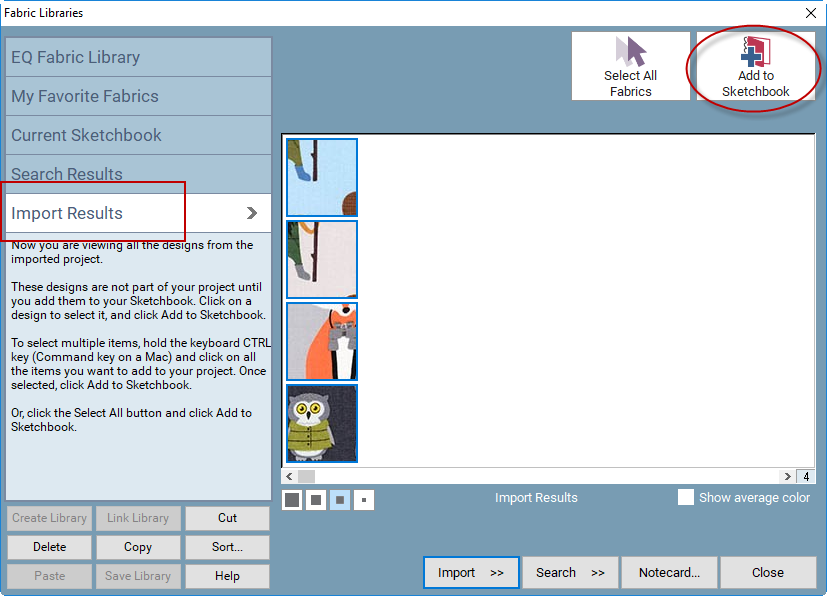
- The fabrics will display in the Import Results section of the Library. Select the fabrics you want to add to your project and click Add to Sketchbook. The fabrics will now be in your Fabrics Sketchbook.
Importing each fabric one at a time to the Image Worktable
When the fabric images need edited, you need to import them to the Image Worktable first. Click the Import Image tool to open the Import dialog. This dialog lets you navigate to the location of the file you saved and want to import. EQ8 can import the following formats: bitmap (.bmp), GIF (.gif), JPEG (.jpg), PNG (.png) and TIFF (.tif). The most common file formats for scanning and web images are JPG and PNG.
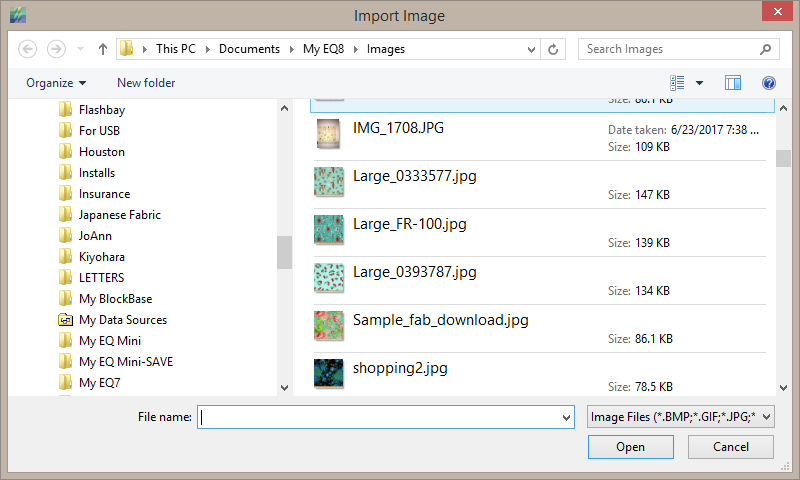
Navigate to the folder containing the files, and click directly on the file to select it. Click the Open button and the image will display on the worktable.
When you open any image, EQ will display the image so that it fits your screen. The way it fits your screen depends on the image’s resolution as well as the screen resolution of your computer’s display. The zoom level will display as a percentage in the palette. Click View Actual Size, and then click Fit to Window to observe the difference.
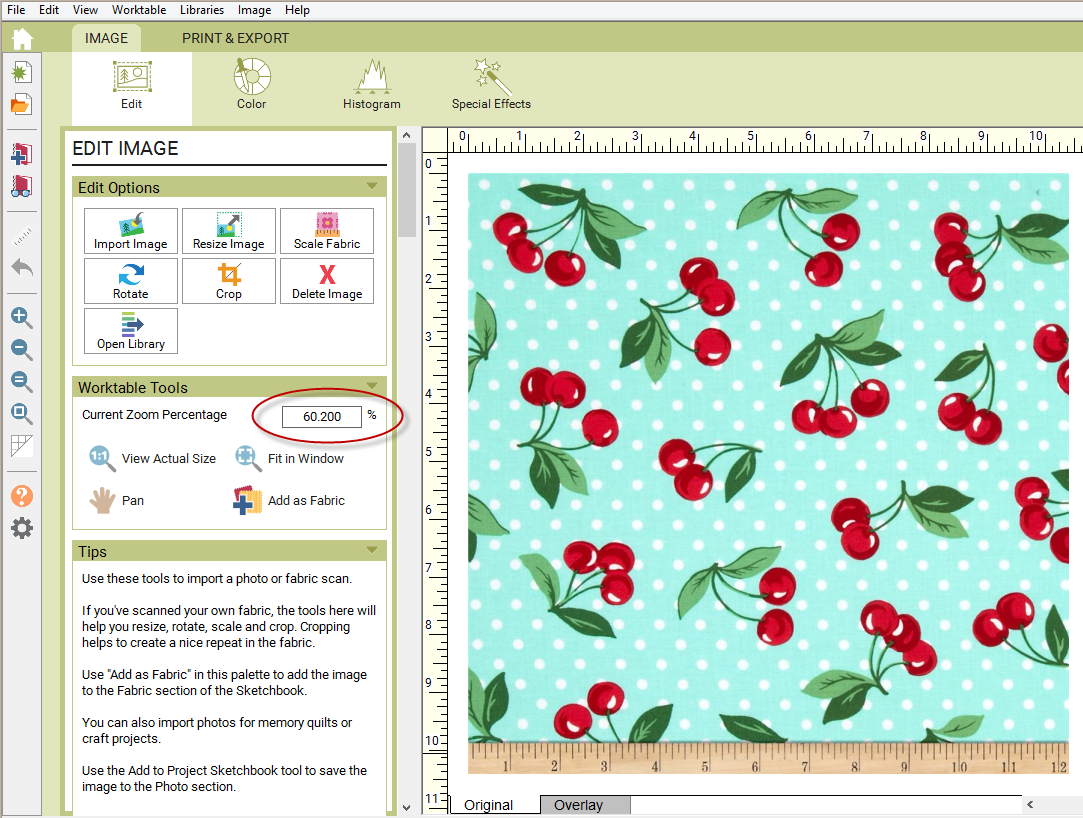
At this point, you’ll want to make the following edits, in this order, before creating the EQ fabric image.
- Check the image resolution by clicking Resize Image. If it’s 72 or 75 DPI, no adjustments need to be made. If it’s higher (like 150 or 300 DPI), we recommend changing the DPI to 72 or 75. High DPI settings will create large file sizes and will slow down your program. Note: Do NOT change the Width and Height in the Resize Image box.
- Check and adjust the fabric scale. (If it’s a web image, you may have no way to check the scale.)
- Rotate or straighten the image.
- Crop smaller and/or to the repeat.
When your adjustments have been made, be sure to click the Add as Fabric button in the palette. This will create the EQ fabric image in your Fabrics Sketchbook.


